How to Move a Washing Machine Downstairs Safely at Home
A practical, step-by-step guide to relocating a washing machine downstairs safely at home, covering planning, gear, safety checks, when to hire pros, and post-move testing.

Goal: safely move a washing machine downstairs with minimal risk to people or the appliance. This quick answer highlights planning, essential gear, and safety checks. You’ll need helpers, protective gear, and the right dolly or moving straps. If stairs are narrow or the machine is heavy, consider hiring pros. According to Best Washing Machine, thorough preparation reduces damage and speeds up the move.
Why this move presents unique challenges on stairs
Moving a washing machine down a flight of stairs requires careful planning and teamwork. The combination of weight, size, and the narrow corridor can turn a simple relocation into a hazardous task. Even a small misstep can cause floor damage, injure a helper, or misalign hoses. The Best Washing Machine team emphasizes that the main risks are tip-overs, friction against corners, and sudden shifts when turning on a stair tread. Before you start, commit to a clear plan, a route map, and a safety first mindset. Having the right people, protective blankets, and the correct equipment dramatically reduces the chance of mishap, especially on awkward stair shapes or tight doorways. If you’re uncertain, pause and reassess rather than forcing a move that could cause damage or injury. The goal is to complete the move without bending the machine’s chassis or stressing door frames. This article uses a practical, homeowner-friendly approach to minimize risk while staying within DIY capabilities.
Planning the route: measure widths, doorways, and turns
Start by measuring every potential passage the machine must traverse: doorway widths, stairwell clearance, and the landing width. Add at least 2 inches of clearance on each side to allow for straps and blankets. Create a drawn outline or note on the floor to visualize the path. Consider using plywood sheets to bridge threshold gaps and protect steps from scratches. If a doorway or stair opening is smaller than the machine, you may need to remove a hinge door or temporarily remove the machine’s feet or control panel. The Best Washing Machine team suggests validating both end points—the origin and the destination—to ensure there’s a straight, unobstructed line. Planning ahead also helps you estimate the number of people and the amount of time you’ll need, which reduces stress and speeds up the process.
Gear, crew, and safety basics
Equip yourself with moving straps or a heavy-duty harness, a sturdy appliance dolly, and plenty of moving blankets. Slip-resistant gloves and sturdy footwear are non-negotiable. Assign at least two trustworthy helpers to share the heavy lift and designate a spotter to guide the machine and watch the doorway. Keep a tape measure and masking tape handy to mark the route, and have a sheet of plywood ready to smooth any floor transitions. Secure the power cord and water hoses so they won’t snag or pull during the move. Remember to disconnect power and water before lifting, and never attempt to move the washer while it’s connected to utilities. The right team and gear make a big difference in keeping the weight balanced and the motion controlled.
Protecting floors, walls, and stairs
Lay down moving blankets and protective ram board or plywood on every surface you’ll contact. Tape blankets to the machine and rails to prevent slipping. Use wedge shims on carpeted stairs to create a friction-free glide where possible. When working on wood or tile, check that the floor beneath is dry and free of debris; moisture can cause straps to slip. Clear the area of pets and bystanders to avoid distraction, and keep a extinguisher or first-aid kit on hand as a precaution. Slow, deliberate steps beat fast, jerky lifts, and listening to the machine’s weight transition as you pass each tread helps you adjust your grip without losing control. This step-by-step approach reduces scuff marks and keeps the machine intact.
DIY vs. professional help: weighing the options
If the stairs are particularly tight or the machine is older or unwieldy, hiring a professional moving service can be a wise investment. DIY can save money, but it increases risk if you lack the proper equipment or adequate help. If you decide to DIY, negotiate a two-person lift plan and practice a dry run with a lighter object first to build team coordination. Check your home insurance policy or renter’s coverage to confirm whether a DIY relocation is covered for accidental damage. Remember that professionals have experience safely negotiating tight turns, and they often bring specialized equipment designed for stairways and landing transitions. The choice depends on your space, the machine’s weight, and your comfort with risk.
After the move: reconnecting, leveling, and testing
Set the machine down carefully in its new location where it can be leveled. Reconnect hoses, water supply, and drain lines, then run a short test cycle with the door secure and the area clear of obstructions. Check that hoses are tight, there are no leaks, and the machine is stable with all feet planted. If the floor is uneven, adjust the leveling feet until it sits squarely. Finally, observe the machine during a test run to ensure there’s no unusual vibration or noise. If you notice anything abnormal, stop and reassess rather than continuing to use the unit. The move should leave you with a functional washer in its new downstairs space and no lingering safety concerns.
Tools & Materials
- Moving straps or heavy-duty harness(Two-person use; ensure weight rating > machine weight)
- Appliance dolly/hand truck(Wide base, secure wheels, load rated for weight)
- Floor protection (moving blankets, cardboard, or plywood)(Protect floors and the appliance surfaces)
- Plywood sheets (optional)(Used to bridge thresholds or edge transitions)
- Tape measure(Measure doorways and stair widths)
- Masking tape(Mark route and secure blankets)
- Heavy-duty gloves(Improve grip and protect hands)
- Screwdriver set (optional)(For hinge removal or panel access if needed)
- Two to three helpers(At least two lifters and one spotter)
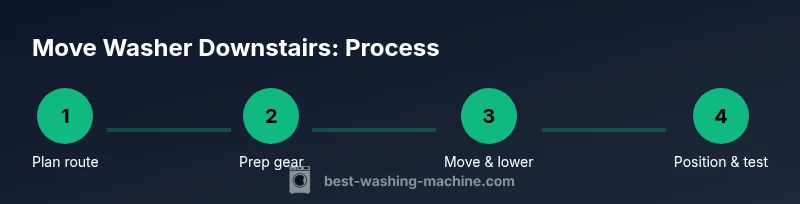
Steps
Estimated time: 2-4 hours
- 1
Plan the move
Assess the route, assign roles, and rehearse a dry run with a lighter object to build team coordination. Confirm doorway widths, stair widths, and landing clearances before touching the washer.
Tip: Do a quick practice lift with a similar-sized box to verify your team’s communication and timing. - 2
Unplug and drain safely
Unplug the washing machine at the outlet. Disconnect water supply hoses and drain any remaining water into a bucket or floor drain. Cap hoses to prevent spills during the move.
Tip: Never pull the plug while the unit is still connected to water lines; unplug first, then disconnect hoses. - 3
Protect route and prep equipment
Lay moving blankets along the floor path and up the stairs. Place plywood where transitions occur and mark the route with tape. Ensure the dolly is ready with the straps accessible.
Tip: Test fit the machine on the dolly before attempting the full lift. - 4
Load and secure machine
Wedge the machine onto the dolly; attach moving straps to secure the load. Balance the weight so it doesn’t tip forward or sideways and keep the path clear of obstacles.
Tip: Keep the machine as upright as possible to protect the drum and hoses. - 5
Move step-by-step through stairs
Have one lifter on each side and a spotter guiding the path. Move one flight at a time, pausing if the space tightens or the load shifts.
Tip: Take small, controlled steps and communicate any changes in pace or direction. - 6
Set down and test
Place the washer in its final location, level it, reconnect hoses, and run a short test cycle to check for leaks and stability.
Tip: Check for vibration during the test; if present, adjust leveling feet and re-test.
FAQ
Do I need to disconnect hoses before moving the washer?
Yes. Unplug the washer, disconnect water hoses, and drain any remaining water before moving.
Yes—unplug the washer, disconnect the water hoses, and drain any remaining water before moving.
Can I move a washer down stairs by myself?
Moving a washer down stairs alone is risky due to weight and balance. It’s better to have at least two people helping and a spotter.
It's risky to move it alone; always have at least two people helping.
What if the stairs are too narrow?
If stairs are too narrow, consider disassembly (if feasible) or hire a professional mover to avoid damage.
If stairs are too narrow, consider professional help to avoid damage.
What gear is essential for this move?
A dolly, moving straps, blankets, gloves, tape, and at least two helpers are essential.
You need a dolly, moving straps, blankets, gloves, tape, and helpers.
How long does a typical downstairs relocation take?
Plan for about 2-4 hours depending on stairs, space, and preparation.
Around two to four hours, depending on layout and prep.
When should I hire a pro?
If stairs are unusually tight, the machine is very heavy, or you’re unsure about safety, hire a professional mover.
If it’s heavy or stairs are tight, hire professionals.
Watch Video
The Essentials
- Plan the route before touching the machine
- Use proper equipment and a helper team
- Protect floors, walls, and stairs during the move
- Unplug and drain safely before lifting
- Test run and level the washer after repositioning