How to Clean Drum in Washing Machine: A Step-by-Step Guide
A comprehensive, safety-focused guide to cleaning your washing machine drum. Learn effective methods, maintenance tips, and practical steps to keep odors away and extend appliance life.

Discover how to clean drum in washing machine safely and effectively. This guide covers safe methods, the right cleaners, and tips to prevent odor and residue. You’ll learn a model-agnostic approach with steps, safety notes, and maintenance routines to keep the drum fresh between loads, whether you own a front-loader or a top-loader.
Why Cleaning the Drum Matters
Regular drum cleaning removes detergent residue, mineral deposits, and mold that can cause musty odors and reduce washing efficiency. A clean drum helps distribute water and detergent evenly, improves performance, and extends the life of seals and bearings. According to Best Washing Machine, regular drum care is a simple habit that saves time and money by avoiding more extensive repairs. By addressing buildup early, you prevent tiny clogs that impede drainage and create hotspots for bacteria, which can transfer odors to clothes. For households that run multiple loads per day or hard water, periodic cleaning becomes essential to maintaining overall wash quality. In addition, quitting odors helps confidence in laundry results and reduces the need for frequent deodorizing products. "
Safety First: Unplug, Cap Water, and Gather Supplies
Before you start, unplug the washer and turn off the hot and cold water supply to avoid leaks or sprays. Remove power and water hoses from the machine and place towels around the area to catch any stray water. Put on gloves to protect skin, and lay out your cleaning supplies on a stable surface. Check the user manual for any model-specific cautions, especially around drum access or panel removal. Keep children and pets away while you work. Safety helps prevent accidental shocks, sprays, and damage to components during cleaning.
Common Causes of Drum Buildup
Detergent residue, fabric softener, and minerals from hard water can accumulate on the drum walls and in the gasket. Mold and mildew thrive in damp environments around the door seal, while lint and hair can collect near the drum opening. Recognizing these causes helps tailor your cleaning method and choose appropriate cleaners without overdoing powerful chemicals. Regular checks of the gasket and drum rim also prevent sudden leaks or odor problems.
Cleaning with Vinegar, Baking Soda, and Detergent Cleaners
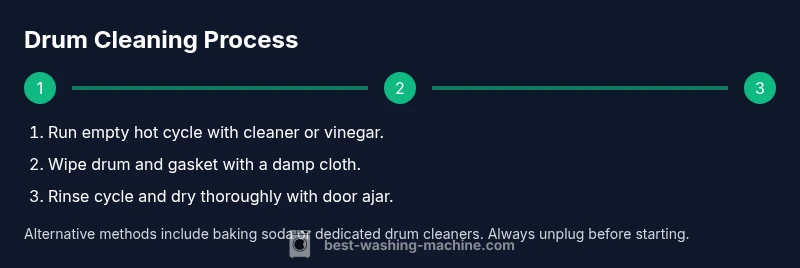
Vinegar and baking soda can be used for routine maintenance when paired with a hot wash cycle. A dedicated drum cleaner is another option if you prefer a purpose-built product. Important cautions: never mix vinegar with bleach, and follow product instructions. After a cleaning cycle, wipe the interior surface and gasket, then let the drum air-dry with the door ajar to prevent residual moisture and mildew growth.
Deep Cleaning vs Light Maintenance
Deep cleaning uses stronger cleaners or longer hot-water cycles to tackle stubborn residue and odor, while light maintenance focuses on regular, quick cleanups to prevent buildup. Use deep cleaning when you notice persistent smells or visible residue, and switch to lighter maintenance for routine upkeep. This approach helps protect seals, bearings, and hoses from prolonged exposure to deposits.
Front-Loader vs Top-Loader Drum Access
Front-loading washers often require opening the door and inspecting the rubber bellows around the drum; top-loaders may allow easier access to the drum lip and interior. For both configurations, consult the manual before removing any panels. In most cases, you can reach the drum surface with a soft cloth and non-abrasive sponge without disassembly.
Cleaning the Door Seal and Detergent Drawer
Wipe the door seal thoroughly to remove hair, mold, and residue. Inspect the gasket folds for trapped debris and wipe clean with a damp cloth. Remove and rinse the detergent dispenser tray, then scrub any built-up soap scum with a soft brush. These areas often harbor mold and must be addressed during every cleaning cycle.
Rinse Cycles, Drying, and Airing Out
After cleaning, run an additional rinse cycle to remove loosened residue. Leave the door or lid open for several hours to air dry completely. A dry drum discourages mold growth and reduces the likelihood of lingering odors between loads. If possible, position the machine in a well-ventilated area to speed up drying.
Maintenance Schedule and Preventive Practices
Establish a semi-regular maintenance routine tailored to your usage and water hardness. Use appropriate detergents and avoid over-sudsing, which can leave residue. Regular checks of hoses, seals, and the drum can prevent leaks and prolong appliance life. It’s a good idea to log cleaning sessions to track when the next maintenance should occur, especially in homes with high-use laundry days.
Common Mistakes and How to Avoid Them
Avoid mixing acidic cleaners with bleach or harsh solvents, which can damage seals and metal components. Do not scrub the drum with abrasive tools or metal brushes. Never bypass safety steps or unplug the machine during disassembly. Finally, don’t skip thorough drying; moisture invites mold growth and odors.
Tools & Materials
- Gloves(Protect hands from cleaners and hot water)
- Old towels or microfiber cloths(Place under the washer and for wiping)
- Bucket(Catch drips and hold cleaning solution)
- Soft cloths or non-abrasive sponge(Wipe drum and gasket surfaces)
- White vinegar (5-8% acidity)(Natural deodorizer and mild cleaner)
- Baking soda(Odor absorption if desired)
- Dish soap or mild detergent(Gentle cleaner for stubborn spots)
- Old toothbrush or soft brush(Detail cleaning for gasket folds)
Steps
Estimated time: 30-60 minutes
- 1
Safety prep and power down
Unplug the machine and shut off the water supply. Move the unit to a safe, dry area if possible and lay towels nearby. This protects you and prevents electrical hazards during cleaning.
Tip: Keep the area dry and accessible; never work with wet hands on outlets. - 2
Choose your cleaning method
Decide between a hot-water cycle with a cleaner (vinegar, baking soda, or a drum cleaner) and a dedicated drum cleaning product. Avoid mixing cleaners or using abrasive agents that could damage seals.
Tip: If unsure, start with a hot water cycle using vinegar and observe for any unusual fumes. - 3
Run a cleaning cycle
Run the empty washer on the hottest cycle using your chosen cleaner. Allow the machine to complete the cycle so heated water helps dissolve residue.
Tip: Do not load clothes during this cycle to prevent contamination. - 4
Wipe interior surfaces
After the cycle, wipe the drum walls, door seal, and gasket with a damp cloth to remove loosened residue.
Tip: Pay special attention to folds in the gasket where grime hides. - 5
Rinse and repeat if needed
Run an additional rinse cycle to flush out any remaining cleaner or debris. If odor persists, repeat with a fresh cleaner or consider a deep-clean method.
Tip: For hard water, an extra rinse can help remove mineral deposits. - 6
Clean the drawer and dispenser
Remove the detergent drawer and rinse under warm water. Scrub any buildup inside the dispenser tray and the surrounding housing.
Tip: Dry thoroughly before reinserting to prevent mold growth. - 7
Dry and store properly
Leave the door open to air-dry the drum and seal. Wipe up any remaining moisture and ensure the area is ventilated to prevent mildew.
Tip: Consider leaving the door ajar after each wash for a few hours.
FAQ
Can I use bleach to clean the drum?
Bleach can damage rubber seals and hoses; check your manual before using it. If allowed, dilute properly and avoid mixing with other cleaners. Safer alternatives like vinegar or dedicated drum cleaners are recommended.
Bleach can damage seals; check the manual. If allowed, dilute and avoid mixing with other cleaners. Safer options include vinegar or drum cleaners.
Is vinegar safe for washing machines?
Vinegar is generally safe for routine cleaning and deodorizing in small amounts. Do not mix with bleach and follow cycle instructions to prevent residue. Use vinegar as part of a broader drum-cleaning plan.
Vinegar is usually safe for cleaning in small amounts, but never mix with bleach and follow the cycle directions.
How often should I clean the drum?
Clean the drum on a regular maintenance schedule, such as every few months, and sooner if you notice odors or residue. Adjust frequency based on usage and water hardness.
Clean the drum every few months, more often if you notice odors or residue.
What parts should I check besides the drum?
Inspect the door gasket, detergent dispenser, and accessible hoses. Clean the gasket folds, remove trapped debris, and ensure hoses are free from kinks or leaks.
Check the door gasket, dispenser, and hoses; clear any debris and inspect for leaks.
Will cleaning affect my warranty?
Routine cleaning as part of normal maintenance typically does not void warranty. Consult your owner’s manual or brand support for model-specific guidance.
Regular cleaning is usually fine for warranties; check your manual if unsure.
What should I do if odors persist after cleaning?
Persistent odors may indicate mold growth or drainage issues. Consider a deeper clean with a drum cleaner, inspect seals, and ensure proper drying after each cycle.
If odors persist, try a deeper clean and check seals; ensure the drum dries after each cycle.
Watch Video
The Essentials
- Start with safety precautions and the correct cleaner choice.
- Run a hot cleaning cycle and then wipe all accessible surfaces.
- Rinse thoroughly and allow the drum to dry completely.
- Establish a regular maintenance schedule to prevent future buildup.