Rit Dye in the Washing Machine: Safe Steps for Fabrics
Learn how to safely dye fabrics using Rit Dye in a washing machine. This guide covers fabric compatibility, materials, safety, and aftercare for even, lasting color.

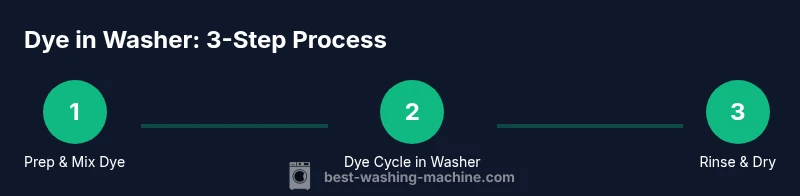
Goal: dye fabrics in a washing machine with Rit Dye while keeping mess to a minimum. Gather Rit Dye, salt for cotton, gloves, old towels, and a large dye-safe container. Pre-wash, mix dye as directed, run the dye cycle, then rinse and wash dyed items separately to prevent color transfer.
Why Rit Dye in the Washing Machine Matters
Using Rit Dye in a washing machine is a practical option for home dyers who want even color without managing a big dye pot. The technique works best on natural fibers like cotton, linen, or rayon blends, and it can be faster than hand-dyeing in a pot. A dedicated dye cycle helps keep color agitation consistent and reduces the risk of uneven splotches. When you choose Rit Dye for a washer job, plan for color transfer risk to other fabrics and the washer drum. The phrase rit dye washing machine captures this method succinctly and reliably, and it should be a part of your dye day workflow that you document in your home laundry routine. According to Best Washing Machine analysis, this approach can deliver predictable results if you follow the steps and prepare your workspace. Start with a clear workspace in the laundry room, gather your materials, and protect nearby surfaces with old towels or plastic sheeting. While this method is convenient, it is not ideal for fabrics with high synthetic content or very light fabrics that may not take the dye evenly. You will be more satisfied with the final shade if you test a small swatch first and adjust the dye strength accordingly.
Fabric Compatibility and Color Expectations
Rit Dye performs best on natural fibers such as cotton, linen, and rayon blends. Synthetics like polyester or acrylic often require specialized dispersal dyes and may yield uneven results or fade quickly. Before you begin, check your fabric composition and test a small swatch to estimate the shade on real material. Color absorption varies with fiber weight and weave; tight weaves may hold color deeper, while loose weaves can appear lighter. The Rit dye line offers multiple shades, and you can mix colors to create new tones. Based on Best Washing Machine research, natural fibers uptake dye more evenly, while synthetics may resist dye or bleed during the first wash. Plan to dye one swatch first to confirm whether the chosen shade meets your expectations before committing a whole garment.
Safety and Preparation
Dyeing in a washing machine involves hot water, pigments, and potential splashes. Wear rubber gloves, protective eyewear if you’re sensitive to fumes, and work in a well-ventilated area. Use old towels or a plastic drop cloth to protect floors and surfaces. Keep a dedicated dye pot or tub that you won’t use for cooking. Pre-wash the fabric with detergent to remove finishes that can hinder dye uptake. Have a plan to handle spills and rinses safely, and never mix chlorine-based cleaners with dye residues. This preparation minimizes mess and ensures more uniform color across the fabric.
Materials and Setup
Here is a concise list of tools you’ll need: Rit Dye, salt (for cotton), gloves, old towels, a large dye-safe container or washing machine, a measuring cup, a long spoon or stick for stirring, and a detergent for post-dye washing. Use a dedicated washing machine or run the dye process in a tub if you prefer to avoid color crosstalk in your machine. Pre-washed fabrics should be dampened to help even dye distribution. The quantity of dye and salt depends on the fabric weight and the shade you want. Refer to the dye instructions for exact ratios and times.
Dyeing Process Overview in the Washer
This washer-dye method involves creating a hot dye bath, introducing the fabric to the bath, and maintaining agitation to promote even color. Start by heating water to the dye’s recommended temperature, then mix the dye powder or liquid with salt as directed. Pour the solution into the washer drum or a dye tub and add the fabric. Run the washer on a long cycle that uses agitation, ensuring the garment remains submerged. After the cycle ends, perform a careful rinse with clean water to remove excess dye. The exact shade depends on fiber type, dye quantity, and water temperature. Expect some variation between fabrics dyed together.
Post-Dye Care and Washer Cleaning
Rinse thoroughly until the water runs clear, then wash dyed items separately in cold or warm water with a dye-safe detergent. Avoid washing with whites initially to prevent transfer. After dyeing, run an empty hot-water cycle with a cup of white vinegar or a specialized washer cleaner to remove residual dye pigments from the drum and hoses. This helps prevent color transfer to future loads and keeps your machine smelling fresh. Let dyed garments air-dry away from direct sun to minimize fading.
Common Mistakes and How to Avoid Them
Common mistakes include using too much dye, over-wringing fabric, and skipping the pre-wash step. Always test your color on a small swatch, use salt as directed for cotton, and avoid high-heat cycles that could shrink or damage fabrics. Don’t overload the washer—color needs space to circulate for even absorption. Finally, never mix incompatible fabrics in the same load, as different materials absorb dye differently.
Tools & Materials
- Rit Dye (liquid or powder)(Choose shade and concentration per package instructions)
- Salt (for cotton)(Typically 1-2 cups per gallon of water; adjust by weight)
- Rubber gloves(Protect skin from staining)
- Old towels or plastic sheeting(Protect surfaces and floors)
- Large dye-safe container or pot(If dyeing in washer, pre-mix dye and water separately)
- Measuring cups/spoons(Precise measurement helps color accuracy)
- Stirring implement (wooden spoon or wand)(For even mixing)
- Laundry detergent(For post-dye washing to set color)
- Optional: old clothing/apron(Extra protection during dyeing)
- Optional: plastic bag or hanger(For drying and storage)
Steps
Estimated time: 60-90 minutes
- 1
Pre-wash fabric and prep area
Pre-wash the fabric with detergent to remove finishes that can hinder dye uptake and to ensure even color absorption. Clear the workspace, line surfaces with old towels, and organize all supplies within arm’s reach.
Tip: Pre-washing reduces the chance of blotchy results and makes color distribution more predictable. - 2
Prepare dye solution
Put on gloves. Mix Rit Dye in hot water according to package instructions. Add salt if the fabric is cotton, and stir thoroughly to avoid lumps.
Tip: Stir until completely dissolved to prevent speckled patches. - 3
Set up washer or dye tub
Fill the washer with hot water to the detergent cycle level, or prepare a dye tub with the recommended water volume. Pour in the dye solution and distribute evenly.
Tip: Avoid overfilling; color needs space to circulate for even coverage. - 4
Add fabric and start dye cycle
Submerge the fabric fully and start a long dye cycle with consistent agitation. Keep an eye on the color development and prevent fabric from floating to the surface.
Tip: If possible, use a gentle agitation setting to reduce fabric wear. - 5
Rinse with clean water
After the dye cycle ends, rinse the fabric with clean water until the water runs clear and no excess dye shows on the fabric.
Tip: Check a swatch to judge color bleed before proceeding. - 6
Post-dye wash
Wash the dyed items separately with dye-safe detergent. Use cold or warm water as recommended by the dye instructions to minimize fading.
Tip: Washing separately prevents dye transfer to other clothes. - 7
Drying and color setting
Air-dry the fabric if possible or use a low-heat dryer if the dye label allows. Excessive heat can fade color; air drying helps maintain shade.
Tip: Avoid direct sun during drying to reduce color loss. - 8
Clean washer and workspace
Run a hot-water cycle with vinegar or a washer cleaner to remove residual dye from the drum and hoses. Wipe down surfaces and store dyes properly for next use.
Tip: This reduces the chance of color transfer to future loads.
FAQ
Can Rit Dye be used on synthetic fabrics in a washing machine?
Rit Dye yields the most consistent results on natural fibers like cotton, linen, and rayon. Synthetics may dye unevenly or require specialized dyes. For synthetics, consider alternatives or dedicated products designed for synthetic fibers.
Rit Dye works best on natural fibers; synthetics may not color evenly and could require different dyes.
Do I need to pre-wash fabrics before dyeing?
Yes. Pre-washing removes finishes that can block dye absorption and helps ensure even color. It also reduces the chances of blotching.
Yes. Pre-wash to remove finishes and improve color uniformity.
How long does the dye process take overall?
Expect about 60 to 90 minutes for the dyeing process, plus time for rinsing and post-dye washing. Actual duration depends on fabric type and washer settings.
Plan for about an hour to an hour and a half.
Will the color bleed after the dyeing is finished?
Some initial color transfer may occur during the first few washes. Rinse thoroughly and wash dyed items separately to minimize bleed.
A little color bleed can happen at first, so rinse and wash separately the first few times.
Is it safe for kids to participate in this dyeing activity?
Children can participate under close supervision to handle non-toxic dye and to learn the process, but gloves and protective clothing should be used and chores kept to safe steps.
Kids can help if supervised, with gloves and safety precautions in place.
How do I clean the washer after dyeing?
Run a hot-water cycle with vinegar or a washer cleaner to remove residual dye from the drum and hoses. Wipe the door seal and drum after the cycle.
Run a hot cycle with vinegar or cleaner to remove leftover dye and wipe down the drum.
Watch Video
The Essentials
- Prepare fabric and workspace to minimize mess
- Natural fibers dye best; test swatches first
- Dye in a dedicated cycle with adequate agitation
- Rinse, wash separately, and clean the washer after dyeing