Washing Machine Drain Pan Installation: A Step-by-Step Guide
Learn how to install a washing machine drain pan safely with this step-by-step guide. It covers tools, preparation, installation steps, leak testing, and maintenance to prevent floor damage.

You can install a washing machine drain pan to catch leaks and protect floors. Start by choosing a pan that fits under your washer and matches local codes, then prepare a stable base, seal joints, and connect to the drain. This guide walks you through the steps, safety tips, and maintenance to prevent water damage.
Why a drain pan matters for washing machines
A washing machine drain pan is a simple, proactive safeguard against accidental leaks or overflows. A pan provides a dedicated catch basin that channels water toward a drain, reducing the risk of staining, warping, or mold on floors and subfloors. For homeowners and renters alike, this can mean fewer costly repairs and less downtime from appliance issues. According to Best Washing Machine analysis, many modern homes benefit from a properly installed drain pan, especially in basements, laundry rooms with hard floors, or areas where spills can go unseen. While a pan won’t fix a faulty washer, it dramatically improves containment and buys you time to address issues before they escalate. Before you begin, confirm local code requirements, since some jurisdictions specify pan dimensions, drain connections, or required accessories. A well-chosen drain pan also improves resale value by signaling careful maintenance and thoughtful protection of the space. In short, a drain pan installation is a practical upgrade that protects your property and your peace of mind.
Choosing an appropriate drain pan and base under the washer
Selecting the right drain pan starts with fit and compatibility. Look for a pan that fully covers the footprint of your washer and sits level on a stable surface. Avoid pans that flex, crack, or trap dirt and moisture under the appliance. If you’re upgrading an older washer, consider a pan with a slightly larger footprint to accommodate minor shifts over time. The pan should offer a dedicated drain outlet compatible with your house plumbing and have a reliable seal against the floor. Drain pans come in various materials, including durable plastics and corrosion-resistant metals. While metal pans can be sturdy, they may require additional sealing to prevent leaks at seams. Plastic pans are lighter and easier to install, but ensure they’re thick enough to handle accidental impacts. In any case, ensure the pan’s drain point lines up with your existing drain pipe or standpipe. Best Washing Machine recommends verifying the pan’s compatibility with your washer size, the plainness of the floor, and the local plumbing setup before purchase.
Site preparation and base leveling before pan installation
The next step is preparing the space so the drain pan sits flush and stable. Move the washer carefully to create room for the pan, and clear the area of debris or clutter. Check the floor for levelness; uneven floors can cause gaps that allow moisture to escape or rust the pan’s bottom. Use leveling shims or a thin plywood base to correct small dips. If you’re installing on a concrete floor, consider a membrane or sealant along the pan’s bottom to further reduce moisture penetration. Place the pan on the prepared surface and verify that it remains level with the washer resting squarely on top. This foundation is critical: a wobbly setup can lead to misaligned drainage and increased risk of leaks around the pan edges. Keeping the space tidy and dry during this phase makes the subsequent steps smoother and safer.
Tools, materials, and safety considerations you’ll need
Preparing the right toolkit helps avoid delays. You’ll want a drain pan that fits your washer, a non-porous sealant suitable for wet environments, and a flexible drain hose or adapter compatible with your home plumbing. A measuring tape ensures an accurate fit, while gloves protect your hands during handling, cutting, and sealing. Keep towels or rags handy for quick cleanup, and have a bucket to catch any residual water during removal or installation. Use a level to confirm flatness and a utility knife or scissors to trim adhesive or sealant as needed. If you’re uncertain about local codes, contact a licensed plumber or check the municipal building department’s guidance. Safety never takes a back seat: unplug the washer, turn off water valves, and ensure power is off to avoid any electrical hazards during installation.
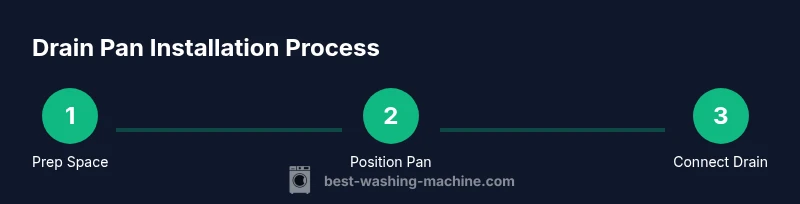
Step-by-step overview: what the installation process looks like in practice
In broad terms, you’re preparing a level base, positioning the pan, sealing the edges, connecting the drain, and verifying there are no leaks. This flow keeps the project organized and minimizes surprises. While the exact order may vary by pan design, the essential principles remain: ensure a clean, dry surface; confirm that the drain connection is secure and properly pitched toward the sewer; and test the system with a controlled water flow before running a full wash cycle. Throughout the process, visually inspect for gaps, misalignments, or any potential points of water intrusion. By following these general guidelines, you’ll be well on your way to a durable, leak-resistant setup that protects your floors and foundation.
Drain connection, leak testing, and final checks
Once the pan is placed and sealed, connect the drain hose or adapter from the pan outlet to the home drainage line. Make sure the connection is snug but not over-tightened, which can crack fittings. Avoid sharp bends in the hose to prevent kinks that restrict flow. After securing the connection, slowly run a test cycle or pour water into the washer tub to simulate a leak scenario. Observe the pan for any drips, moisture around the seal, or pooling at the edges. If you detect seepage, reseal the joints, re-check your pan alignment, and re-test until the system remains dry. A simple, thorough test is often the difference between a quick fix and extended basement or floor damage. Finally, set a routine inspection schedule—checking for cracks, loosening connections, or signs of wear helps you catch issues before they escalate.
Tools & Materials
- Washing machine drain pan(Choose pan size that fully covers the washer footprint and fits under the unit)
- Measuring tape(Used to verify fit and layout before installation)
- Non-porous silicone sealant(Waterproof seal along the pan edges)
- Flexible drain hose adapter or drain kit(Ensure compatibility with your home drainage)
- Level(Confirm the pan and washer sit evenly)
- Plywood or leveling shims(Create a stable, level base on uneven floors)
- Gloves(Hand protection during handling and sealing)
- Towels or rags(Cleanup and quick dry-up during work)
Steps
Estimated time: 30-60 minutes
- 1
Validate space and pan fit
Measure the washer footprint and compare it to the pan footprint to ensure full coverage. Clear the area, remove the washer if necessary, and plan alignment with the drain.
Tip: Double-check clearance around the hose inlet and the path to the drain to avoid kinks. - 2
Prepare a flat, stable base
Place leveling shims or a thin plywood layer on the floor to eliminate dips. The pan must sit flush to prevent water from pooling in corners.
Tip: Use a carpenter’s level to ensure both front-to-back and side-to-side flatness. - 3
Position the drain pan
Slide the pan under the washer so the drain outlet aligns with the planned drain path. Ensure the pan remains level after placement.
Tip: Mark the drain outlet location on the pan for accurate hose attachment. - 4
Seal the pan edges
Apply a continuous bead of silicone sealant along the pan’s bottom edge where it meets the floor, then smooth with a finger or tool to seal gaps.
Tip: Allow sealant to cure per manufacturer instructions before running water. - 5
Attach drain hose and secure connections
Connect the drain hose or adapter to the pan outlet and route it to the home drain. Make sure there are no sharp bends and the connection is snug.
Tip: Do not over-tighten plastic fittings; finger-tight plus a quarter-turn is usually enough. - 6
Test for leaks
With the washer unplugged, run a short cycle or pour water into the tub to observe for leaks around seams and connections.
Tip: Have towels ready and check for several minutes after the test cycle begins.
FAQ
Do I need a drain pan by code?
Code requirements vary by location. Check local building codes or your homeowner’s association rules. If a drain pan is required, ensure you follow approved materials and installation methods.
Code requirements vary by location. Check local codes or HOA rules to see if a drain pan is required, and follow approved materials and methods.
What size drain pan should I use?
Choose a pan that covers the washer footprint and provides room for drainage. Do not use a pan that is too small or flexible, as it may fail under pressure.
Pick a pan that covers the washer and allows for drainage; avoid undersized or flimsy pans.
Can I install a drain pan myself?
Yes, with basic carpentry and plumbing awareness. Follow the manufacturer’s instructions for your pan, and consult a professional if you encounter unfamiliar drain configurations or unexpected leaks.
Yes, you can install it yourself if you’re comfortable with basic carpentry and plumbing. If you see unusual drain setups, consider a pro.
What’s the difference between a pan with a grate and a solid pan?
A grate can allow drainage through gaps, which may be useful for certain floor types but can let small debris through. A solid pan provides a closed surface and can be easier to seal, reducing spill risk.
Grate pans drain more and can collect debris; solid pans seal easier and may prevent spills.
How often should I inspect the drain pan?
Inspect at least twice a year for cracks, sealant wear, and hose integrity. Look for signs of moisture near the edges and test the drainage path during each inspection.
Inspect twice a year for wear and leaks, and retest the drain path during each check.
Watch Video
The Essentials
- Choose a pan that fully covers the washer footprint
- Level the base for stable, leak-free installation
- Seal joints thoroughly and test for leaks
- Maintain the setup with periodic inspections