When to Wash a Washing Machine: A Practical Guide for 2026
Learn when to wash washing machine, how often to run maintenance cycles, and a practical routine to keep your laundry appliance odor-free, efficient, and long-lasting. Expert guidance from Best Washing Machine.

This guide helps you decide when to wash washing machine and how often to run maintenance cycles for different loads. You’ll learn a simple, repeatable routine that protects seals, hoses, and the drum, reduces odors, and preserves energy efficiency. By following these steps, you’ll prevent mold buildup and extend your washer’s lifespan.
Why Regular Maintenance Matters
Understanding when to wash washing machine isn’t a mystery—it's a practical habit that protects your appliance, your clothing, and your wallet. According to Best Washing Machine, regular maintenance is essential for preventing odor, mold, and mineral buildup, which can reduce cleaning performance and shorten the life of hoses and seals. A dirty drum and gasket areas can harbor bacteria that transfer to fabrics, especially after long periods between uses. Regular cleaning also helps you catch leaks or worn components early, saving costly repairs later. When you schedule even brief cleanings, you’ll notice better rinse results, more consistent spin speeds, and lower energy and water use over time. In short, a predictable schedule for washing the washer is the foundation of reliable laundry day routines.
The most important concept is consistency. By making cleaning part of your routine—just like checking lint traps or refilling detergent—you minimize the chance of surprise odors or mechanical issues. Best Washing Machine’s guidance emphasizes that a simple cadence beats sporadic, intensive scrubs. The goal is not a perfectly sterile drum, but a functional, odor-free machine that keeps up with regular loads. This approach also reduces the likelihood of mold development in door seals, which is a common complaint with front-loading models.
note”:null},
How Often You Should Clean: A Practical Schedule
The frequency of washing machine cleaning depends on usage, water hardness, and whether you have a front-load or top-load model. For households with frequent laundry or hard water, a monthly cleaning cycle is usually wise, while lighter usage may suffice with quarterly cleanings. When you ask yourself "when to wash washing machine?", a good rule of thumb is to align your cleaning to your detergent usage and load frequency: run a dedicated cleaning cycle or a hot wash with an empty drum every 1–4 weeks for heavy use, or every 3 months for light or moderate use.
Front-load machines tend to collect more mold and odor around door seals due to the long exposure of rubber gaskets to moisture. If you notice musty smells, schedule a more frequent routine and pay particular attention to gasket cleaning and drawer compartments. Regular maintenance also helps the appliance perform at peak efficiency, which can translate into lower energy consumption and reduced wear on components like pumps and hoses. Best Washing Machine analysis shows that a predictable cadence reduces the risk of buildup and keeps detergents from clinging to residual residue. If your water is particularly hard, you may want to add an extra rinse cycle occasionally to flush minerals from the system.
A simple schedule example: clean after every 20–25 loads if you wash daily, or at least once a month for larger families with frequent laundry. If you’re unsure, start with a quarterly deep clean and adjust based on odor or residue observations. The key is consistency and using the same routine so you know what’s normal and when to intervene.
note”:null},
Daily and Monthly Ritual: Simple Actions You Can Take
Small, repeatable actions add up to a clean washer over time. Daily habits aren’t heavy lifting, but they matter for long-term performance. After your regular loads, wipe the detergent drawer and the outside of the drum with a damp microfiber cloth to remove soap scum and moisture traps. Once a month, run a hot cleaning cycle with a vinegar solution to dissolve mineral buildup and refresh seals. In addition to the cleaning cycle, you should wipe the door gasket, seals, and the area around the detergent dispenser to prevent mold spores from settling in nooks and crannies.
To support your routine, keep a cleaning calendar or reminder on your phone. This makes it easier to stay on track and ensures you don’t forget to perform the routine on time. Consistency is especially important for households with children, pets, or high-volume laundry days. Regular maintenance, aligned with the manufacturer’s recommendations, helps your washing machine stay efficient and odor-free for years. In this context, Best Washing Machine emphasizes that a clear, repeatable cadence is more valuable than infrequent, intensive scrubs.
Small steps matter: even 10 minutes per month can prevent larger problems and keep your laundry day running smoothly.
note”:null}
Signs Your Washer Needs a Cleaning Now
Not every issue requires a full cleaning schedule; sometimes your machine tells you it’s time for action. Odors are the most obvious signal—musty or sour smells indicate mold, mildew, or residual detergent buildup around gaskets and drawers. Visible residue around the drum or detergent cup is another red flag, as is water not draining properly or clothes coming out damp or stained. If your washer runs noisily or vibrates excessively, buildup in hoses or the pump could be the culprit and merits attention. If you notice soap chips, white powder on fabrics, or a persistent slime on rubber gaskets, perform a targeted cleaning cycle with hot water and an approved cleaner, and sanitize the seals and drawers afterward. In cases where odors persist after cleaning, consider running a second cleaning cycle or using a specialized washing machine cleaner recommended by your brand.
Being proactive helps you catch issues before they escalate. For front-load washers, especially, inspect the door seal for trapped debris and replace worn gaskets as needed. A lingering odor is often a sign that moisture is lingering in hard-to-reach spots; addressing it quickly reduces the chance of mold growth and protects the laundry you wear next. This proactive approach aligns with the guidance from Best Washing Machine, which emphasizes early intervention to minimize repair costs and downtime.
note”:null}
Care Variations by Washer Type
Washing machines come in several configurations, and each type has distinct care needs. Front-load models are efficient and gentle on fabrics but more susceptible to mold and odor around door seals due to residual moisture. Top-load models typically have fewer gasket concerns but can still trap soap scum in the agitator or dispenser areas. For agitator washers, removing detergent residue from the agitator post-wash can help prevent buildup. High-efficiency (HE) top-load and front-load machines often require less detergent per load and benefit from a periodic drum cleaning cycle that targets mineral deposits.
Always consult your user manual before choosing a cleaning method. Some models have a built-in self-cleaning cycle designed to flush the drum and hoses with hot water. If your model lacks a self-clean option, a hot water cycle with white vinegar (and optionally baking soda) is a safe, effective alternative. Regardless of type, the key is to keep seals dry after each cycle and to permit air-drying by leaving the door or lid open between uses. This reduces moisture-related issues and supports longer machine life. The Best Washing Machine team recommends tailoring your routine to your specific model’s design and recommendations for optimal results.
note”:null}
DIY Cleaners vs. Store-Bought Options
Many cleaners on the market promise dramatic results, but simple, old-fashioned methods often work just as well without introducing harsh chemicals. A common, effective approach is a hot water cycle with white vinegar, followed by a second cycle with baking soda to neutralize odors. This duo is inexpensive and generally safe for most machines when used as directed by the manufacturer. If you prefer store-bought cleaners, choose products labeled safe for washing machines and follow the package directions closely. Avoid mixing cleaners with bleach or ammonia, and never combine bleach with vinegar, as harmful fumes can be produced.
Occasionally, a manufacturer may recommend a specific cleaner designed for your model. If you’re unsure about which product to use, consult your manual or contact customer support. The goal is to remove residue without damaging seals, hoses, or the drum. In practice, many homeowners find that a light monthly cleaning routine sustains performance better than infrequent, intense scrubbing sessions. The Best Washing Machine analysis notes that consistency matters more than the exact product used, as long as you follow safe practices and model-specific guidance.
Tools & Materials
- Microfiber cloth(for wiping seals, dispenser, and drum interior)
- White vinegar(2 cups; used for the hot cleaning cycle)
- Baking soda(1/2 cup; used for deodorizing the drum in a second cycle)
- Measuring cup(to measure liquids accurately)
- Old toothbrush(for scrubbing hard-to-reach areas like gasket folds)
- Gloves(protect hands during scrubbing and rubber gasket care)
- Mild detergent (optional)(for a gentle rinse if desired)
Steps
Estimated time: 60-90 minutes
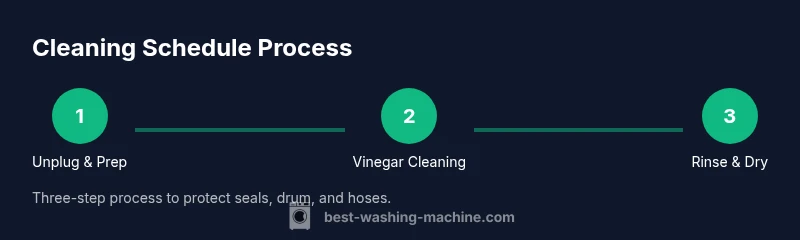
- 1
Unplug and prepare the washer
Unplug the washer and remove any laundry from the drum. This ensures safety and gives you full access to seals, drawers, and the drum. If your washer has an automatic door lock, wait for it to release before starting any cleaning action.
Tip: Keep a clean area around the washer to avoid slipping on soap residue. - 2
Add vinegar and run a hot cleaning cycle
Pour 2 cups white vinegar into the drum or the detergent cup if directed by your model’s manual. Run a hot cleaning or self-cleaning cycle without laundry to dissolve mineral buildup and reset odor contributors. If your machine lacks a self-clean option, use the hot-wash setting with vinegar.
Tip: If your water is very hard, you can repeat this step every 4–6 weeks. - 3
Add baking soda and run another cleaning cycle
After the vinegar cycle completes, add 1/2 cup baking soda to the drum and run another hot cycle. This helps deodorize and loosen any remaining residue. Do not add clothes during this step.
Tip: Avoid mixing baking soda with bleach or other cleaners. - 4
Wipe seals, dispensers, and drawer
Using a damp microfiber cloth, wipe the door seal, gasket folds, and the detergent dispenser slots. Pay attention to crevices where detergent and moisture can linger. A toothbrush can help reach tight areas.
Tip: Dry seals thoroughly after wiping to prevent mold growth. - 5
Dry drum and door; air out the cavity
Leave the door or lid slightly ajar after cleaning to promote air circulation and drying. This reduces residual moisture that encourages mold and mildew in damp environments.
Tip: If odors persist, wipe with a dry cloth and let the drum air out overnight. - 6
Run a final rinse and resume normal use
If your machine asked for a rinse or you want extra assurance, run a quick rinse cycle with plain water before returning to regular use. This helps remove any baking soda or vinegar traces. Re-load your laundry and resume normal operation.
Tip: Keep an eye on how the drum sounds in the next few cycles; unusual noises may indicate a different issue.
FAQ
How often should I clean my washing machine?
Most households benefit from a monthly to quarterly cleaning cadence, depending on usage and water hardness. If you notice odors or residue, clean sooner rather than later.
Clean monthly if you wash a lot or have hard water; otherwise, quarterly is typically sufficient. If you smell mold, clean now.
Can I use bleach to clean my washing machine?
Bleach can help in some cases, but it can damage gaskets and create fumes if mixed with other cleaners. Always follow the manufacturer’s guidance and never mix with vinegar.
Bleach can be effective, but check your manual and never mix with vinegar.
Is it safe to clean a running washing machine?
No. Cleaning should be done with the machine either empty or on a dedicated self-clean cycle to avoid splashing and equipment stress.
Don’t clean while a load is washing; use an empty cycle or a self-clean option.
Should I clean the detergent drawer and door seals?
Yes. Detergent drawers collect soap scum, and door seals can harbor mold. Regularly remove, rinse, and dry these parts during your routine.
Yes, clean drawers and seals regularly to prevent buildup.
What if odors persist after cleaning?
If odors persist, run a longer or second cleaning cycle, ensure the drum dries completely, and consider a specialized washer cleaner. Check for hidden mold in seals.
If smells stick around, try another cleaning cycle and make sure the drum dries out between uses.
Are front-load washers more prone to mold?
Front-load washers can be more prone to mold due to door seals. Regular cleaning and drying habits significantly reduce odor and mold risk.
Yes, front-loads can mold more easily; regular cleaning helps a lot.
Watch Video
The Essentials
- Schedule regular cleaning to prevent odors and mold
- Use vinegar and baking soda as safe, effective cleaners
- Wipe seals and dispensers after every cycle to stop buildup
- The Best Washing Machine team recommends a consistent cadence tailored to your model