Can the Rubber Seal on a Washing Machine Be Replaced? A Practical Guide
Learn whether you can replace the rubber door gasket on a washing machine, how to choose the right seal, and step-by-step methods to swap it safely. A homeowner-friendly guide from Best Washing Machine.

Can the rubber seal on a washing machine be replaced? Yes—most front-loading gaskets can be swapped without replacing the entire drum. If you're dealing with a leak, worn edges, or mold build-up, replacement is often the most cost-effective fix. This guide covers model compatibility, sourcing the right seal, and a careful step-by-step replacement process.
Understanding Why Seals Fail and Replacement Reality
The rubber door gasket is designed to flex with each wash cycle, but heat, detergents, and repeated motion take a toll. Over time, the material can dry out, crack, or tear; folds can trap moisture and mold, leading to odor and leaks. The direct question — can the rubber seal on a washing machine be replaced? In most front-loading models, the answer is yes. A skilled homeowner or a technician can swap the gasket without dismantling the entire drum, preserving the tub and electronics. According to Best Washing Machine, gasket replacement is a cost-effective repair for machines with a sound drum but a failing seal. Model compatibility matters: some seals are integrated into the door frame, others slide into a groove around the drum. Before you begin, confirm fit by checking the model number and diagram from the manufacturer.
This path saves you from premature disposal and keeps your washer in service. The replacement approach varies by brand and design, so take time to identify the exact gasket type and the mounting method. A properly installed gasket creates a watertight seal and minimizes risk of drips during high-spin cycles. A careful process also minimizes the chance of damaging the drum edge or door frame.
Model Compatibility: How to Find the Right Seal
Choosing the correct gasket starts with identifying your washer's model and verifying the gasket type. First locate the model number (often on a label inside the door frame, behind the front panel, or on the back). Then compare the gasket’s shape, groove width, and locking tabs with the OEM diagram for your model. Some brands use a full door seal that threads into a groove, while others use a seal that snaps over the drum lip. If you have a top-load washer, you may be dealing with a different seal arrangement than a front-load. In all cases, the model number is your best antidote against a mismatch. If the model is older, you might need a discontinued gasket or a compatible aftermarket alternative; in that case, contact the retailer with the model number to confirm fit. The goal is a snug, watertight fit that matches the groove design and mounting method. A correct match reduces the risk of future leaks and ensures warranty compatibility.
Having the right gasket also affects installation time. If you replace the gasket with an ill-fitting part, you may experience persistent leaks or rubbing against the drum. Take accurate measurements and verify notch alignments before ordering. When in doubt, reach out to a parts specialist who can confirm fit based on your model number and serial information.
Sourcing the Right Gasket: OEM vs Aftermarket
After you confirm the exact gasket type, you must decide where to buy it. OEM gaskets promise exact fit, original materials, and the highest chance of lasting performance, but they can be pricier and may not be available for older models. Aftermarket or third-party gaskets are often cheaper and readily available, but quality and fit can vary. Always check compatibility notes and verify the part number against your model. Look for gaskets that explicitly state compatibility with your washer brand and model and read user reviews focusing on fit, leak performance, and longevity. Inspect the gasket’s dimensions, especially inner diameter, thickness, and groove replicability, to ensure it sits evenly around the drum. Some technicians recommend replacing clamps or spring clips when you install a new gasket; this can improve sealing and reduce the chance of leaks due to aged hardware. If you’re working with a professional, confirm whether they supply the gasket or if you’ll provide it. Keeping a record of the part number helps future maintenance and warranty claims.
OEM options often guarantee a closer match to the original material properties, including elasticity and chemical resistance. If you choose aftermarket, prefer brands with clear fit charts and return policies. Finally, verify any warranty terms tied to the gasket—some dealers offer limited coverage on seals only if installed by a qualified technician.
Safety and Preparation Before Replacement
Replacement work involves electricity, water, and moving parts, so a safety-first approach is essential. Start by unplugging the machine and shutting off the hot and cold water supplies. If your home has auto-fill valves, turn them off as well. Place towels and a bucket under the area to catch any residual water. If your model requires removing the front panel, follow the manufacturer’s instructions to avoid damaging screws, clips, or cosmetic panels. Use a flashlight to inspect the gasket groove for crust, residue, or corrosion, and plan to clean thoroughly. Wear eye protection and gloves to guard against sharp edges and splashy water. Take photos during disassembly to aid reassembly and verify the orientation of components. If you notice burning odors, scorch marks, or smoke, stop immediately and seek professional help—these can indicate internal damage. Ensure you have all necessary tools and the correct gasket before starting to prevent mid-project trips to the store. A careful start reduces the chance of water damage and injury.
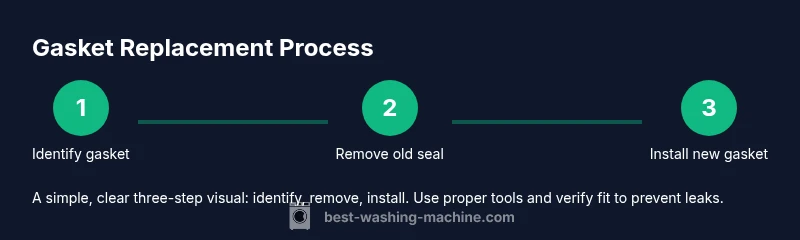
The Replacement Process in Concept
Here we outline the typical replacement flow rather than a model-specific, step-by-step tutorial. The goal is to access the gasket groove, remove the old seal, clean the groove and drum lip, and install the new gasket so it sits evenly around the drum. You will then reattach clamps, hoses, and any front-panel components, reseal the panel, and run a short test cycle. While steps vary by brand, the core sequence tends to be: isolate power, gain access, remove the old gasket, install the new gasket, reassemble, and verify. A successful gasket replacement stops leaks and preserves the tub; a misstep can cause leaks or damage to the drum edge. Expect minor water spillage during disassembly, so have towels ready and work slowly to maintain alignment. After installation, perform a thorough leak test on a short cycle with a towel barrier to confirm a good seal.
The Replacement Step-by-Step: Quick Reference
The following steps provide a concise action plan you can apply to most front-loading washers. If your model differs, consult the manufacturer’s guide for model-specific quirks. Each step emphasizes a clear action and the reason behind it to help you stay oriented during the repair.
- Disconnect power and water sources. Why: to prevent electric shock and water leaks.
- Remove the outer panel or bottom access panel to reach the gasket. Why: to expose the groove and clamps.
- Loosen and remove the hose clamps and retaining springs that secure the old gasket. Why: to free the old seal without damaging the drum lip.
- Remove the old gasket and clean the groove and drum edge thoroughly. Why: debris can compromise the seal and cause leaks.
- Fit the new gasket into the groove, aligning any notches or arrows. Why: proper alignment ensures even compression and prevents leaks.
- Reattach clamps, hoses, and front panel, ensuring a snug fit without pinching or stretching. Why: loose hardware can leak or fail in high-speed cycles.
- Run a test cycle with towels nearby to verify there are no leaks and that the door seals correctly. Why: confirms installation success before regular use.
Tip: Take photos during disassembly to guide reassembly and consider labeling parts as you go. This reduces confusion if you pause the project and resume later.
Common Mistakes to Avoid
Common missteps include not fully draining water before panel removal, forcing components, or failing to align the gasket notch with the drum notch. Skipping a test run can miss small leaks that appear only under pressure. Do not reuse an old gasket if it shows cracks, stiffness, or deformations; install a new one that matches your model. Avoid overtightening clamps, which can cut or stretch the gasket. Finally, avoid using harsh cleaners that degrade rubber; opt for mild soap and water unless the manufacturer approves a specialized cleaner. Taking your time and verifying fit at every stage reduces rework and protects the drum edge.
Maintenance to Extend Seal Life
After a successful gasket replacement, preventive care will extend its life. Wipe the gasket surface after each cycle to remove moisture and residues. Leave the door slightly ajar after cycles to air-dry and prevent mold buildup in folds. Use a detergent appropriate for your washer type and avoid harsh chemicals that can degrade rubber. Inspect the gasket monthly for cracks, pliability, and signs of wear, addressing issues early to prevent leaks. If you notice persistent mold, clean with a manufacturer-approved cleaner that’s safe for rubber and seals. Finally, keep a routine maintenance log noting the replacement date and the model details so you can track wear over time and schedule future replacements when needed.
Real-World Case: When Replacement Makes Sense
In many homes, a slow door-leak with a visible crack or a swollen gasket edge indicates a failing seal. Replacing the door gasket often restores full sealing and prevents water damage without replacing the entire washer. For units with a metal drum edge showing corrosion or a crack near the seal lip, you’ll want a professional assessment to rule out structural damage. If the drum or bearings show wear, a gasket swap alone may not resolve all issues, and a broader repair plan could be more cost-effective than continued leaks. In general, if most other components are in good condition and the leak traces to the gasket path, replacement is a sensible, cost-conscious option.
Quick Troubleshooting Before Replacement
Before committing to a gasket swap, perform quick checks: look for obvious leaks around the door frame, inspect folds for mold, and ensure the gasket isn’t pinched by the door or drum. Check clamps and springs for corrosion or wear. If you can reproduce a leak by gently pressing the gasket, the seal is likely the culprit. If the machine is under warranty, consider professional service to avoid voiding coverage. For older models, get a second opinion if you’re unsure about the remaining life of the drum and bearings.
Additional Notes and Considerations
Not every washer uses a readily replaceable gasket. Some models have molded-in gaskets or sealed tubs and require more invasive disassembly or professional intervention. Always consult the user manual and manufacturer support resources for model-specific instructions and part numbers. If you are uncertain about fit, safety, or proper tools, hire a technician to perform the replacement. A well-executed gasket replacement should leave you with a drip-free, reliably sealed washer that continues to operate within its warranty terms.
Tools & Materials
- Replacement door gasket (rubber seal) compatible with your model(Obtain exact part number from model label/diagram; check grooves and locking features)
- Screwdriver set (Phillips and flat)(Varies by model; include small and large heads)
- Needle-nose pliers(For clamps and hose clamps)
- Putty knife or plastic pry tool(Non-metallic to avoid scratching panels)
- Bucket or shallow tray(Catch residual water during disassembly)
- Absorbent towels or rags(Keep workspace dry and safe)
- Silicone-based lubricant (optional)(Use on gasket edges if recommended by manufacturer)
- Gloves and eye protection(Protect hands from sharp edges and splashes)
- Clean cloth and mild detergent(Clean the groove and drum lip before seating the new gasket)
Steps
Estimated time: 90-120 minutes
- 1
Disconnect power and water
Unplug the washer and shut off the water valves. Remove any hoses and place the ends into a bucket to catch drips. This step prevents electric shock and minimizes water loss during disassembly.
Tip: Take a photo of hose connections before removing them to ensure proper reattachment. - 2
Access the gasket area
Remove the front panel or door boot cover as required by your model to expose the groove that holds the gasket. Keep track of screws and clips so you can reassemble easily.
Tip: Work slowly and support the drum to avoid misalignment when paneling comes off. - 3
Loosen and remove clamps
Loosen the clamps or spring rings securing the old gasket, then carefully detach the seal from the drum lip. Do not force parts; if a clamp is stubborn, re-check alignment.
Tip: Document the orientation of the gasket and clamps with a photo for reference. - 4
Remove the old gasket and clean
Peel away the old gasket and wipe the groove and drum lip clean.Remove residue, rust, or adhesive carefully with a non-abrasive pad.
Tip: Ensure the groove is dry before seating the new gasket. - 5
Install the new gasket
Fit the new gasket into the groove, aligning any notches with corresponding drum features. Start at a fixed point and work around to avoid kinks.
Tip: Leave a small gap at the top edge to prevent pinching when closing the door. - 6
Reconnect clamps and hoses
Re-secure the clamps and reattach any hoses, restoring tension so the gasket sits evenly. Reinstall the front panel and check for proper seating.
Tip: Do not overtighten clamps; overcompression can pierce the gasket. - 7
Test the seal
Plug in the machine and run a short cycle with towels around the base to catch leaks. Watch the door edge and gasket for any drips as the drum spins.
Tip: If leaks appear, power off and reseat the gasket, checking for misalignment.
FAQ
Can I replace the gasket myself or should I hire a professional?
Replacing a gasket is a common DIY task for many front-load washers, provided you have the right gasket and basic tools. If you’re unsure about electrical or drum alignment, or if you notice rust or damaged components, hire a technician.
Replacing a gasket is often doable for homeowners with the right parts and tools. If you’re unsure, consider professional help to avoid damaging the drum.
What are signs the gasket needs replacement?
Visible cracks, tears, or stiff, hard edges are telltale signs. Recurrent leaks around the door, mold in folds, or water pooling at the bottom during cycles also indicate a gasket issue.
Look for cracks or tears and leaks around the door; mold in the folds is another warning sign.
How long does gasket replacement take?
Replacement time varies by model and experience, but most households complete the job within a few hours, including setup and testing.
Most people finish in a few hours, counting setup and a test run.
Can a gasket replacement fix a leaking drum?
If the leak originates from the gasket path and the drum itself is sound, replacing the gasket should stop the leak. Leaks from a damaged drum edge or bearings require additional repairs.
If the leak is from the gasket area and the drum is okay, replacing the gasket should stop it.
Should I replace clamps and hoses at the same time?
Replacing clamps and hoses along with the gasket can improve sealing and prevent future leaks if those parts show wear.
You can replace clamps and hoses to prevent future leaks when you replace the gasket.
Is a gasket replacement worth it on an old machine?
If the rest of the machine is in good shape and the drum is sound, replacing the gasket is often cost-effective compared to a full appliance replacement.
If the washer is otherwise solid, a gasket swap is usually a smart, economical fix.
What maintenance helps the gasket last longer?
Regular cleaning, drying the gasket after cycles, and periodic inspections help extend gasket life and prevent mold buildup.
Keep it clean, dry, and inspected—regular checks help the gasket last longer.
The Essentials
- Confirm gasket compatibility with your model before purchase.
- OEM gaskets offer the most reliable fit, but aftermarket options exist with proper verification.
- Safety first: unplug power, close water supply, and prepare for spills.
- A proper install prevents leaks and protects the drum edge for years.