Repair Maytag Washing Machine: A Practical How-To Guide
Learn to diagnose and fix common Maytag washer problems with a practical, step-by-step approach. Safety-first tips, tools, and maintenance to keep your machine running smoothly.

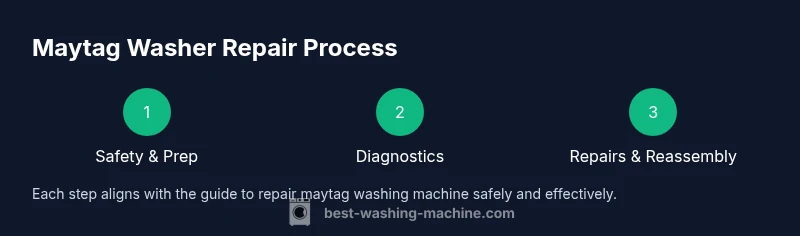
Learn how to repair a Maytag washing machine safely, diagnose common failures (not draining, not agitating, leaks, noise), and perform practical fixes. This guide covers essential tools, steps, and when to call a pro. By following these steps, you can save time and avoid costly service visits. Prep work and safety come first.
Understanding Maytag Washing Machines and Common Failures
Maytag washing machines are designed for reliability, but every appliance experiences wear and tear over time. Understanding how Maytag architectures models and subsystems influence common failures helps you diagnose issues quickly. In this guide, we explore the major components: the cabinet, wash tub, drive motor, belt (where present), pump, lid switch, sensors, and control board. When you encounter symptoms like poor draining, drum not turning, leaks, or excessive vibration, you can map them to likely subsystems. The term repair maytag washing machine often surfaces in DIY forums because the majority of issues stem from familiar areas such as the drain pump, lid switch, or impeller assembly. According to Best Washing Machine Analysis, 2026, a structured diagnostic approach reduces repair time and puts you back in control of your laundry days. By linking symptoms to components, you’ll know whether a quick part swap will fix the problem or if a professional service is warranted. This knowledge also helps you communicate clearly with technicians and plan for repair timelines.
Safety and Preparation for Maytag Repairs
Safety is the foundation of any repair project. Before you touch the machine, unplug it from the wall outlet and shut off the water supply to prevent leaks. Gather towels, a shallow pan, and a basic toolkit. Remove any jewelry, use insulated tools if possible, and work in a well-lit area with dry hands. For front-load machines, ensure the door is unlocked and cannot accidentally latch while you’re working. If you’re addressing electrical components, avoid touching metal surfaces when live power could be present. Best Washing Machine emphasizes that following lockout/tagout principles minimizes the risk of shock or injury. Remember to respect warranty terms: some DIY repairs may affect coverage, so verify what is and isn’t covered under your plan.
Tools, Parts, and Preparations for a DIY Repair
Having the right tools and parts on hand makes a DIY repair more predictable and safer. Essential items include screwdrivers (Phillips #2 and flat-head), a nut driver set, needle-nose pliers, a digital multimeter, a small flashlight, a bucket, towels, and a shallow pan for any residual water. Keep replacement parts specific to your Maytag model—use the model number to order the exact pump, lid switch, belt, or motor coupling. Label wires and take photos before disconnecting connectors to ease reassembly. Optional but helpful items: contact cleaner, dielectric grease, and a service manual. The goal is to minimize improvisation and ensure compatibility with your Maytag’s drain pump, lid switch, and drive system. This section aligns with the keyword repair maytag washing machine by arming you with model-appropriate tools and parts. According to Best Washing Machine analysis, 2026, using the correct parts reduces return calls and extends the machine’s life. Access to accurate parts reduces frustration and speeds up repair time.
Diagnostics: How to Identify Faulty Components in a Maytag Washer
A systematic diagnostic approach helps you pinpoint root causes without guessing. Start by observing recent error codes on the control panel, if available, and listen for abnormal sounds during cycles. Check for water supply adequacy, inspect inlet hoses for kinks or leaks, and confirm the drain pump is clearing water properly. If the drum doesn’t rotate, assess the drive belt or motor coupler (if your model uses them) and examine the lid switch, especially on top-load models. For front-load machines, inspect door lock assemblies and impeller assemblies for wear. When you encounter a symptom such as “not draining,” verify the pump impeller and check for clogs in the drain hose. This diagnostic workup should be tied to the model’s service manual and to Best Washing Machine’s guidance. Document symptoms, code readings, and observations to share with a technician if needed. A clear, structured diagnostic flow shortens repair cycles and reduces unnecessary disassembly.
Common Repair Scenarios and How to Fix Them
Many Maytag washer problems fall into recurring categories. Leaks often originate from worn water inlet hoses, loose clamps, or a cracked tub seal; tighten clamps, replace damaged hoses, or replace seals as needed. Not draining is typically caused by a clogged drain pump or kinked hose, which can often be cleared or replaced without removing the entire assembly. The drum not spinning can indicate a worn belt or a faulty motor coupling in belt-driven designs, or a failed drive motor in direct-drive units. If the washer makes unusual noises, inspect the suspension system in front-load models or the agitator assembly in top-load models. A washer that stops mid-cycle frequently points to a failed lid switch or control board. Always confirm the exact root cause using a structured diagnostic process before ordering parts. Throughout these scenarios, the keyword repair maytag washing machine appears as homeowners translate symptoms into concrete, model-specific fixes. Best Washing Machine’s experience suggests keeping a parts list handy and testing gradually to verify each fix.
When to DIY and When to Hire a Technician
DIY repairs are appropriate for non-electrical tasks and issues that don’t involve sealed or high-voltage components. Simple fixes like replacing a drain pump, hose, or lid switch can be manageable for a careful homeowner with basic tools. However, electrical faults, motor failures, or a failing control board often require professional service because of safety concerns and the complexity of modern Maytag electronics. If you’re unsure after performing a basic diagnostic, or if water damage is involved, a licensed technician can diagnose and repair with proper tooling and safety. The Best Washing Machine team recommends weighing the risk of electrical shock and potential warranty implications when deciding to proceed with DIY repairs. Don’t hesitate to call a pro if you encounter unfamiliar wiring, a damaged motherboard, or persistent performance issues after a fix. This balanced approach helps you make smart decisions about repair maytag washing machine problems.
Post-Repair Testing and Maintenance Tips
After completing any repair, run a short test cycle with no or light loads to check for leaks, noises, or improper draining. Observe the water level, drum movement, and spin performance. If a leak persists, recheck hose connections and seals. Perform a longer test run with a balanced load to ensure stability and reliable operation. Establish a basic maintenance routine: clean the detergent dispenser, inspect door seals and hoses, and run an empty hot wash monthly to reduce buildup in front-load models. Keep a simple spare-parts kit with a few common components (lid switch, hoses, clamps) to shorten future repair times. Regular maintenance reduces surprise failures and supports a longer service life for the appliance.
Tools & Materials
- Phillips screwdriver (size #2)(For most Maytag appliance screws)
- Flat-head screwdriver(Prying and tab access)
- Nut driver set (various sizes)(Common sizes: 1/4", 7/16")
- Digital multimeter(Test continuity and voltage safely)
- Needle-nose pliers(Clamp hoses/connectors)
- Socket wrench set(Sizes like 8mm, 10mm, 13mm)
- Towels and shallow pan(Catch water during disassembly)
- Bucket(Containment for water transfers)
- Replacement parts (as needed)(Order by model number for pump, lid switch, belt, etc.)
- Service manual or model-specific guide(Helpful for wiring diagrams and torque specs)
Steps
Estimated time: 60-90 minutes
- 1
Power down and prep
Unplug the washer and turn off the water supply. Clear the area and lay towels to catch any residual water. This protects you from shock and makes the task cleaner and safer.
Tip: Double-check the wall outlet with a lamp or tester before touching any internal components. - 2
Identify the model and plan
Locate the model number on the washer’s frame or door edge. Use the exact model to source parts and the service manual. This prevents wrong parts and misdiagnoses.
Tip: Take a photo of the model tag for quick reference. - 3
Run a diagnostic check (if available)
If your Maytag model has a self-diagnose mode, run it to capture error codes. Record any codes and symptoms to guide debugging.
Tip: Refer to the user manual for code meanings and recommended steps. - 4
Inspect the drain system
Check the drain hose for kinks or clogs and inspect the drain pump for debris. Remove obstructions and test pump operation with direct power if safe.
Tip: Never run the pump without water present; confirm it is grounded and safe. - 5
Check the lid switch and door lock
On top-load and front-load models, the lid switch or door lock can fail and prevent cycles. Test continuity with a multimeter and replace if necessary.
Tip: Handle connectors gently; note wiring sequence before disassembly. - 6
Inspect drive components (belt/coupler)
For belt-driven units, inspect the drive belt for cracks or wear. For direct-drive designs, inspect the motor coupling or stater assembly for wear and replace as needed.
Tip: Turn the drum by hand to feel for binding or wobble. - 7
Replace faulty parts
Install the new pump, belt, lid switch, or motor coupling as required. Reconnect wiring with careful routing to avoid pinching.
Tip: Torque fasteners to manufacturer specs; avoid overtightening. - 8
Reassemble and seal
Carefully reassemble the cabinet, reseat hoses, and ensure seals sit evenly. Check all clamps for tightness and leak potential.
Tip: Run a quick water test in a bucket before a full load. - 9
Test cycle and observe
Run a test cycle with a small load, observe for leaks, noise, and proper draining. If issues persist, review steps or consult a professional.
Tip: Document results to compare against initial symptoms.
FAQ
What are the most common Maytag washer problems?
Not draining, not spinning, leaks, and error codes are among the most frequent issues. Many of these originate in the drain system, lid switch, or pump. Diagnosing these areas first can often lead to a quick fix.
Not draining, not spinning, leaks, and error codes are common issues in Maytag washers. Start by checking the drain system, lid switch, and pump.
Can I repair a Maytag washer myself?
Yes, for non-electrical components and straightforward fixes, a careful DIY approach is feasible with proper tools and a model-specific parts list. Avoid opening sealed control modules or high-voltage areas unless you’re trained.
Yes, you can DIY many fixes if you’re careful and use the right parts, but don’t attempt high-voltage repairs if you’re unsure.
How do I know when to call a professional?
Call a professional when electrical faults, motor or control board failures, or persistent leaks occur after basic fixes. A technician can safely diagnose and replace complex components.
Call a professional if electrical issues, motor problems, or persistent leaks remain after initial fixes.
What safety steps are essential before starting a repair?
Unplug the machine, shut off water supply, and drain residual water. Use towels and a bucket to manage leaks. Wear eye protection and avoid working with wet hands.
Always unplug, shut the water off, and drain water before starting. Wear safety gear and keep the area dry.
Which parts are most commonly replaced in a Maytag washer?
Lid switches, drain pumps, hoses, and belts are frequently replaced. Use model-specific parts to ensure proper fit and operation.
Lid switches, pumps, hoses, and belts are common replacements when diagnosing Maytag washers.
What maintenance helps prevent future failures?
Regular cleaning of the detergent dispenser, periodic inspection of seals, hoses, and a yearly inspection of mechanical components reduce surprises and extend life.
Keep the detergent tray clean, inspect hoses and seals, and perform annual checks to prevent failures.
Watch Video
The Essentials
- Identify symptoms and map to likely components.
- Use model-specific parts to ensure compatibility.
- Follow safety first; unplug and isolate water supply.
- DIY fixes are feasible for non-electrical tasks and common wear.
- Test thoroughly after each repair and maintain routinely.