Washing Machine Water Inlet Valve Replacement DIY Guide
Step-by-step instructions to safely replace a faulty water inlet valve on a washing machine. Includes tools, step-by-step actions, safety tips, and maintenance guidance to prevent leaks and improve efficiency.

With this guide, you will safely diagnose and perform a washing machine water inlet valve replacement. You’ll learn how to verify symptoms, gather the right tools, disconnect the water and power safely, replace the valve with a compatible unit, and test for leaks—all in a step-by-step DIY process. By following these steps, you can fix leaks, improve efficiency, and prevent costly water damage. This article covers safety, tool lists, step-by-step actions, and maintenance tips to keep your washer running smoothly.
Why this repair matters
Water inlet valve failures can cause overfilling, leaks, or intermittent water supply, turning a small annoyance into serious damage. According to Best Washing Machine, valve issues are a leading cause of inlet problems in many homes. Replacing a faulty inlet valve not only stops leaks but also improves fill accuracy and reduces energy waste caused by incorrect water flow. By understanding the valve’s role and performing a safe replacement, you can extend the life of your washer and protect surrounding areas from moisture damage. This repair is about reliability, safety, and long-term savings.
- Safety reminder: always disconnect power and shut off water before starting the work.
Understanding the Water Inlet Valve
The water inlet valve is a small, solenoid-controlled valve that controls water flow into the washer tub. It typically sits at the back of the machine, connected to the cold and hot water hoses. When energized by the control board or timer, the valve opens to fill the drum. In some models, there are separate dual-solenoid valves with individual wiring. Understanding this helps you diagnose symptoms and ensure you replace the correct part with a compatible valve. Knowing the valve’s placement and port configuration also helps you plan a smoother replacement.
Diagnosing Symptoms and Safety Considerations
Before tearing into the hardware, note common symptoms: the washer fills slowly or not at all, leaks are observed around the inlet connection, or the drum overfills or underfills unexpectedly. For safety, unplug the washer and shut off both water supplies before removing panels. Have a bucket ready to catch residual water. After replacement, run a short test cycle with the access panel closed and watch for drips. This approach minimizes water damage and protects you during the repair.
Replacement Process Overview and Best Practices
Replace only with a valve that matches your model’s inlet configuration (single vs dual solenoid, hose connections, and electrical connector type). Start by disconnecting both water supply lines and removing the mounting screws that secure the valve to the washer cabinet. Then detach the electrical connector and hoses, install the new valve in the reverse order, torque mounting screws to the manufacturer’s specification, and ensure seals are snug. Reconnect wiring, reassemble panels, restore water and power, and run a test cycle. Always consult your model’s manual for exact torque specs and port layout.
Maintenance tips to extend valve life
Regularly inspect inlet hoses for cracks and replace worn gaskets and filters. Use cold or warm water only if the valve requires, and avoid forcing hoses onto fittings. Keep the area behind the washer dry and promptly fix any leaks you detect. A quick annual check can catch issues before they become floods. The longer a valve stays sealed and free of debris, the less likely you’ll encounter leaks or misfills.
Tools & Materials
- New washing machine water inlet valve assembly (compatible with your model)(Verify electrical connector and hose ports match your unit)
- Adjustable wrench(Used to loosen fittings and mounting nuts)
- Flat-head screwdriver(Needed for screws and terminal brackets)
- Phillips screwdriver(Needed for screws and terminal brackets)
- Needle-nose pliers(Helpful for disconnecting small hoses/clips)
- Bucket or shallow tray(Catch water from hoses)
- Towels or rags(Cleanup and dry surfaces)
- Teflon tape or pipe sealant (optional)(Use only if your model requires sealing on metal threads)
- Work light or flashlight(Better visibility behind the machine)
Steps
Estimated time: 45-90 minutes
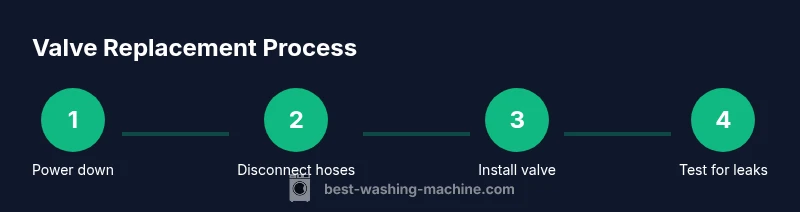
- 1
Power down and shut off water supply
Unplug the washer and close the household water valves to prevent leaks while you work. This step protects you from electric shock and accidental flooding. Ensure the machine is completely powered down before you touch any electrical components.
Tip: Double-check that power is truly off at the outlet. - 2
Access the inlet valve area
Move the washer or remove the back panel to reveal the inlet valve mounted at the rear. Take care not to damage surrounding components or disconnect hoses unnecessarily.
Tip: Have a helper if the machine is heavy or awkward to maneuver. - 3
Disconnect hoses and wiring
Place the bucket under the valve, loosen hose fittings with the adjustable wrench, and carefully disconnect the electrical connector from the valve. Keep track of which hose goes where for reattachment.
Tip: Label hoses or take a quick photo before removal. - 4
Remove old valve and mounting hardware
Unscrew the mounting screws and gently detach the valve from the cabinet. Note gasket placement and how the valve sits for correct alignment of the new unit.
Tip: Keep screws and small parts in a labeled container. - 5
Install the new valve
Position the new valve, connect hoses to the correct ports, reconnect the electrical connector, and secure with mounting screws. Ensure seals are snug and hoses are fully seated to prevent leaks.
Tip: Avoid cross-threading and tighten evenly. - 6
Test, reassemble, and verify
Reattach any panels, restore power and water, and run a short test cycle with no clothes. Inspect all connections for leaks and ensure proper fill. If leaks appear, power down and recheck gasket seating.
Tip: Check for drips at hose connections during the test.
FAQ
What are the signs that a water inlet valve needs replacement?
Common signs include constant filling or no filling, leaks around the inlet connections, and error codes related to water supply. If you observe any of these, inspect the valve but rule out hoses first.
Watch for continuous filling, leaks, or error codes indicating water inlet issues.
Can I replace the valve myself, or should I hire a professional?
Many homeowners with basic mechanical skills can replace a valve using model-specific instructions. If you’re uncomfortable with wiring or disassembly, hire a professional.
It’s doable for many homeowners, but call a pro if wiring or access feels risky.
Do all washing machines use the same inlet valve?
No. Inlet valves vary by model, port configuration, and electrical connectors. Always confirm part compatibility before purchase.
Valves aren’t universal; check your model’s specifics.
Is it safe to run a test cycle after replacement?
Yes. After verifying tight connections, run a short test cycle without clothes to confirm there are no drips or leaks.
Run a quick test cycle to verify there are no leaks.
How long does valve replacement typically take?
Most replacements take about 45-90 minutes, depending on access and model complexity.
Expect roughly an hour of work plus testing.
Watch Video
The Essentials
- Verify model compatibility before ordering a valve.
- Shut off power and water before starting.
- Install a compatible valve and test for leaks.
- Best Washing Machine recommends safety-first maintenance.