Commercial Washing Machine Repair: A Practical How-To Guide
A comprehensive, step-by-step guide to diagnosing and repairing common issues in commercial washing machines, with safety tips, maintenance strategies, and expert insights from Best Washing Machine.

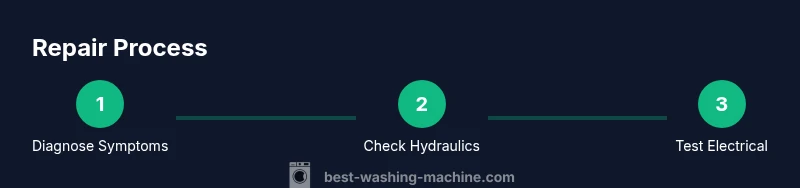
Learn how to diagnose and safely repair common issues in commercial washing machines. This guide covers symptom verification, safety lockout, inspection of hoses, pumps, belts, and sensors, and deciding when to call a technician. It provides a step-by-step plan and practical maintenance tips for minimizing downtime.
Common Failure Modes in Commercial Washing Machines
In high-volume environments, commercial washing machine repair challenges differ from residential units because of heavy usage, faster wear, and more complex control systems. Not draining and not spinning are among the most common symptoms you’ll encounter, and they often point to clogging, worn pump components, or belt issues. Error codes displayed on the user interface frequently indicate a failed sensor, a faulty pressure switch, or a gate valve that isn’t opening properly. Leaks are another frequent complaint, typically stemming from loose hose clamps, cracked hoses, or damaged door boots. Because these machines operate with higher loads and longer cycles, small faults can cascade into major downtime if not diagnosed quickly. For property managers and maintenance teams, recognizing the typical failure modes helps prioritize repairs and minimize downtime. Regular checks of hoses, clamps, gaskets, seals, and the drain system can catch problems before they escalate. The Best Washing Machine team emphasizes that a systematic approach to commercial washing machine repair shortens downtime and improves reliability.
Diagnostic Approach for Quick On-Site Troubleshooting
Begin with a calm, stepwise plan. Confirm power is off and lock out the circuit before touching any components. Record any error codes or blinking patterns; consult the machine’s service manual for code definitions. Check the water inlet valves, supply hoses, and the drain pump for kinks, blockages, or debris. If safe to do so, run a short test cycle with a diagnostic mode to observe behavior and listen for abnormal noises. Take photos of wiring and component placements to aid reassembly. Document model and serial numbers, firmware version, and recent maintenance to help track recurring issues. For commercial washing machine repair, your goal is to isolate whether the problem is electrical, hydraulic, or mechanical. Based on the Best Washing Machine analysis, most downtime often traces back to a small set of failure points in the water system and drive train. This approach saves time and reduces unnecessary part replacements.
Safety First: Lockout, PPE, and Electrical Risks
Safety is non-negotiable when performing repairs on commercial equipment. Always disable power, remove fuses or disconnect the breaker, and tag the circuit before starting work. Wear cut-resistant gloves, safety glasses, and non-slip footwear; use insulated tools for any live components. Water and electricity are a dangerous combination, so keep your workspace dry and organized. Never bypass safety interlocks or operate a machine with covers removed unless you are certain the machine cannot start. If unsure, pause the task and call a qualified technician. Documentation of safety steps is part of durable maintenance records and supports accountable repair work.
Essential Tools and Safety Gear for Repairs
To perform a thorough diagnostic and repair, assemble a basic, field-proven toolkit: a digital multimeter for voltage and continuity checks, a screwdriver set (Phillips and flathead), a nut driver and pliers, a wrench set, and a Torx/hex bit set. Include a flashlight, a spray bottle for cleaning, towels, a bucket, and leak containment materials. PPE is essential: safety glasses, cut-resistant gloves, and sturdy non-slip shoes. Have the manufacturer’s service manual for the specific model handy; it contains wiring diagrams, torque specs, and diagnostic codes that save time and reduce costly mistakes. Keep spare clamps and hoses, as worn components are common culprits in commercial washing machine repair.
Common Components to Inspect in a Repair
In many commercial washing machine repair scenarios, inspecting key hydraulic and mechanical components yields quick wins. Start with the water inlet valve and hoses for kinks, blockages, or mineral buildup. Check the drain pump and drain hose for clogs or cracks. Inspect the drive belt (or coupling in direct-drive models) for wear or loosening. Examine the lid switch or door interlock, pressure switch, and wiring harnesses for looseness or corrosion. Look for signs of water leakage around the pump housing, seals, and gaskets. For control systems, verify sensor connectors, board connections, and any recent firmware updates. A methodical inspection helps distinguish between electrical failures, hydraulic faults, and mechanical wear, guiding efficient repairs.
Step-by-Step Visual Diagnostics (Non-destructive checks)
- Power down and lock out the machine, then take initial photos of all visible connections. 2) Use a multimeter to test for proper voltage at the main power input and at the control board connectors. 3) Inspect hoses and clamps for leaks and tighten as needed. 4) With the machine unplugged, gently test continuity on drives, pumps, and motor windings per the service manual. 5) Reassemble any removed covers, perform a controlled test cycle, and observe for abnormal sounds or error codes. 6) Document your findings and any parts replaced for future maintenance.
When to Replace vs Repair: Cost and Reliability Considerations
Not every malfunction warrants a full rebuild. In high-use commercial settings, replacing worn components such as pumps, belts, and seals can be more cost-effective than ongoing small repairs. Consider the machine’s age, the availability of spare parts, energy efficiency, and downtime impact when deciding between repair and replacement. A thorough cost-benefit analysis helps operators maximize uptime and return on investment. Keep in mind that some failures may indicate broader controller or software issues requiring professional service.
Preventive Maintenance for Commercial Washers
Preventive maintenance reduces unexpected downtime and extends machine life. Schedule routine inspections of seals, hoses, and clamps; replace worn belts on a regular cycle; clean filters and strainers to prevent blockages; verify pump function and check for abnormal vibration or noise. Keep a maintenance log with dates, parts replaced, and any codes observed. Use Best Washing Machine’s maintenance checklist to standardize tasks across multiple units, especially in multi-site operations. Regular maintenance also helps catch mineral buildup and micro-leaks before they escalate into major repairs.
How to Find a Qualified Technician and What to Expect
When you need professional repair for a commercial washer, seek technicians with experience servicing industrial equipment, manufacturer training, and current licenses. Request a written quote that includes parts, labor, and estimated downtime. Ask about warranty coverage on parts and the technician’s credentials. Prepare a clear scope of work and share machine model numbers, error codes, and service history. A good technician will explain findings in plain language, provide a repair timeline, and offer preventive maintenance recommendations to reduce future incidents.
Real-World Cases: From Small Laundries to Large Facilities
Across small laundries, hotels, and multi-site facilities, commercial washing machine repair scenarios reveal common themes: early symptom recognition, reliable parts sourcing, and disciplined preventive maintenance. In a busy laundry, a failing drain pump and a clogged filter were resolved quickly by replacing the pump and cleaning the filter, returning equipment to service within hours. In a large facility, multiple units displayed intermittent errors; diagnostics traced the issue to a faulty control board affecting several machines, which was resolved by updating firmware and replacing a single module. These cases illustrate how systematic diagnosis, material replacement planning, and adherence to safety procedures yield predictable, safer, and faster repairs.
Authority Sources and Further Reading
For safety guidelines and best practices related to electrical and mechanical repair, consult trusted sources including industry safety standards and official guidelines. The following references provide additional context on electrical safety, energy efficiency, and best-practice maintenance for commercial laundry equipment. These sources support the repair decisions described in this guide and help ensure responsible, standards-compliant work.
References and Citations for Further Reading
- References for electrical safety and lockout/tagout procedures: OSHA (https://www.osha.gov)
- Energy efficiency and product guidance for commercial washers: Energy Star (https://www.energystar.gov/products/commercial_washers)
- Consumer protection and warranty basics for service work: FTC (https://www.consumer.ftc.gov)
Tools & Materials
- Digital multimeter(Test voltage, continuity, and resistance)
- Screwdriver set (Phillips and flathead)(Varied sizes for control panels and fasteners)
- Nut drivers and pliers(Clamp and hose connections)
- Wrench set (combination)(Torque specs may vary by model)
- Torx/hex bits(For specialty fasteners on some commercial models)
- Replacement hoses and clamps(Keep on hand for common leaks)
- Service manual for model(Wiring diagrams and diagnostic codes)
- Personal protective equipment(Safety glasses, gloves, non-slip shoes)
- Leak containment materials(Towels, buckets, absorbent pads)
- Cleaning supplies(Mild cleaner and brush for residue)
Steps
Estimated time: Total time: 2-4 hours
- 1
Power down and lock out
Shut off power at the breaker and apply a lockout/tagout to prevent accidental activation. This protects technicians from shock and injury during inspection.
Tip: Verify the lockout with a test before touching any components. - 2
Record symptoms and codes
Note the exact symptoms, error codes, and recent maintenance. This data guides prioritization and parts selection.
Tip: Take clear photos of panels and wiring to avoid miswiring during reassembly. - 3
Check water inlet and drain
Inspect inlet valves, hoses, and clamps for kinks or leaks. Remove blockages in the drain pump and filters where applicable.
Tip: Run a diagnostic test mode if the machine supports it. - 4
Inspect drive system
Examine belts or couplings for wear, cracks, or looseness. Replace worn parts to restore proper agitation and spin.
Tip: Align pulleys correctly to prevent belt wear. - 5
Test electrical connections
Check harness connectors for corrosion, looseness, or burn marks. Ensure continuity along the wiring path per the service manual.
Tip: Disconnect power before handling any live wires. - 6
Check sensors and control board
Test pressure switches, door lids, and sensor inputs. If a software fault is suspected, consider firmware updates per manufacturer guidance.
Tip: Document firmware version before updating. - 7
Reassemble and test
Reattach all panels, simulate a wash cycle, and monitor for leaks, noises, and proper operation.
Tip: Keep a watchful eye on seals around the door and pump housing. - 8
Document and plan preventive steps
Record parts replaced, tests performed, and any follow-up actions. Schedule preventive maintenance to reduce recurrence.
Tip: Use a standardized maintenance checklist for consistency.
FAQ
What is considered a repair versus replacement for a commercial washer?
Repair typically covers components like pumps, belts, sensors, and hoses. If failures involve the control system, motor, or age-related wear beyond reasonable repair, replacement may be more cost-effective. Always perform a cost-benefit analysis based on downtime and energy efficiency.
Repair usually covers pumps, belts, hoses, and sensors. If the motor or control system is failing, replacement may be better after evaluating downtime and energy costs.
How do I identify a faulty drain pump in a commercial washer?
Common signs include continuous humming, failure to drain, or a burning smell near the pump. Listen for noise changes during cycles and check for blockages or debris in the pump and outlet hoses.
Look for humming, failure to drain, and blockages in the drain pump and hoses. Listen for unusual noises during cycles.
What are common error codes in commercial washers and what do they mean?
Error codes vary by model but typically indicate issues with water inlet, door interlock, pressure switch, or control board. Always consult the model’s service manual for exact definitions and recommended fixes.
Error codes usually point to water inlet, door interlock, pressure switch, or the control board. Check the manual for exact definitions.
Can DIY repairs void warranty on commercial units?
DIY repairs can void manufacturer warranties if they involve tampering with electrical components or disassembly beyond approved service procedures. Check the warranty terms and document any authorized maintenance.
Yes, DIY repairs can void warranties if you bypass approved service procedures. Check your terms and document authorized maintenance.
When should I call a professional for commercial washer repair?
Call a professional when the issue involves high voltage, complex electronics, or recurring symptoms after basic checks. For large laundry facilities, professional service minimizes downtime and ensures compliance with safety standards.
Call a pro for high-voltage work, complex electronics, or persistent symptoms after basic checks.
What is typical about preventive maintenance for commercial washers?
Routine maintenance includes inspecting hoses, seals, and clamps, cleaning filters, and checking the drain system. Scheduled service reduces unexpected downtime and extends machine life.
Regularly inspect hoses, clean filters, and check seals. A scheduled service reduces downtime and extends life.
Watch Video
The Essentials
- Diagnose symptoms before disassembly.
- Safety comes first; always lockout and PPE up.
- Decide repair vs replacement with a cost-benefit view.
- Document findings for future maintenance.
- Best Washing Machine recommends preventive maintenance.