Fix Washing Machine: Step-by-Step Troubleshooting and Maintenance
Learn to diagnose and fix common washing machine problems with a clear, step-by-step approach. This educational guide covers safety, diagnostic flow, DIY repairs, maintenance, and when to call a professional from Best Washing Machine.

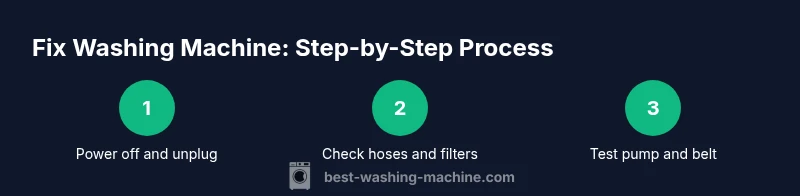
Fixing a washing machine often comes down to a few common issues. This quick guide, from Best Washing Machine, outlines a practical, 6-step approach to diagnose and repair typical problems such as not draining, not spinning, or leaks. Gather basic tools, follow safety tips, and you'll save time and avoid unnecessary service calls.
Why Fixing a Washing Machine Matters
A washing machine is a workhorse in every home, and most common faults can be addressed with basic tools and careful safety. According to Best Washing Machine, taking a do-it-yourself approach to routine issues saves time, protects your schedule, and reduces waste by delaying replacement. By understanding how your washer works—drum, pump, valve, and control board—you gain confidence to diagnose problems without fear. This guide emphasizes a practical mindset: observe symptoms, verify causes, and apply safe, tested fixes. You’ll learn to differentiate simple maintenance from problems that require professional service, which can help you avoid unnecessary downtime on laundry day.
As you work through fixes, keep in mind that many issues share a common root: wear, clogging, or an overlooked hose connection. With patience and a systematic approach, you can resolve most of the frequent faults in a home washer. Best Washing Machine’s guidance focuses on actionable steps, basic safety, and maintenance habits that prevent future breakdowns. The goal is to empower homeowners, renters, and small-ops laundries to keep their machines running smoothly while minimizing service calls and costs.
Common Problems That Hint a Fix Is Needed
Not draining, not spinning, leaks, or excessive noise are signals that something inside the washer is amiss. A washer may fail to drain if the pump is clogged or the impeller is worn. A belt on older top-load models can slip, causing no spin. Leaks often start at hoses, clamps, or the door boot, while loud banging might indicate an unbalanced load or worn bearing. This section outlines the most frequent symptoms and likely culprits so you can prioritize diagnostic steps and avoid replacing the entire unit unnecessarily. Common symptoms to watch for include water pooling around the machine, unusual grinding noises, and clothes appearing unusually damp after a cycle. By recognizing these patterns, you can narrow down the probable cause and focus your efforts efficiently.
Safety First: Before You Begin
Electrical and water accidents are real risks when repairing a washing machine. Always unplug the unit and shut off the cold water supply before touching any components. If you must move the machine, use proper lifting technique and never lean on the drum while it’s open. Wear safety glasses when working with moving parts or potential splashes. Keep a clear workspace and use a nearby towel to catch spills. If you notice sharp edges or a gas-like smell from components, stop immediately and seek professional assistance.
Safety isn’t optional here—it's the foundation of any DIY repair. By setting the right environment and following basic precautions, you protect yourself from shocks, floods, and accidental damage to circuits that power the machine. Remember to disconnect power before opening access panels, and never place your hands inside a running drum. A calm, methodical approach reduces mistakes and keeps the project moving forward.
Helpful tip: work in a dry area, and have a friend or family member nearby in case you need a spotter or an extra set of hands for heavier tasks.
Tools & Materials
- Flathead screwdriver(For prying panels and removing screws in access covers)
- Phillips screwdriver(For assorted screws on panels and control boards)
- Nut driver or adjustable wrench(To disconnect hoses and clamps safely)
- Multimeter(To test continuity and voltage safely)
- Bucket and towels(To catch and manage any spilled water during tasks)
- Replacement hoses/clamps (on-hand)(Optional if hoses show wear or cracks)
Steps
Estimated time: 40-60 minutes
- 1
Power off and unplug
Begin by unplugging the washer from the outlet and shutting off the cold water supply. This eliminates the risk of shock and flooding while you inspect components. Check you have a dry workspace and place towels nearby to catch any incidental drips.
Tip: Take a photo of panel connections before you disconnect anything to aid reassembly. - 2
Check for obvious leaks and drain hose kinks
Inspect all hoses for cracks, bulges, or loose clamps. Ensure the drain hose is not kinked and sits properly into the drain standpipe or tub. Replace any damaged hoses and tighten clamps to factory tension.
Tip: Run a quick water test after tightening clamps to verify you’ve stopped the leak. - 3
Test the lid switch or door lock
Some washers won’t spin if the lid switch or door lock isn’t engaging. If accessible, test the switch with a multimeter or bypass only if you know how (and only briefly, as a diagnostic). Replace the switch if it’s faulty.
Tip: Never bypass safety interlocks for extended testing. - 4
Inspect the pump and filter for clogs
Many not-draining issues come from debris in the pump or lint in the filter. Disconnect the hoses to access the pump inlet and remove any blockages, then clear the filter screen. Reassemble securely.
Tip: Be prepared for residual water; keep towels handy to manage cleanup. - 5
Check the drive belt (older models)
On front- or top-load machines with belts, inspect the belt for cracking or glazing. If worn, replace the belt and ensure proper tension as per your model’s service manual.
Tip: Belts wear gradually—if you’re not comfortable with belt tensioning, consult a service manual before proceeding. - 6
Run a diagnostic or empty cycle
With panels resecure, run an empty cycle to observe whether the machine drains and spins correctly and whether any error codes appear on the control display.
Tip: Document any codes shown and consult the manual or guide for code meanings. - 7
Clean or replace the filter and reassemble
If a filter exists, clean it thoroughly or replace it if it’s clogged. Reassemble all panels, reconnect power, and run a test wash to confirm the fix.
Tip: Keep screws organized and return panels only when snug; overtightening can strip threads. - 8
Evaluate performance and plan next steps
If symptoms persist after these steps, reassess the suspected components. Some problems require professional diagnosis, especially if there are electrical or motor concerns.
Tip: Do not push through a fix that leaves you unsure—safety and accuracy come first.
FAQ
Can I fix my washing machine myself, or should I hire a professional?
Many common issues can be addressed at home with basic tools and careful safety. Start with visual checks and simple parts like hoses, clamps, and filters. If you encounter electrical components, motor faults, or unfamiliar error codes, consider professional service to avoid safety risks and potential further damage.
Many fixes are doable at home, but electrical or motor problems are best left to a professional.
What are the most frequent causes of a washer not draining?
A clogged pump, a blocked filter, or a kinked drain hose are typical culprits. Debris like coins, lint, or small fibers can accumulate and block flow. Inspect these components first before moving on to more complex parts.
Usually debris or a clogged pump are to blame for not draining.
Is it safe to open the washer while it’s running?
No. Do not open access panels or touch moving parts while the machine is in operation. Only test on a powered-off unit after you have completed safety checks and reassembled any opened components.
Don’t open the washer while it’s running for safety.
How often should I clean the filter and hoses?
Check the filter if your model has one at least every 6 months, and inspect hoses for wear during routine maintenance every 6-12 months. Regular cleaning reduces clogs and prolongs service life.
Clean filters and inspect hoses regularly to prevent clogs and leaks.
When should I replace a washing machine belt?
If the belt shows cracks, glazing, or slipping, replacement is recommended. A worn belt can cause poor spinning performance or motor strain and may require professional service if you’re not comfortable with tensioning the belt.
A worn belt should be replaced to avoid further damage.
Watch Video
The Essentials
- Power safety comes first when fixing a washer
- Most fixes involve hoses, filters, or clogs
- Test after each fix to confirm success
- Call a pro for electrical or motor issues
- Maintain routine care to extend washer life