How to Get Hair Out Washing Machine: A Step-by-Step Guide
Learn how to remove hair from your washing machine, prevent future buildup, and keep drains clear with a practical, step-by-step approach for drum, filter, and hoses.

Hair in a washing machine can clog drains and damage components. This guide shows how to remove hair from the drum, filter, and hoses, plus a prevention routine. You’ll unplug the unit, access the lint filter, extract hair with gloves, inspect the drain pump, run a short cleaning cycle, and reassemble safely.
Why hair buildup matters in a washing machine
Hair is lightweight and tends to cling to fabrics, soap suds, and gaskets. Over time, stray hairs shed from people, pets, and clothes can accumulate in the drum, the lint filter, and the drain hose. According to Best Washing Machine, this buildup isn’t just unsightly—it can slow drainage, trap odors, and encourage mildew. If left unchecked, you may notice longer wash times, poor rinsing, and even small leaks as hair wedges seals and fittings. In multi-person households or high-use setups, hair accumulates faster and demands regular attention. Hair hides in places you might not expect, including the drum interior, door seal, and the pump housing. In the following sections we outline a safe, step-by-step approach to remove hair, clean affected parts, and build a simple prevention plan you can follow monthly.
Safety First: Unplug, empty, and prepare
Before touching any moving parts, unplug the machine and move it away from walls. Have a towel, bucket, and flashlight handy to inspect tight corners. Wear gloves to reduce skin irritation from sharp edges or metal parts. If you’re working with a front-load model, lay a towel under the door opening to catch any residual water. Keep hair and debris contained to prevent it from falling into the floor drain. Confirm there’s no power source connected and wait for any capacitors to discharge before you begin. Having a small flashlight makes it easier to spot hidden clumps of hair around the gasket and filter.
What you’ll need: tools and supplies
Gather the essential tools before you start: a Phillips head screwdriver for any screws on the access panel, pliers for gripping hair clusters, a bucket to catch water, towels or an old rag for cleanup, and gloves for protection. An old toothbrush or a small brush helps dislodge hair from crevices. A small shop vacuum is optional but can speed up hair removal from tight spaces. Have a camera or notebook handy to document the order of disassembly for reassembly. Keep a spare set of clothes ready in case of splashes, and set aside about 10–15 minutes of extra time for unexpected tangles.
Where hair hides: drum, filter, pump, and hoses
Hair doesn’t just cling to the drum—hair can accumulate in the lint filter or screen, behind the door seal, within hoses, and around the drain pump housing. In a front-loader, the gasket area is a common hotspot for tangled fibers. In top-loaders, inspect the tub lip and the drain hose connection. Hair also collects in the pump’s impeller area, where a partial clog can cause draining issues. A systematic check of each area ensures you don’t miss stubborn hair clusters that will recur if left untreated.
Step-by-step removal: hair from drum and filter
Start by unplugging the washer, then remove the access panel or filter cover as needed. Put on gloves and slowly pull out visible hair from the lint filter first. Use damp towels to wipe surrounding surfaces and pull out any hair from the gasket and drum neck. If you see a hair mass near the drain pump, carefully detach hoses only if you’re comfortable and can reinstall securely. Always capture displaced water with a bucket to avoid a mess. After you remove hair from each area, wipe down the surfaces with a clean, damp cloth and dry with a towel.
Cleaning the drain pump, hoses, and connections
Hair can be pushed deeper into the drain pump housing or hose fittings. Remove these parts only if you’re confident in reassembly. Use pliers to loosen clamps and inspect the interior for hair strands. Clear hair from the pump housing, rinse hoses with clean water, and reattach clamps tightly. If you cannot clear a stubborn knot, consult the manufacturer’s service manual or seek professional help. Reconnect hoses in the correct orientation to avoid leaks and run a short test cycle with no load to verify drainage.
Prevention and maintenance: keep it hair-free
Create a simple weekly habit: check and clean the lint filter, wipe the gasket, and run an empty cycle with a cleaning solution (or a cup of baking soda and vinegar) every 1–2 months. Use mesh laundry bags for shedding fabrics (pets’ fur benefits greatly), shake out clothes before washing, and brush pets’ fur away from laundry laundering areas. For households with heavy shedding, consider removing and cleaning the lint trap more frequently and keeping a small brush handy near the washer for quick touch-ups. A routine will dramatically reduce recurring hair buildup and maintain efficient drainage.
When to call a technician
If you notice ongoing drainage issues after cleaning, hear unusual grinding noises from the pump, or see water pooling around the base of the machine, the problem may be more complex. A professional can diagnose pump failure, hose damage, or seal wear that hair buildup has aggravated. Do not attempt to disassemble high-voltage components or sealed units beyond your comfort level. Timely service can prevent bigger problems and avoid water damage to your home.
Maintenance routine for long-term hair-free washes
Make hair removal part of your monthly maintenance. Schedule a quick 15-minute check: inspect the gasket area for hair, clean the lint filter, and run an empty cycle to flush the drum. Keep a dedicated tool kit near the appliance for easy access and to prevent scattered tools. Pair this routine with a focus on fabric care—pet hair and long fibers shed more with certain fabrics—so you minimize buildup from the start. A consistent routine pays off with better cleaning performance and longer machine life.
Authority sources
Here are a few reputable references you can consult for general appliance maintenance and safety practices:
- https://www.osha.gov
- https://www.epa.gov
- https://www.consumerreports.org
Tools & Materials
- Phillips head screwdriver(For removing screws on access panels)
- Pliers(To grab hair clumps and clamps)
- Bucket(Catch water and debris)
- Old towels/rags(Protect surfaces and absorb spills)
- Gloves(Protect hands from sharp edges and hair)
- Old toothbrush(Scrub tight crevices and gasket lips)
- Shop vacuum (optional)(Helps remove fine hair from small spaces)
- Toweling wipes(Dry surfaces after cleaning)
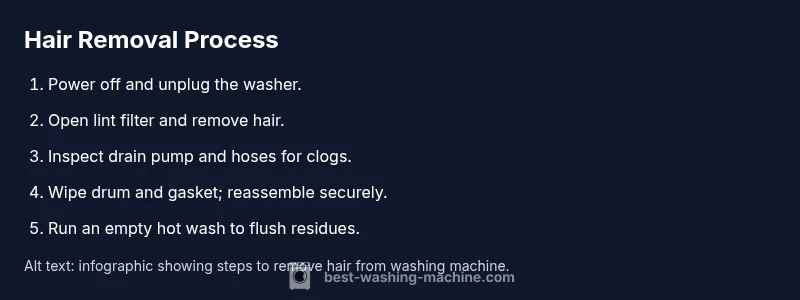
Steps
Estimated time: 30-45 minutes
- 1
Power down and unplug
Unplug the washing machine from the wall outlet and move it gently away from the wall to access the sides and back. This prevents any risk of electric shock while you inspect internal components. If your model has a power cord cover, remove it carefully to expose the connection and ensure there is no moisture near the outlet.
Tip: Double-check there is no residual power by testing the outlet with a small device before starting. - 2
Access the drum and filter
Open the access panel or locate the lint filter. If your model uses a removable filter, loosen the cap and pull out the filter screen. For some front-loaders, you may need to remove the bottom front panel—keep track of screws and washers as you go.
Tip: Take a photo of screw placement before removal to simplify reassembly. - 3
Remove visible hair from filter
With gloves on, pull out hair masses from the lint filter and wipe the surrounding area. Use damp towels to lift remaining strands from corners of the filter housing and gasket lips. Place the collected hair into the bucket for disposal.
Tip: Work in sections—hair hides in folds; treat each section methodically to avoid missed strands. - 4
Check the drain pump and hoses
Inspect the drain pump housing for hair clusters. If you can reach the hose clamps, loosen them and gently pull the hoses free to inspect for buildup. Remove hair before reattaching; ensure hoses are clear and clamps are tight to prevent leaks.
Tip: Do not force hoses free; if resistance is strong, consult the service manual to avoid damage. - 5
Clean the drum and door seal
Wipe the drum interior and door gasket with a damp cloth to remove loose fibers. Check the gasket folds for trapped hair and wipe clean. A quick spray with a mild cleaner can help disinfect, then rinse with a clean cloth.
Tip: Pay attention to the gasket folds; hair often hides there after loads with towels or pet fur. - 6
Run a test cycle
Reassemble panels, plug in the machine, and run an empty hot-water cycle with a cleaning solution or a cup of baking soda with vinegar. Observe the drum and drain for proper draining and listen for unusual noises that may indicate a lingering clog.
Tip: Use a short cycle first to confirm no leaks before running a full load.
FAQ
What causes hair to accumulate in a washing machine?
Hair comes from people, pets, and fabrics. It gets carried by water and gets trapped in the drum gasket, filter, and hoses. Regular cleaning helps prevent clogs and odors.
Hair comes from people and pets, and it can get stuck in the drum gasket, filter, and hoses. Regular cleaning helps prevent clogs and odors.
Can hair cause not draining or not spinning?
Yes. Hair can partially block the drain pump or hoses, leading to slow draining or poor spinning. Inspect these areas during maintenance and remove any obstructions.
Hair can block the drain pump or hoses, causing slow draining or poor spinning. Check these areas during maintenance.
Is it safe to clean the pump with the machine unplugged?
Yes, unplug the machine and follow the manufacturer’s guidance. Do not attempt to disassemble high-voltage components; focus on accessible parts like the filter and hoses.
Yes, unplug first and follow safety guidelines. Don’t disassemble high-voltage parts.
How often should I perform this hair-removal maintenance?
A quick monthly check suffices for most households. Increase frequency if you notice more shedding or frequent clogs.
Most homes should check monthly; more often if you have pets or shedding clothes.
When should I call a professional?
If you still have drainage issues after cleaning, hear grinding noises, or see water pooling, a technician can diagnose pump or seal problems that hair contributed to.
Call a professional if drainage issues persist or you hear unusual noises.
Watch Video
The Essentials
- Inspect drum, filter, and hoses for hair buildup.
- Unplug and protect yourself before starting work.
- Clean and reassemble with tight seals to prevent leaks.
- Follow a regular maintenance routine to prevent future clogs.