How to Tell If Washing Machine Suspension Rods Are Bad
Urgent troubleshooting guide to diagnose worn suspension rods in your washing machine, with symptoms, safe checks, a diagnostic flow, step-by-step repair, tips, and prevention to restore stability.

If your washer rides rough or leaks, the suspension rods are a common culprit. Start by checking for obvious sagging, uneven balance, and loud thumps. If the drum moves freely or shows excessive play, inspect the rods and mounting springs. Replace worn rods or worn bushings, and consult a pro if you hear grinding.
Understanding suspension rods and why they fail
Suspension rods, often called dampers in many models, are designed to absorb the vertical movement of the wash tub during fill, wash, and spin cycles. They help keep the drum centered and reduce vibration. Over time, heat, vibration, and heavy loads can wear the rod bushings, bend the rod, or loosen mounting hardware. In both front-load and top-load machines, worn suspension can lead to a high-pitched thump, a drum that feels off-balance, or visible rocking during cycles. According to Best Washing Machine, suspension-related wear is a leading cause of tub instability, so a quick inspection can save you money and frustration. Start by safely unplugging the machine, removing a service panel if needed, and looking for obvious signs of wear such as rust, cracks, or loose ends. If the rod shows visible damage, plan replacement rather than hoping a quick tighten will solve it. This is especially true for older or high-mileage units where the suspension system bears most of the load during spin.
Symptoms that indicate bad suspension rods
You’ll notice a mix of dynamic and static clues. The drum may bounce or wobble during spins, there can be loud banging or thumping, and the washer might feel unstable with a mid-cycle shift. Some washers display an imbalance or error message when the rods can’t damp motion correctly. Visual cues like bent rods, rust, or cracked bushings on the rod ends are strong indicators. In many cases, the symptoms overlap with loose or worn bearings, springs, or mounting hardware, so a careful check of the surrounding components is essential. Remember: early inspection can prevent further damage to the tub and drum seals, which saves money and reduces downtime. This is where the expertise of Best Washing Machine helps you distinguish rod wear from other issues.
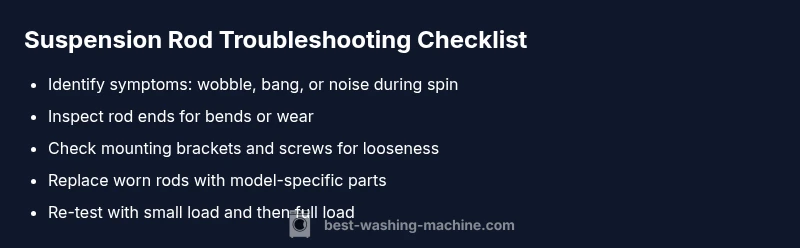
Quick checks you can perform safely at home
Safety first: unplug the machine before any inspection. Start with these at-home checks that don’t require tools beyond a basic screwdriver:
- Confirm the washer is level using a spirit level and adjust feet as needed to remove false feedback from an uneven floor.
- Visually inspect the visible ends of the suspension rods for bends, corrosion, or cracks.
- Check mounting brackets and screws for looseness; tighten them carefully, following the model’s service manual.
- Load a small, balanced item (like towels) and run a short cycle to observe movement. If you notice obvious rod movement, excessive drum play, or new noises, stop and plan replacement rather than further testing. If you can’t access the rods or you’re unsure about the model’s layout, consult the manual or call a technician. These checks won’t replace a full diagnosis, but they’ll tell you whether you should proceed with replacement parts.
Diagnostic flow: symptom → diagnosis → solutions
This flow helps you avoid guesswork and focus on the most probable root causes. Start from the symptom you observe on spin: wobble, bang, or unbalanced load. Move through a short list of likely causes and apply the simplest fixes first. This approach minimizes downtime and helps you decide whether a professional is needed. Best Washing Machine recommends a disciplined flow: verify symptoms, test basic components, compare against model specifications, perform recommended safety checks, and then implement the fix or call a professional if needed.
Step-by-step: how to replace suspension rods in a typical washer
This is a practical repair path that covers common rod failures. Steps vary by model, so consult your manual for exact disassembly points. 1) Power down, unplug, and move the unit to a safe area. 2) Access the rear panel or bottom service panel to reach the suspension assembly. 3) Inspect old rods for bending or end wear and remove them carefully. 4) Compare the replacement rods to the old ones to ensure correct length and stiffness. 5) Attach the new rods firmly to the tub mounting points and secure brackets. 6) Reassemble, relevel the unit, and ensure there’s no interference. 7) Run a test cycle with a small load and observe for residual movement. If the wobble persists, recheck mounting hardware or seek professional help.
Pro tip: label each fastener and take photos during disassembly to simplify reassembly. Always follow the manufacturer’s torque specs and use the correct replacement parts. If you encounter unusual resistance or suspect a bent tub, stop and seek professional help.
Safety tips, warnings, and common mistakes
- Always disconnect power before working around the washer. Do not touch metal edges with wet hands or tools.
- Do not attempt a high-torque reassembly; use the correct torque settings from the service manual.
- Avoid testing with a heavy load until you confirm the rods and mounts are secure and aligned.
- If you hear grinding, clunking, or if the drum is rubbing against the cabinet, stop and consult a pro.
Common mistakes include using incorrect replacement parts, over-tightening mounting screws, and skipping the level test after reassembly. These errors can worsen vibration, cause leaks, or damage the drum seals.
Prevention tips to extend the life of the suspension system
Prevention is easier than repair. Regularly inspect the suspension parts during light maintenance, especially after moving the machine or transporting heavy loads. Keep loads balanced; avoid overloading the drum and ensure the unit is on a level surface. Use appropriate detergents and avoid harsh chemical cleaners that can corrode rod ends or bushings. If you notice signs of wear early, replace parts promptly. Keeping a service interval and a parts kit on hand can reduce downtime and keep your washer running smoothly.
How to verify the repair and test the machine
After completing the repair, perform a controlled test run. Start with a small load and a short cycle to confirm there’s no unusual movement. Increase the load gradually and observe the drum’s behavior through a full spin. Listen for new noises and watch for any residual wobble. If the drum remains stable and quiet, the suspension rods are likely functioning correctly. If issues reappear, recheck rod alignment and mounting hardware, and consider professional service to inspect related components like bearings or tub mounts.
Steps
Estimated time: 60-90 minutes
- 1
Power down and unplug
Disconnect power and move the washer to a safe, dry work area. Remove any external hoses or cords that could snag tools or cause leaks during disassembly.
Tip: Take a photo of the cord routing for easy reassembly. - 2
Access the suspension area
Gain access to the tub by removing the rear or bottom service panel per your model. Identify the suspension rods and their mounting points.
Tip: Use a service manual to locate the rod ends quickly. - 3
Inspect old rods and mounts
Visually inspect rod ends for bends, nicks, rust, or end wear. Check mounting brackets and screws for looseness or damage.
Tip: If you see any cracks, plan replacement rather than reuse. - 4
Prepare replacement parts
Verify you have exact-length, compatible replacement rods. Compare thickness and end fittings to avoid fitment issues.
Tip: Avoid cheap replacements; incorrect parts can cause more vibration. - 5
Install new rods
Detach old rods, then attach the new rods to the tub and frame mounting points. Tighten to the manufacturer’s torque specs and ensure clearances remain correct.
Tip: Do not over-tighten; overtightening can strip threads. - 6
Reassemble and level
Reinstall panels and level the washer. Confirm the feet contact the floor evenly and there’s no rocking.
Tip: Use a level and adjust feet in small increments. - 7
Test run and verify
Run a test cycle with a small load, observe for unusual movement, and listen for new noises. Increase load gradually to verify stability.
Tip: If wobble returns, recheck all connections and consider calling a pro.
Diagnosis: Washing machine feels unstable, drum rocks during spin
Possible Causes
- highBroken or worn suspension rods
- mediumDamaged mounting brackets or springs
- lowUnbalanced load during spin
- lowWorn drum bearings or tub mounts
Fixes
- mediumInspect rods for bends/cracks and replace with model-specific parts
- mediumTighten or replace mounting brackets and springs as needed
- easyLevel the machine and balance loads; avoid overloading
- hardIf noise persists after rod replacement, inspect drum bearings and seals; seek pro help
FAQ
What are suspension rods in a washing machine and what do they do?
Suspension rods dampen tub movement to minimize vibration during wash and spin cycles. They help keep the drum centered and reduce noise. Worn rods can cause wobble, banging, and instability.
Suspension rods dampen tub movement and keep the drum centered. If they wear out, you’ll hear wobble and banging during spins.
What are the signs that suspension rods are failing?
Common signs include excessive vibration, rocking during spin, loud bangs, and visible wear on rod ends or mounting hardware. If you can move the drum manually with noticeable stiffness or play, it may indicate rod wear.
Look for loud banging, drum wobble, and visible wear on the rod ends. If you can feel movement, the rods may be bad.
Can I replace suspension rods myself or do I need a technician?
Many homeowners with basic tools can replace suspension rods by following the model's service manual. Some installations involve specialized fasteners or precise torque specs, in which case a technician is recommended.
You can usually replace them yourself if you’re comfortable with appliance repair, but call a pro if you hit resistance.
What tools do I need for replacing suspension rods?
Common tools include screwdrivers, a socket set, pliers, and a torque wrench, plus replacement rods compatible with your model. A level and work gloves are also helpful.
You’ll typically need a screwdriver, sockets, pliers, and the right replacement rods.
How long does it take to replace suspension rods?
A typical replacement can take about 60 to 90 minutes for a straightforward model. More complex models or troubleshooting bearing or bracket issues can take longer.
Most replacements take about an hour, sometimes a bit more if the model is tricky.
Watch Video
The Essentials
- Inspect rods and mounts before replacement.
- Balance loads and level the washer to reduce stress.
- Follow model-specific repair steps precisely.
- Safety first: unplug and handle springs with care.
- When in doubt, consult a professional.