Rust Remover for Washing Machine: A Complete How-To
Learn safe, appliance-friendly methods to remove rust from a washing machine, choose the right rust remover, apply it correctly, and prevent future rust for a longer-lasting washer.

Yes. To remove rust on a washing machine, choose a rust remover formulated for appliances, typically oxygen-based or citric-acid based. Test on a small, hidden area first, follow the product directions, and never mix cleaners. For prevention, address mineral buildup, run clean-out cycles, and consider a descaling routine.
Rust basics: understanding rust in washers
Rust on a washing machine typically appears as orange-brown stains that may corrode metal parts. It can form when water sits on metal surfaces, or when protective coatings wear away. Distinguishing rust from mineral deposits is important: rust often has a deeper color and may be pitted, while lime-scale stains are pale or chalky. The best practice starts with understanding where rust is likely to occur: around the drum seal, door frame, and metal hoses. The latter may corrode earlier if exposed to harsh cleaners or high mineral content. The reader should consult appliance manuals and local service recommendations. According to Best Washing Machine Team, tackling rust promptly reduces risk of holes and leaks.
Types of rust removers suitable for washing machines
Not all rust removers are equal for appliances. For washers, prefer products labeled appliance-safe, typically oxygen-based or citric-acid based. Oxygen-based removers react with rust to form a soluble compound that easily rinses away. Citric acid-based products are milder and work well on light rust or superficial staining. Avoid chlorine-based whiteners or harsh chemical cleaners, which can degrade seals and enamel over time. Always read the label to confirm compatibility with stainless steel drums and enamel coatings. The Best Washing Machine analysis suggests starting with the gentlest option that can still remove the rust present.
Safety first: preparing your washer and workspace
Before you begin, unplug the machine and disconnect the water supply to prevent accidental shocks or leaks. Work in a well-ventilated area and wear gloves to protect skin from chemical exposure. Lay down a soft towel to catch drips and avoid slipping. If your model has a stainless steel drum, test any cleaner on a small inconspicuous area first to ensure there is no surface discoloration. Keep kids and pets away while you work.
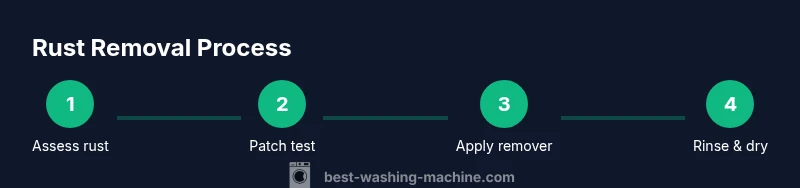
Patch testing and applying rust remover
Begin with a patch test on a discreet area of the drum or outer surface to confirm compatibility. If the patch shows no adverse effects after the recommended contact time, apply the rust remover directly to the rust spots using a soft cloth or brush. Avoid applying to control panels, gaskets, or seals. Follow the product’s dwell time and wipe away residue with a clean cloth when finished. Reassess progress before proceeding to a full treatment.
Cleaning, rinsing, and drying after treatment
Rinse the treated area thoroughly with clean water to remove all chemical residue. Wipe dry with a microfiber towel and inspect for remaining spots. If rust remains, you can repeat the gentle treatment on a localized area rather than a full reapplication. After drying, run an empty wash cycle with hot water (no detergent) to flush the system, then air-dry the interior. This helps prevent residual moisture from promoting new rust formation.
Prevention: keeping rust from returning
Preventing rust starts with controlling mineral buildup and moisture exposure. Use a descaler or mineral-softening product as recommended by the manufacturer, especially in areas with hard water. Regularly wipe the drum and door seal after cycles, and leave the door ajar to promote air drying. Consider a routine cleaning cycle every few months to maintain surfaces and seals. If your area has consistently hard water, a filtration system can reduce mineral content, which contributes to rust.
Common mistakes and troubleshooting
Common mistakes include using chlorine-based cleaners, which can damage seals, and over-saturating surfaces with rust remover, which may require extra rinsing. If staining returns, re-evaluate the extent of rust—small spots may respond to targeted treatment, while widespread corrosion may require part replacement. Always consult the warranty and manufacturer guidance before major repairs to avoid voiding coverage.
When to call a professional
If you notice rust around critical components such as the drum bearing, door lock, or water hoses, or if staining recurs after treatment, it’s wise to contact a technician. Pro-level rust issues may indicate underlying corrosion that affects safety or performance. A certified technician can assess seal integrity and potential part replacement to prevent leaks or flooding.
Tools & Materials
- Appliance-safe rust remover(Choose oxygen-based or citric-acid formulas; avoid chlorine-based products)
- Latex or nitrile gloves(Protect skin from chemicals)
- Soft microfiber cloths(For applying product and wiping residue)
- Soft-bristled brush(Non-scratch to avoid enamel damage)
- Old toothbrush(Spot-clean tight crevices)
- Ventilated workspace or fan(Better air movement during chemical use)
- Non-abrasive sponge(Gentle scrubbing if needed)
- Rinse water and container(For thorough rinsing and dilution if needed)
- Drying towels(Dry surfaces after treatment)
Steps
Estimated time: 40-60 minutes
- 1
Power down and unplug
Unplug the washer and shut off the water supply to prevent shocks and leaks. This safety step minimizes risk before handling chemicals.
Tip: Always prioritize safety; if you smell gas or see a leak, stop and evacuate. - 2
Prepare workspace and inspect
Clear the area, lay down towels, and inspect visible rust areas. Note the severity and plan localized treatment first to minimize chemical use.
Tip: Taking photos helps track progress and outcomes. - 3
Patch test and select remover
Perform a patch test on a hidden area to confirm compatibility with your drum and seals. Select an appliance-safe rust remover appropriate for the rust type observed.
Tip: If you see discoloration after test, stop and choose a milder option. - 4
Apply remover to rust spots
Apply the product to rust spots following the label directions. Use a cloth or brush to ensure even contact while avoiding electrical components.
Tip: Keep product away from control panels and gaskets. - 5
Gently scrub and monitor
Gently scrub the treated areas with a soft brush to loosen corrosion without scratching enamel. Check frequently for changes in color or texture.
Tip: If there is resistance, stop to avoid surface damage. - 6
Rinse and run a test cycle
Rinse thoroughly with clean water and perform a short, detergent-free wash cycle to flush residues. Inspect the drum after the cycle.
Tip: Do not run a full load with clothes during this test. - 7
Dry and plan prevention
Dry all surfaces completely and consider descaling as a preventive step. Store products properly and leave the door ajar after treatment to promote air drying.
Tip: Keep a regular descaling cadence if you have hard water.
FAQ
Can rust remover damage enamel or stainless steel in a washing machine?
Most appliance-safe rust removers are formulated to be gentle on enamel and stainless steel when used as directed. Always patch-test first and follow the label instructions. If you notice discoloration or surface roughening, discontinue use and consult a professional.
Most safe rust removers are designed for enamel and stainless, but always patch-test and follow directions. If you see damage, stop and seek help.
Is rust staining the same as rust?
Rust is the corrosion of metal that often appears as orange-brown spots and can be structural. Mineral staining from hard water may look similar but generally cleans with descalers. Distinguish by texture: rust tends to be pitted or raised, while mineral staining is smoother.
Rust is corrosion and often rusty in texture; mineral stains are usually smoother. Distinguish them before treatment.
Can household cleaners like vinegar be used instead of commercial rust removers?
Mild acids like vinegar can tackle light rust but are less predictable for appliances. They may interact with seals or coatings if used in excess. Always test and consider approved appliance-safe products for best results.
Mild acids can help with light rust, but test first and prefer appliance-safe products for reliability.
How often should I descale to prevent rust in hard water areas?
In hard water areas, descaling every few months is a common recommendation, but follow your manufacturer’s guidance and local water hardness. Regular descaling helps keep mineral buildup from fostering rust formation.
Descale every few months if you have hard water, per manufacturer guidance.
What should I do if rust returns after treatment?
If rust reappears, re-evaluate moisture exposure, seals, and nearby components for ongoing corrosion. Re-treatment may help, but persistent rust could indicate worn seals or metal parts needing replacement.
If rust comes back, check seals and consider professional assessment for possible replacement.
Is rust always a sign I need to replace parts or the washer?
Not always. Small, localized rust can often be managed with treatment and preventive care. Widespread rust around critical parts may require part replacement or professional service.
Rust isn't always a sign you must replace the entire washer; assess extent and consult a pro if unsure.
Watch Video
The Essentials
- Identify rust vs mineral stains before treatment.
- Choose appliance-safe rust removers and patch-test first.
- Rinse thoroughly and dry to prevent re-oxidation.
- Regular descaling reduces future rust risk.