GE Washing Machine Troubleshooting: Quick Fixes and Expert Guidance
A comprehensive, urgent guide to diagnose and fix GE washers. Learn step-by-step checks, safety tips, error-code insights, and maintenance to prevent future problems.

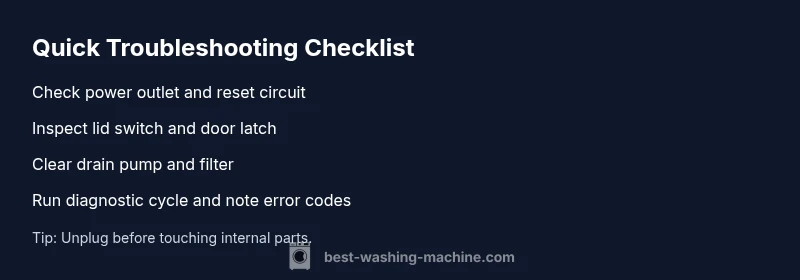
Most GE washer troubles start with power, lid switch, or drainage problems. Begin by unplugging the unit and resetting the outlet, then inspect the lid switch and door latch. Check the drain pump and filter for clogs, and run GE’s built‑in diagnostic cycle. If the machine still won’t start, spin, or drain, contact a qualified service technician.
Why Brand Reliability Matters
When you are dealing with washing machine troubleshooting ge, understanding brand reliability helps homeowners, renters, and operators focus on the most likely culprits. The GE ecosystem values predictable performance, which means most faults come from accessible, preventable issues like power supply glitches or clogged filters. According to Best Washing Machine, a systematic approach shortens downtime and reduces unnecessary part replacements. In 2026, homeowners report faster resolutions when they document symptoms and follow a structured plan. This guide leverages that philosophy, blending GE-specific notes with broad appliance-repair best practices so you can protect your laundry day.
Common GE washers issues and quick checks
GE washers share several recurring problems that show up during daily use. Not starting cycles, not filling with water, not draining, or not spinning are the big four. Start with the simplest checks: verify the outlet has power and the circuit isn’t tripped; inspect the power cord for damage; ensure the washer is properly seated and level. Next, inspect the lid switch or door latch, which tells the washer when the lid is closed. A faulty switch can halt operation without obvious signs. If there are signs of standing water or slow drainage, focus on the drain hose, pump, and lint filter. Regular cleaning of filters and hoses can prevent many frustrations, especially in households with hard water or high usage.
Safety first: unplug, water supply, and hose checks
Safety should precede every troubleshooting step. Always unplug the unit before touching internal components. Turn off water supply to the machine if you’re inspecting hoses for leaks. Check the hot and cold water inlet hoses for kinks, punctures, or loose fittings. A blocked or frozen filter can cause the machine to run but not complete cycles. Use a flashlight to inspect the drain pump and filter area for debris. If you smell burning plastic or see melted components, stop immediately and call a technician. These safety checks reduce the risk of electric shock or water damage.
Diagnostic overview: symptoms to causes
A clear mapping from symptom to likely cause speeds up repair. If the wash cycle starts but stops mid-way, suspect a lid switch, stuck relay, or control board hiccup. If there is no power at all, the issue is often power-related—outlet, circuit breaker, or wiring. Not draining usually points to a clogged pump, blocked filter, or kinked drain hose. Not spinning often involves a belt issue (older GE models), a worn transmission, or a failed lid switch that prevents the spin cycle. By prioritizing simple checks, you can triage quickly and determine whether you’re within DIY reach or need pro service.
Step-by-step: not spinning and not draining (most common fix)
This section walks through the most common fix for GE washers: addressing drainage and spin issues. Begin with the simplest steps and escalate as needed. Gather a flashlight, a towel, and a shallow tray. Keep away from water sources and unplug the unit during any inspection. Record any error codes that appear on the control panel to guide your next steps. If you encounter unfamiliar codes, refer to the user manual or GE support resources. The aim is to restore function without risking further damage.
Special cases: leaks, error codes, and when to call a pro
Leaks around hoses or the drum can signal loose fittings, damaged hoses, or a cracked tub. For small leaks, reseating clamps and replacing damaged hoses is often sufficient. Persistent leaks, large puddles, or cracks require professional assessment to prevent flood damage. Error codes on GE washers vary by model but typically indicate sensor, pump, motor, or wiring faults. Note codes in a repair log and share them with a technician. If you’re unsure about your safety or the complexity of the repair, don’t hesitate to contact a certified technician.
Maintenance to prevent future problems
Prevention is cheaper than repair. Schedule regular filter cleanings, and use the recommended detergent type and quantity. Keep the discharge hose free of bends and kinks, and check water-supply hoses for wear every few months. Run a monthly diagnostic cycle and clear out any debris or lint from accessible areas. A rotating schedule for internal maintenance helps extend the life of your GE washer and reduces the chance of unexpected downtime.
Steps
Estimated time: 30-45 minutes
- 1
Power check and reset
Unplug the washer, wait 60 seconds, and plug back in. Confirm the outlet is powered by testing another device. If the outlet is controlled by a GFCI, reset it and run a short cycle to verify power delivery.
Tip: Avoid touching the cord while the circuit is live; ensure hands are dry. - 2
Inspect lid switch
Open and close the lid firmly to see if the switch engages. Look for a loose or stuck mechanism. If you hear a switch click when closing the lid, it’s a sign the switch is engaged; if not, test with a multimeter or replace the switch.
Tip: Try starting a cycle with the lid firmly closed to confirm proper engagement. - 3
Check drain components
Locate the drain pump and filter. Remove any visible lint or debris. Ensure the pump impeller can rotate freely and there are no objects blocking the pump or hose.
Tip: Have a shallow tray ready for any residual water; unplug before touching restricted areas. - 4
Inspect hoses and fittings
Check inlet and discharge hoses for kinks or leaks. Tighten clamps and ensure hoses aren’t crushed behind the machine. Replace damaged hoses before reusing.
Tip: Use a bucket to catch drips when disconnecting hoses. - 5
Run diagnostic cycle
Access the GE diagnostic mode following the manual for model-specific steps. Record any error codes and clear non-essential alerts. If codes relate to sensors or modules, plan for professional service.
Tip: Note exact code numbers to speed up diagnosis with a technician. - 6
Test a full cycle
After parts are reassembled, run a complete cycle with a small load. Observe for abnormal noise, vibration, leaks, or failure to advance through stages.
Tip: Keep children and pets away during testing.
Diagnosis: Washer won't start
Possible Causes
- highPower issue
- mediumDoor/lid switch fault
- lowControl board or motor fault
Fixes
- easyCheck outlet, test with a known working device, and reset the circuit breaker
- mediumInspect lid switch or door latch for damage or misalignment and replace if needed
- hardRun GE’s built-in diagnostic mode and note error codes; contact service if codes persist
FAQ
What are the most common GE washer issues?
Power, drainage, spin, and fill problems are typical GE washer issues. Start with power checks and lid switch tests before moving to pumps and filters.
Common GE washer issues include power, drainage, spin, and fill problems. Start with power checks and lid switch tests before moving to pumps and filters.
How do I reset a GE washing machine?
Unplug the washer for a minute, then plug it back in and run a test cycle. If the device still won’t operate, consult the manual for model-specific reset steps.
Unplug for a minute, plug back in, and run a test cycle. If it still won’t operate, check your manual for model-specific reset steps.
Is it safe to DIY fix a GE washer?
Many basic issues, like power and hose checks, are DIY-friendly. Complex problems involving the control board or motor should be handled by a professional.
Many basic issues you can DIY safely, but control board or motor problems should be left to a professional.
What do GE error codes mean?
Error codes indicate sensor, drainage, or motor issues. Refer to model-specific manuals or GE support to interpret codes accurately.
Error codes point to sensor, drainage, or motor problems. Check your manual or GE support to interpret them.
When should I call a technician?
If safety risks are present, if there are persistent leaks, unusual noises, or if error codes persist after basic checks, contact a technician.
Call a tech if safety risks exist, leaks persist, or codes stay after basic checks.
Watch Video
The Essentials
- Identify power, lid switch, or drainage as the first culprits.
- Follow a safety-first, stepwise diagnostic approach.
- Record error codes and useGE diagnostic modes to guide repairs.
- Perform regular maintenance to reduce future faults.