Why Aren't Washing Machine Timers Accurate? A Troubleshooting Guide
Diagnose and fix timer inaccuracies in your washing machine with practical, safe steps. Learn common causes, quick checks, and reliable fixes from Best Washing Machine to keep cycles on time.

Why aren't washing machine timers accurate? Timer inaccuracies usually come from wear, drift in the control board, or sensor misreads—not a faulty clock alone. Start with simple checks: ensure the timer linkage moves freely, listen for a stuttering motor, and verify that the start time matches the programmed cycle. If basic fixes fail, use this guide from Best Washing Machine to continue.
The Reality of Timer Accuracy
When you start a wash cycle, the machine's timer should align perfectly with the program you selected. In practice, why aren’t washing machine timers accurate is a common question for homeowners and renters trying to keep schedules predictable. According to Best Washing Machine, the timer is a central synchronization device that coordinates drum rotation, water fill, and drain phases. Timers can be mechanical or electronic, and both types are susceptible to wear, drift, and sensor misreads. A loose dial, worn gears, or a tired motor can cause skipping or early starts. In high-use homes the problem may be amplified by voltage fluctuations or firmware drift in electronic controls. The goal is to distinguish a simple mechanical snag from a genuine control-system issue. By understanding how timers work, you can triage quickly and avoid unnecessary replacements. This guide from Best Washing Machine will walk you through practical checks and safe fixes.
Common Causes of Inaccurate Timers
Several issues can throw a washer timer off. The most frequent are mechanical wear and improper linkage; a sticking or loosely seated dial can send the wrong timing signal. Electronic timers suffer from connector corrosion, loose wires, or degraded firmware. Sensor inputs such as water level, door lock, or pressure switches can also misreport conditions, leading to mistimed cycles. Inconsistent power supply, surge protection, or a faulty clock motor can introduce drift over a span of cycles. By listing the likely suspects, you can prioritize fixes without guessing.
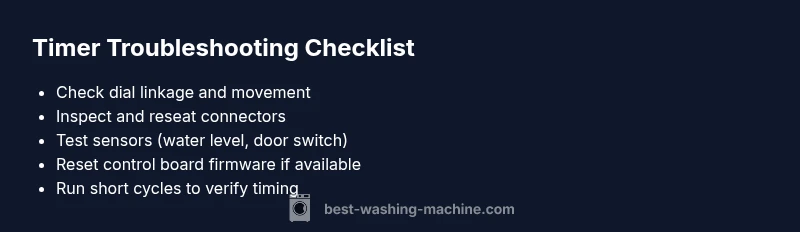
Quick Diagnostics: What to Check First
Begin with the easiest checks that require no tools. Verify the timer dial moves smoothly and returns to zero cleanly. Ensure the selection on the control panel matches the cycle you expect. Inspect visible wiring for loose connectors or corrosion. Listen for unusual motor hum or stutter when the cycle progresses. If the machine advances the cycle but still feels off, check the door switch and water level sensor signals, which can affect timing. Finally, unplug the unit and reseat the main power connectors to reset the control logic. If the issue persists, move to deeper diagnostics.
Step-by-Step Fixes for the Most Common Causes
-
Free up a sticking timer dial: power off, remove access panel, and manually rotate the dial while watching the gears; lubricate with light appliance oil if recommended by the manufacturer and reassemble. Tip: use gentle movements and avoid forcing gears.
-
Re-seat connectors: with power off, unplug the harnesses from the timer module and the control board; reseat firmly, then test with a short cycle.
-
Reset firmware: some electronic timers support a soft reset; follow the user manual to perform the reset, then reprogram the cycle.
-
Check sensors: test water level, pressure, and door latch inputs; reseat or replace faulty sensors.
-
Power supply checks: ensure the outlet is stable, and try a different outlet; avoid shared power strips.
-
If the problem remains, replace the timer module or the control board: this is typically a mid-difficulty task; consult the manufacturer service manual or a technician.
Safety, Warnings, and When to Call a Pro
Safety always comes first. Always unplug the washer before opening access panels or handling wiring. Keep water away from electrical components and avoid using aggressive cleaners near the timer area. If your unit is under warranty, contact the manufacturer or an authorized technician to prevent voiding coverage. For stubborn timer issues, professional service is recommended, especially when a control-board recalibration or module replacement is involved. Never bypass safety interlocks or operate with exposed wiring.
Prevention Tips to Keep Timers Accurate
- Schedule regular inspections of timer linkage and control connectors during routine maintenance.
- Use a dedicated, properly sized outlet to minimize voltage fluctuations; avoid power strips for washers.
- Keep the control area dry and clean; wipe away lint and moisture that can interfere with sensors.
- Periodically reset electronic timers after firmware updates or service work to prevent drift.
Steps
Estimated time: 60-90 minutes
- 1
Power down and access timer area
Unplug the washer and remove access panels to reach the timer module. This minimizes shock risk and prevents accidental cycles during inspection.
Tip: Use a flashlight and label connectors before unplugging. - 2
Check mechanical linkage
Gently move the timer dial and watch the linkage for sticking or binding. If it sticks, clean, lubricate as recommended by the manufacturer, and reseat.
Tip: Avoid forcing parts; apply only light lubrication where approved. - 3
Inspect wiring and connectors
Look for loose, frayed, or corroded wires around the timer and control board. Reseat connectors firmly and inspect for heat damage.
Tip: Take photos before disconnecting to ensure correct reconnection. - 4
Test with short cycles
Reconnect power and run a minimal cycle to observe timing. Note any drift or misalignment and compare to the programmed settings.
Tip: Do not run full loads during testing to minimize risk. - 5
Reset or recalibrate firmware
If applicable, perform a soft reset or reprogram the timer according to the manual. Confirm the cycle starts on time and ends as expected.
Tip: Firmware reset might erase custom settings; have a backup plan. - 6
Evaluate sensor inputs
Test the water level sensor, door latch, and other inputs that influence timing. Replace any faulty sensors or tighten related connections.
Tip: Use manufacturer-recommended replacement parts only.
Diagnosis: Timer runs off or does not align with the selected cycle; start times are inconsistent
Possible Causes
- highWorn timer mechanism or dial linkage
- mediumControl board drift or firmware issue
- mediumLoose or corroded wiring/connectors
- lowSensor input misreads (water level, door switch)
Fixes
- easyInspect and reseat timer linkage; replace worn dial/gear if needed
- mediumReset or recalibrate the control board; update firmware if available
- easyCheck all harnesses and connectors; reseat firmly and test
- mediumInspect sensors (water level, door switch); replace faulty parts
FAQ
Why do timer drift vary between cycles?
Timer drift can be caused by aging mechanical components, intermittent sensor inputs, or firmware updates that alter timing. Inconsistent power can also contribute to uneven cycle lengths. Diagnosing the exact cause requires testing each subsystem and observing timing across multiple cycles.
Timer drift can come from aging parts or sensor glitches; testing each part helps identify the exact cause.
Can I fix timer issues without replacing parts?
Yes, many timer issues stem from loose wiring, dirty or stuck linkages, or a software reset. Start with reseating connectors and freeing any sticky gears, then reset the control board if your model supports it.
Often you can fix it by reseating connectors and resetting the control board.
Is it safe to attempt timer repairs myself?
Only if you can safely disconnect power and follow the manufacturer’s instructions. Avoid contact with water and metal components while powered. If you’re unsure, hire a licensed technician to prevent electrical or water damage.
If you’re unsure, it’s safer to hire a pro.
Should firmware updates be attempted by the homeowner?
Firmware updates are model-specific and can be risky if done incorrectly. Check the manufacturer’s guidance and use official tools. If in doubt, contact support or a technician.
Firmware updates can be tricky; follow official guidance or seek help.
How can I prevent timer issues in the future?
Keep the control area clean and dry, ensure outlets are stable, and perform periodic inspections of timers and sensors. Regular maintenance reduces drift and extends the life of the timer system.
Regular maintenance helps prevent timer drift.
Watch Video
The Essentials
- Identify whether the issue is mechanical or electrical first
- Reseat connectors and inspect the timer linkage for wear
- Reset firmware and test with short cycles before full replacements
- Call a pro when the timer module or control board needs replacement