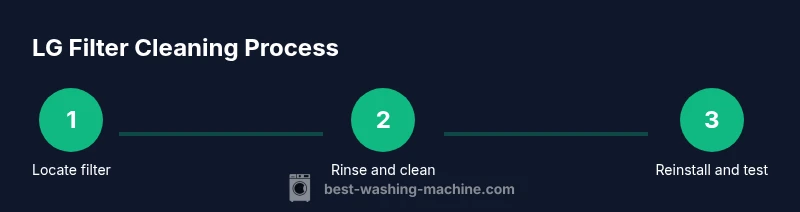
How to Clean the Filter on LG Washing Machine: Step-by-Step Guide
A complete guide to cleaning the LG washer filter, locating it, safely removing debris, and establishing a maintenance routine for optimal drainage and performance.

You can quickly extend your LG washer’s life by cleaning the filter regularly. This guide shows you exactly how to locate, remove, rinse, and reinstall the filter for clean filter on lg washing machine, plus tips for safe handling and a maintenance schedule. Gather gloves, a towel, and a small container; expect a 5–15 minute routine that prevents drainage problems and improves spin performance.
How to clean filter on lg washing machine: why it matters
Keeping the filter clean on lg washing machine is a simple preventive task with big payoff. The filter traps lint, hair, coins, and soap scum that would otherwise circulate through the pump and hoses. When the filter gets clogged, the washer can run less efficiently, drain slowly, or even stop mid-cycle. According to Best Washing Machine, regular attention to the filter helps preserve performance and extends the life of sensitive components. This is not just about a cleaner drum; it's about reducing strain on the pump, improving water flow, and preventing unpleasant odors from trapped residue. By making filter maintenance a routine, you can avoid costly service calls and keep your laundry day predictable. In this article we’ll cover where to find the filter, how to safely remove and clean it, and how often you should perform the task. The goal is to empower you with a quick, reliable process you can repeat without tools beyond basic household items.
Where LG washers hide the filter
On many LG front-load and some top-load models, the filter is behind a toe-kick panel at the bottom front of the machine. Other models place a filter inside the drum area or behind a small access panel on the front. Check your user manual for model-specific location. Look for a small circular cap or a rectangular access door. If your model has an electronic drain pump filter, you may need to remove a service panel; if the model has a lint filter in the door seal, clean there. Knowing the exact location helps you avoid unnecessary disassembly and keeps the process smooth.
Tools and precautions before you start
Before you begin, gather basic items and set a safe working area. You’ll want: gloves to protect your hands, a towel or tray to catch spills, a small container for collecting water, a soft brush or old toothbrush, and a mild detergent or diluted vinegar solution. Always unplug the machine and, if possible, turn off the circuit breaker before opening access panels. Place the machine away from walls to prevent moisture damage and keep the floor dry to avoid slips. These precautions minimize risk and make the cleaning more comfortable and effective.
How to clean filter on lg washing machine effectively
First, locate and remove the filter cover according to your model. Then gently pull out the filter and inspect for lint, hair, coins, and fabric fibers. Rinse the filter under warm running water, using a soft brush to dislodge stubborn buildup. Clean the filter housing with a damp cloth, and check the surrounding seals for grime or mold. If you notice persistent odor, soak the filter in warm water with a mild detergent for a few minutes and rinse again. Dry the filter completely before reinstalling. Reassemble by aligning the gasket and replacing the cover snugly. Finally, run a short cold-water cycle to ensure proper drainage and check for leaks around the housing.
Reassembling and testing after cleaning
Secure the filter back into its housing, making sure the gasket seats evenly and the cap is firmly closed. Wipe away any remaining moisture around the access area to prevent rust and mold. Plug the unit back in and run a quick empty cycle on cold to confirm proper drainage and operation. Listen for unusual noises or leaks during the test run. If everything sounds normal, you’re done and the filter is clean and functioning. Keeping a record of the last cleaning date helps you maintain a consistent schedule.
Maintenance scheduling and best-practice reminders
Consistency matters more than intensity. Create a simple maintenance calendar that fits your laundry routine—most households benefit from cleaning every 3–6 months, with more frequent checks if you have hard water, large households, or pets. Keep a small reminder on your calendar or phone. Note the date of cleaning and track any changes in drainage speed or odor. Regular cleaning reduces wear on the pump and hoses and helps maintain overall efficiency.
Common mistakes and safety reminders
Avoid using harsh solvents or abrasive tools that can damage the filter or seals. Never operate the washer with an exposed filter or a loose cap, as this can cause leaks or pump damage. Don’t skip unplugging the machine—electrical safety is essential when you’re near water. If the filter is stubborn or you feel resistance, stop and consult the model’s manual or a professional. Finally, never neglect odors—they’re often a sign of buildup that needs attention beyond a simple rinse.
Model variations and additional checks
LG models vary in filter design and location. If your model has a secondary lint screen inside the door seal or a separate filter for the pump, clean those areas in addition to the primary filter. While you’re at it, inspect hoses for bulges or kinks and verify the door seal is clean and pliable. These extra checks can prevent leaks and improve overall reliability.
Troubleshooting: what to do if drainage remains slow after cleaning
If drainage is still slow after cleaning, recheck the filter seating and gasket alignment. Ensure the drain hose is not kinked or clogged and that the pump is functioning. Run another short cycle to see if water drains fully; if not, there may be an underlying pump issue or a blocked drain line. In such cases, refer to the LG model manual or contact a professional technician for evaluation.
Tools & Materials
- Gloves(Protect hands from dirty water and sharp edges)
- Towel or tray(Cover the floor and catch spills)
- Small container(Catch and hold removed water)
- Soft brush or old toothbrush(Loosen buildup from filter mesh)
- Mild detergent or vinegar solution(Use for odor and buildup; avoid harsh chemicals)
- Warm water(Rinse filter and housing)
- Screwdriver (flathead or Phillips)(Only if panel requires screws)
- Cloth or rag(Dry and wipe surfaces after cleaning)
Steps
Estimated time: 30-45 minutes
- 1
Power off and unplug the washer
Unplug the machine and, if possible, switch off the dedicated circuit. This protects you from shocks while you work near water.
Tip: If the washer is hard-wired, switch off at the breaker and wait a minute before touching panels. - 2
Locate the filter housing
Identify the filter housing location for your LG model—common spots are the toe-kick panel or a front access panel.
Tip: Consult the user manual if you are uncertain about your model's filter location. - 3
Remove the filter cover
Use a soft cloth to catch drips, then carefully remove the filter cover. Some models require a screwdriver to loosen a small screw.
Tip: Keep the cover and screws in a safe place to avoid losing them. - 4
Take out the filter
Gently pull the filter from its housing and inspect for lint, coins, hair, and fabric fibers.
Tip: Hold the filter over a bucket to prevent spills. - 5
Rinse and scrub the filter
Rinse under warm running water. Use a soft brush to remove buildup; avoid harsh scrubbing that could damage the mesh.
Tip: If buildup is stubborn, soak the filter briefly in warm water with mild detergent. - 6
Wipe the housing and gasket
Clean the housing and surrounding seal with a damp cloth. Inspect the gasket and seals for wear or signs of damage.
Tip: A clean housing helps ensure a proper seal after reassembly. - 7
Reinstall the filter and cover
Place the filter back into its position, align the gasket, and reattach the cover securely. Ensure no water leaks at the seam.
Tip: Double-check that the cap or screws are snug but not overtightened. - 8
Test run and verify
Plug in the machine and run a short cold-water cycle to verify drainage and detect leaks.
Tip: Watch for drips around the hinge and filter area during the test. - 9
Document maintenance
Record the date of cleaning, the model, and any observations to guide future maintenance.
Tip: Set reminders on your phone or calendar for the next cleaning.
FAQ
How often should I clean the filter on an LG washing machine?
Most users find that cleaning every 3–6 months keeps drainage smooth and odors minimal. If you have hard water or many pets, you may want to check more often. Use signs like longer cycles or slower drainage as triggers to clean.
Clean the filter every three to six months, or sooner if you notice slow drainage or odors.
Where is the filter located on LG models?
Location varies by model. Common spots include the toe-kick panel at the bottom front or a front panel inside the drum area. Check your user manual for your exact model.
Most LG washers hide the filter behind a bottom front panel or inside the drum area. Check your manual.
Can I use vinegar or bleach to clean the filter?
Use mild detergent or a vinegar solution to avoid damaging seals. Bleach can degrade certain plastics and gaskets over time, so it’s best avoided on filters.
Stick to mild detergent or warm water with vinegar; avoid bleach on filters.
Is it safe to run the washer without the filter?
No. Running with the filter removed can cause debris to reach the pump and hoses, potentially causing damage or clogs. Always reinstall the filter after cleaning.
No. Don’t run the washer with the filter out; it can cause damage.
What if the filter won’t come out or won’t go back in?
If the filter is stuck, disconnect power and consult the manual or a service professional. Forcing the filter can cause damage to the housing or seals.
If the filter sticks, unplug and refer to the manual or a technician.
After cleaning, what else should I inspect?
Check hoses for wear, kinks, or leaks, and inspect the door seal for mold buildup. These checks help prevent future issues beyond the filter.
Check hoses and seals to prevent future leaks after cleaning.
Watch Video
The Essentials
- Identify the correct filter location before starting.
- Unplug the washer and protect the floor during cleaning.
- Rinse and inspect the filter and housing thoroughly.
- Reinstall securely and test for leaks.
- Set a regular maintenance schedule to prevent drainage issues.