Deep Clean Washing Machine: A Complete How-To
Learn how to deep clean your washing machine to remove mold, odors, and mineral buildup with safe methods. Practical steps, tools, and maintenance tips for all washer types.

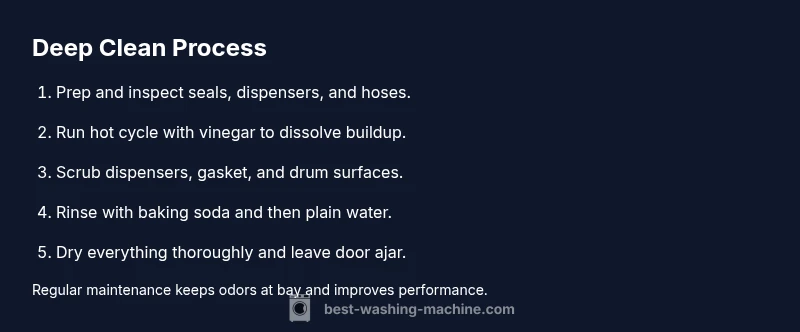
Deep cleaning your washing machine removes detergent residue, mildew, and mineral buildup that can cause odors and poor performance. This quick answer outlines a practical routine you can perform monthly or after heavy use to keep clothes clean and washers running smoothly. The method works for most front- and top-load models and uses common household products.
Why Deep Clean Washing Machine Matters
A deep clean washing machine is more than a fresh-smelling tumble. It directly affects how well clothes come out, how much detergent remains on fabrics, and how efficiently the machine uses water and energy. Over time, soap scum, mineral deposits, and mold can accumulate in the drum, around the door seal, and inside the dispensers. This buildup can trigger odor issues, reduce rinsing effectiveness, and shorten the appliance’s life. According to Best Washing Machine, implementing a regular deep clean washing machine routine helps prevent these problems and keeps your laundry day predictable. The goal is proactive maintenance: a systematic cleanse that refreshes the interior, protects fabrics, and preserves efficiency for homeowners, renters, laundromat operators, and anyone shopping for a washer or repair guidance.
What Builds Up Inside Your Washer
A washer accumulates more than you might expect. Detergent and fabric softener residues can leave a sticky film on drum walls and in dispensers. In high-efficiency (HE) machines, lower water levels concentrate residues, making buildup more noticeable. Mold and mildew thrive in damp seals and crevices, especially if the door is left ajar for long periods. Mineral buildup from hard water can also form a crust along the drum and inlet screens. All of these culprits contribute to odors, uneven cleaning, and longer wash times. Understanding what collects where helps you tailor a cleaning plan that targets the key trouble spots and maintains peak performance, regardless of model or brand.
Choosing Between Vinegar, Baking Soda, and Specialty Cleaners
Many homeowners use household staples like white vinegar and baking soda for a safe, effective clean. Vinegar helps dissolve mineral deposits and can kill certain odors when used in a hot, empty cycle. Baking soda acts as a gentle abrasive and deodorizer that neutralizes acidic odors and lifts grime from drum surfaces. Specialty cleaners marketed specifically for washing machines can be convenient and formulated to be safe for seals and hoses, but always check your manufacturer’s recommendations. Never mix vinegar with bleach or other cleaners, and avoid overuse of acidic cleaners on rubber gaskets. The right combination depends on your washer type, soil level, and water hardness.
Prep Your Washer: Safety and Prep Steps
Before you start, unplug the machine if you’re doing any manual cleaning around the control panel. Remove and rinse any removable parts such as dispensers, then soak and scrub to remove caked-on detergent or fabric softener residue. Put on gloves to protect your hands from cleaners and hot water. Ventilate the laundry space to avoid inhaling strong fumes. Clear the surrounding area of laundry supplies to prevent accidental spills. For front-loaders, inspect the door seal for mold or mildew and gently pull back the gasket to check for hidden debris. This prep work reduces surprises during the cleaning cycle and sets the stage for a thorough clean.
How Temperature, Detergent, and Water Hardness Affect Cleanliness
Temperature and water quality influence how well a cleaning routine works. Hot water helps dissolve stubborn residue and kill mold spores, but not all components tolerate high heat. High-efficiency detergents and softening agents can leave less residue when used correctly. Water hardness increases mineral buildup; if you have hard water, you may notice more scale in the drum and hoses. In those cases, a periodic vinegar boost in hot cycles can be especially beneficial. Remember: always follow label directions and manufacturer guidelines for safe temperatures and cycles.
Common Odors and How to Eliminate Them
Most washer odors originate from mold, mildew, and trapped detergent residues. A thorough cleaning targets the drum, gasket, and dispensers, followed by complete drying to prevent recurrence. Start with a hot empty wash using a safe cleaner, then wipe the door seal and dispenser cups with a microfiber cloth. If odors persist, run a second cycle with a more aggressive cleaner or adjusted amount of cleaner. Keeping the drum and door seal dry between cycles is a simple but powerful habit that dramatically reduces odor buildup.
Maintenance Habits to Prevent Build-Up
Prevention is simpler than remediation. Establish a monthly routine that includes inspecting seals, dispensers, and inlet screens for soap scum and mold. After cleaning, leave the door or lid ajar to promote air circulation and dry all surfaces. Use appropriate detergents and avoid overfilling dispensers to keep residues from accumulating. If you live in a hard-water area, consider a quarterly mineral-control step or a water-softening option for the washer inlet. Regular maintenance helps your machine run quietly, efficiently, and odor-free.
Troubleshooting Quick Fixes If Odors Persist
If odors return after cleaning, reassess the drainage and filter areas for clogs or trapped debris. A persistent scent can indicate trapped moisture or hidden mildew behind the drum or gasket. Revisit the gasket and dispenser areas with a strong cleaning solution and rinse thoroughly. Ensure the appliance has adequate ventilation during and after cycles. If problems persist, consult the manufacturer’s service guidelines or contact a professional technician for a diagnostic check. The goal is to restore fresh laundry performance and extend the life of your washer with a straightforward routine.
Tools & Materials
- White vinegar (5-6% acidity)(1 cup (240 ml) per hot cycle; avoid using distilled vinegar)
- Baking soda(1/2 cup (120 ml) for odor neutralizing needs)
- Microfiber cloths(For wiping gaskets, dispensers, and drum)
- Spray bottle(Fill with water or cleaner for targeted spots)
- Soft-bristled brush or old toothbrush(Scrub dispenser cups and crevices)
- Dish soap(Light degreasing for tough spots)
- Gloves(Protect hands from cleaners and hot water)
- Old towels or rags(Dry and absorb spills during cleaning)
- Thermal-safe measuring cup(Precise pouring for liquids)
Steps
Estimated time: 30-40 minutes
- 1
Prepare and Inspect
Unplug the washer and remove any clothes or items around the machine. Remove dispenser compartments if easy to reach and check for residue. Wipe leaked liquid and set up your cleaning area.
Tip: Having everything within reach reduces interruptions. - 2
Run a Hot Cycle with Vinegar
Fill the dispenser with white vinegar or add 1 cup (240 ml) directly into the drum and run a hot water cycle with nothing else loaded. This helps dissolve mineral buildup and kill algae in the drum.
Tip: Use the hottest cycle recommended for your model. - 3
Scrub Dispensers and Drum
While the hot cycle runs, scrub all dispensers, the door seal, and visible drum surfaces with a microfiber cloth and mild dish soap. Use the toothbrush to reach tight corners.
Tip: Pay special attention to the gap behind the door seal. - 4
Rinse with Baking Soda
Run a second hot cycle, this time with baking soda added to the drum or dispenser to deodorize and lift remaining residues.
Tip: Do not mix baking soda with vinegar in the same cycle. - 5
Clean the Gasket Thoroughly
Wipe the gasket with a damp cloth, pull it back gently to inspect for mold, and clean underneath using a brush. Dry the area completely after cleaning.
Tip: Mold loves damp, dark crevices—dry promptly. - 6
Final Rinse and Dry
Run a final rinse cycle with plain water to remove any cleaning residues, then leave the door open for 15-30 minutes to air-dry the interior.
Tip: Don’t skip the air-dry step; it prevents new mold growth. - 7
Wipe and Reassemble
Dry all parts and reassemble dispensers. Check hoses and filters if accessible and clear any obvious debris.
Tip: Keep a small brush handy for debris around hoses. - 8
Set a Maintenance Schedule
Decide on a cleaning cadence (e.g., monthly or every 20-30 loads) and set reminders to keep on track.
Tip: Consistency beats intensity—short monthly cleans work best.
FAQ
How often should I deep clean my washing machine?
Most households benefit from a deep clean every 1–3 months, or after about 20–30 loads if you run high-usage cycles. If you have hard water or noticeable odors, increase the frequency. Always tailor the cadence to your usage and odor level.
Aim for a deep clean every month or two, especially if you run frequent loads or have hard water. Tune the schedule to odor and buildup.
Can I use vinegar in a high-efficiency (HE) washer?
Yes, but use vinegar sparingly and only in a hot cycle with the drum empty. Avoid pouring vinegar directly into dispensers that are not designed for it. Always consult your manufacturer’s guidelines before using acidic cleaners.
You can, but avoid heavy use and check your maker’s directions first.
Is it safe to use bleach to clean my washer?
Bleach can be effective for disinfection, but never mix it with vinegar or ammonia. Bleach is optional for most homes; many manufacturers advise against frequent use due to rubber seal wear. Read the manual and consider gentler cleaners first.
Bleach is optional; don’t mix with vinegar or ammonia and follow the manual.
Should I unplug the washer during cleaning?
Yes, unplug the washer when you are cleaning around electrical components or removing parts. This reduces the risk of shock and makes it safer to handle damp areas.
unplug before you clean around electronics to stay safe.
What if I find mold behind the door seal?
Gently pull back the seal to inspect for mold and remove it with a cloth and cleaner. Dry the area completely after cleaning and consider a periodic seal check as part of maintenance.
Gently inspect the seal and dry it thoroughly after cleaning.
Are there safe cleaners I can use for the dispenser?
Yes. Use a mild dish soap and water or a cleaner labeled safe for dispensers. Rinse thoroughly to prevent residue that could transfer to clothes.
Use mild cleaners and rinse well to avoid residue.
Watch Video
The Essentials
- Schedule regular deep clean washing machine sessions.
- Target drum, gasket, and dispensers for best results.
- Use safe cleaners and dry surfaces to prevent mold.
- Follow a step-by-step routine for consistent outcomes.
- The routine saves energy and extends appliance life.