How to Clean Whirlpool Washing Machine
Learn a comprehensive, safe method to clean your Whirlpool washing machine using vinegar, baking soda, and common cleaners. This step-by-step guide covers drum, gasket, dispenser drawers, and odor prevention for top- and front-loading models.

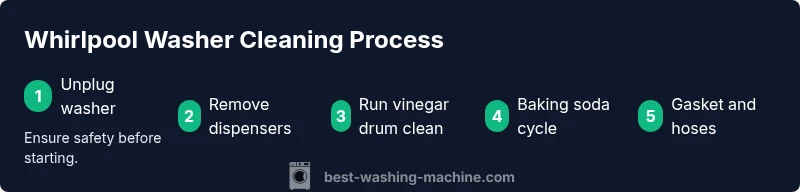
To clean a Whirlpool washing machine, start by unplugging the unit and removing any dispensers. Use a vinegar solution to sanitize the drum, then run empty hot-water cycles with baking soda to dissolve residue. Finish by cleaning the gasket, exterior, and dispenser drawers to prevent odors and mold.
Why Regular Cleaning Matters for Whirlpool Washers
Regular cleaning of your Whirlpool washing machine helps prevent the buildup of soap scum, mineral deposits, and mold that can cause odors, reduced efficiency, and even leaks. When you know how to clean whirlpool washing machine effectively, you extend the life of seals and hoses and keep clothes smelling fresh. According to Best Washing Machine, routine maintenance is a smart, affordable way to protect your investment and maintain performance. This section explains the main culprits (residue, mold, and odors) and sets the stage for safe, thorough cleaning using household staples like white vinegar and baking soda. It also notes that different models (front-load vs top-load) have distinct access points and care requirements, so tailor your approach accordingly. If you’re just starting, plan a 30–60 minute session, place towels to catch drips, and wear gloves for hygiene and grip. The goal is a clean drum, a dry gasket, and a odor-free interior that performs like new.
Safety and Prep Considerations
Before you begin any cleaning project on a Whirlpool washer, prioritize safety and preparedness. Start by unplugging the unit to avoid any electrical shocks, then turn off the water supply to prevent leaks during maintenance. Remove any laundry and wipe down the exterior to reduce slip hazards. Put protective gloves on to shield your skin from cleaners, and lay towels around the machine to catch spills. Reading the user manual for model-specific cautions is a good habit; some Whirlpool models require special care for high-efficiency cycles or caustic cleaners. If you have pets or young children, keep the area clear and ventilated. Finally, gather your tools and materials so you won’t have to interrupt the cleaning mid-task. This preparation helps you complete the process safely and efficiently.
Drum and Gasket Cleaning Essentials
The drum is the heart of the washing machine, and odor often starts there. To begin, rotate the drum by hand to expose every area, then apply a vinegar-based cleaning solution (one cup white vinegar per load’s worth of water) and run a hot cycle. Vinegar acts as a natural descaler and deodorizer without leaving harsh residues. For stubborn residue or mineral buildup, sprinkle baking soda directly into the drum before running another hot cycle. The door seal or gasket is another hotspot for mold and mildew; wipe it with a cloth dampened in a mild cleaning solution, then use a dry cloth to remove moisture from folds. Don’t forget to inspect the bellows or rubber edge for tears and replace if needed. Clever cleanup involves patience and thoroughness to ensure every nook is addressed.
Dispenser Drawers and Hoses: Deep Clean
Dispenser drawers accumulate detergent, fabric softener, and residue that can clog flow paths. Remove the drawers one at a time according to your model’s instructions, rinse them with warm water, and scrub with a soft brush. Clean the corresponding recesses in the detergent well with a microfiber cloth to avoid cross-contamination. For hoses and pipes, detach any accessible hoses, rinse with warm water, and wipe the connections dry. Reassemble carefully, ensuring seals are snug and no hoses leak when you run a test cycle. This step reduces the risk of detergent buildup causing poor dispensing and odors.
Exterior Cleaning and Maintenance Tips
A clean exterior reflects well on your entire cleaning routine and helps keep the workspace hygienic. Wipe the control panel, door, and stainless-steel surfaces with a soft cloth and a mild, non-abrasive cleaner. Avoid ammonia-based products on glass surfaces and never spray cleaner directly into electronic controls. Dry all surfaces thoroughly to prevent water spots and corrosion. Finally, run an empty cycle with hot water every month to flush the system and keep internal components moving freely. Keeping up with this simple routine prevents surprises down the road.
Odor Prevention and Proactive Care
Odors are easiest to prevent with a proactive cleaning cadence. Consider running a quarterly cleaning that combines vinegar and baking soda, then leaving the lid open for a few minutes after cycles to allow evaporation. If you notice persistent smells, repeat the drum-cleaning sequence and check for mold in hard-to-reach areas like the gasket folds. Use a washing-machine-safe cleaner periodically, but always refer to your Whirlpool manual for compatibility. A small investment of time now can save bigger repairs later and ensure your laundry stays fresh.
Tools & Materials
- Microfiber cloths(2–3 for wiping, drying, and detailing)
- Bucket or tray(Catch rinse water and drips)
- Soft-bristle brush or old toothbrush(Clean gasket folds and dispenser recesses)
- Sponge(Scrub surfaces without scratching)
- White vinegar (5% acidity)(1–2 cups for drum cleaning)
- Baking soda(For deodorizing and extra cleaning)
- Mild dish soap(Gentle exterior cleaner)
- Gloves(Protect hands from cleaners)
- Old towels or rags(Contain drips and dry hinges)
- Whirlpool-approved cleaner (optional)(If you have model-specific recommendations)
Steps
Estimated time: 30-50 minutes
- 1
Unplug and prep
Unplug the washer and move it away from walls if possible. Gather tools, read the manual for model-specific cautions, and place towels around the base to catch spills. This foundational step ensures safety and keeps your cleaning organized.
Tip: Have a helper hold hoses or the power cord if the machine is heavy. - 2
Remove and clean the dispensers
Open and carefully remove detergent and fabric-softener dispensers. Rinse with warm water, scrub with a soft brush, then dry completely before reinserting. This prevents residue from affecting future cycles.
Tip: Use a small brush to reach tight corners in the dispenser well. - 3
Clean the drum with vinegar
Pour 1–2 cups of white vinegar into the drum and run a hot water cycle. The acidity helps dissolve mineral buildup and neutralizes odors. Pause briefly if you need to scrub any visible spots and resume the cycle.
Tip: Let the cycle complete rather than stopping mid-way to ensure full contact with the drum surface. - 4
Deodorize with baking soda
After the vinegar cycle, sprinkle baking soda into the drum and run another hot cycle. Baking soda acts as a gentle abrasive and deodorizer, helping remove stubborn residue.
Tip: If your model has an automatic clean cycle, you can use that instead of the baking soda approach. - 5
Gasket and door seal care
Wipe the door gasket, folds, and around the seal with a damp microfiber cloth. Use the brush for any stubborn mold spots, then dry the area completely to prevent mildew growth.
Tip: Inspect for cracks or tears—replace if needed to prevent leaks. - 6
Exterior and hose checks
Wipe the exterior surfaces with a mild cleaner; dry thoroughly. Inspect connections on any hoses for looseness or leaks and re-tighten if necessary. A clean surface helps you notice leaks early.
Tip: Do not spray cleaner directly into control panels. - 7
Dry, ventilate, and test
Leave the door open for an hour or two to air out the drum and gasket. Run a short cycle with no clothes to verify there are no leaks and that the machine runs smoothly after cleaning.
Tip: If you smell stale air after cleaning, run an empty cycle with a bit more vinegar, then air out again. - 8
Maintenance cadence
Create a simple schedule: a monthly deep clean focusing on the drum and gasket, plus a quarterly exterior wipe-down. Consistency is key to prevention.
Tip: Set reminders on your phone or calendar to stay on track.
FAQ
How often should I clean a Whirlpool washing machine?
Aim for a deep clean every 1–3 months depending on usage and odor. Light monthly wipe-downs help maintain freshness, with a full drum cleaning quarterly or after heavy use.
Clean every 1 to 3 months depending on use. Do a quick wipe monthly and a full drum clean quarterly.
Can I use bleach in Whirlpool washers?
Check the owner's manual for your model. Many Whirlpool HE washers recommend non-chlorine cleaners or vinegar and baking soda rather than chlorine bleach to protect seals and avoid residue buildup.
Check your manual; many Whirlpool models favor vinegar and baking soda over chlorine bleach.
Why does my washing machine smell sour after a wash?
Odors usually come from trapped moisture in the gasket or dispenser drawer. Regular cleaning of the drum, gasket, and drawers, plus an occasional hot vinegar cycle, typically resolves the issue.
Odors usually come from trapped moisture in the seal or drawers. Clean those areas and run a hot vinegar cycle to fix it.
Is it safe to run hot water cycles for cleaning?
Yes, hot cycles help dissolve residue and sanitize surfaces. Ensure your model supports hot water cycles and avoid overloading the drum during cleaning runs.
Hot cycles are safe for most models and help sanitize; just don’t overload the drum.
Should I use vinegar on every cleaning cycle?
Vinegar is great for occasional deep cleaning and odor removal, but using it every cycle can affect residue balance of detergents. Alternate with baking soda or a model-approved cleaner.
Vinegar is helpful for deep cleaning occasionally; don’t use it in every cycle.
What’s the difference between front-load and top-load cleaning approaches?
Front-load washers often have more gasket exposure and mold-prone areas; top-load models may offer easier access for certain steps. Adjust your approach based on your model’s door design and user manual.
Front-loads need gasket care; top-loads have different access points—follow your manual.
Watch Video
The Essentials
- Unplug and prep before cleaning to stay safe.
- Vinegar and baking soda are effective, affordable cleaners.
- Clean drum, gasket, and dispensers in dedicated steps.
- Dry all surfaces to prevent mold and odors.