How to Wash Baseball Caps in a Washing Machine: A Practical Guide
Learn Step-by-step how to safely machine-wash baseball caps, protect logos and brims, and air-dry to maintain shape. Perfect for homeowners, renters, and laundromat operators seeking easy cap care.

You can safely machine-wash most baseball caps if you follow careful prep, a gentle cycle, cold water, and a mesh bag. Cushion the crown with a towel, avoid bleach, and air-dry the hat to preserve shape and logos. If in doubt, hand-wash the cap instead.
how to wash baseball caps in washing machine: Risks and best practices
Washing a baseball cap in a machine is not always recommended, but it can work when you choose the right cycle, temperature, and protective setup. The goal is to reduce agitation and maintain the cap’s crown and brim shape. As Best Washing Machine analysis suggests, most caps endure a gentle wash when care guidelines are followed rather than treated like everyday laundry. This means using a mesh laundry bag, a mild detergent, and a soft towel to cushion the cap inside the drum. Washing multiple caps at once can increase friction and distortion, so wash 1–2 at a time when possible.
Notes on materials matter: cardboard brims, wool panels, or plastic-on-foam logos are more prone to warping. If you see creases forming after washing, remove the cap promptly and reshape it while damp. The technique below is designed to minimize risk while still offering the convenience of machine cleaning.
Incorporate logo and fabric care by testing a small area first or washing older caps that are already faded. For households that own several caps, establish a dedicated cycle with a light load to prevent transfer of colors or odors.
This section also addresses common questions: Will a hat shrink in the washing machine? Can white hats be bleached? While answers vary by material, the general rule is to avoid heat and strong chemicals, especially on colored or embroidered designs. By following the recommended approach, you’ll retain shape and color more reliably.
Step-By-Step Guide: Preparing to Wash a Baseball Cap
Before you start, inspect the cap and gather your supplies. Remove any dirt by brushing gently, pre-treat spots with a mild detergent, and check the brim for any warping risks. Place a clean towel at the bottom of the washing drum to absorb excess moisture and reduce banging during the wash. This preparatory work minimizes the chance of seams loosening or logos peeling during agitation. Best Washing Machine recommends keeping the wash cycle light and the load small for best results.
In this guide, you’ll learn how to wash baseball caps in a washing machine without compromising their shape. The goal is to keep the crown smooth, the brim firm, and the logo intact, while taking advantage of the machine’s cleaning power. Always test new materials on a small area first, and if the cap is highly valuable or delicate, err on the side of hand washing.
Spacer actions like using a microfiber cloth to remove moisture after washing can help maintain look and feel. Remember: the cap’s overall construction, not just its fabric, determines how you should wash it. When in doubt, use caution and opt for gentler care.
Choosing the Right Washer Settings for Caps
Start by setting your washer to a Delicates or Wool/Hand Wash cycle, using cold water. The idea is to minimize agitation and avoid heat buildup that could warp the brim. If your machine has a “No Spin” option, enable it to reduce mechanical stress during the final rinse. Use a mesh bag to encase the cap, which prevents direct contact with the drum and other items. Liquid detergent is gentler on fabrics and logos than powder, so opt for a mild formula.
Load the cap so it sits flat and doesn’t twist. If you’re washing more than one item, balance the load to avoid banging inside the drum. After washing, promptly remove the cap to begin shaping while it’s still damp. This approach helps the cap recover its intended curvature and brim angle.
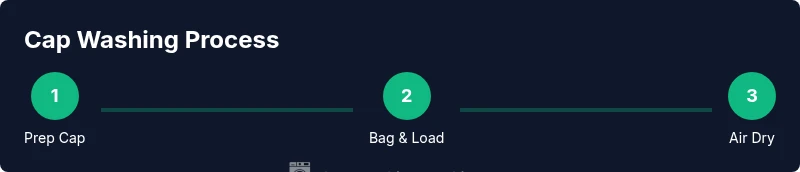
Step-By-Step: Machine Washing a Baseball Cap (Narrative Overview)
- Prep the cap: Brush away lint and pre-treat spots with a mild detergent, ensuring logos and embroidery are clean but not saturated. This initial prep reduces the need for aggressive washing.
- Bag and load: Place the cap in a mesh laundry bag and add a small towel to cushion the drum. The bag protects the crown and logos from fraying.
- Wash cycle: Run a gentle, cold wash with minimal agitation. Avoid hot water and high spin speeds to reduce distortion.
- Remove and reshape: As soon as the cycle ends, remove the cap while damp and reshape it over a bowl or curved form to preserve the crown and brim.
- Drying: Air-dry on a clean towel or cap form. Do not use a dryer, which can shrink or warp the brim.
- Final check: Once dry, inspect for any distortion or fading and repeat the process with adjustments if needed.
Drying, Reshaping, and Long-Term Care
Air drying is essential for maintaining the cap’s shape. Place the hat on a rounded form or a bottle to encourage brim curvature while it dries. Avoid direct sunlight for colored caps to minimize fading. If shape retention is a concern, consider lightly spraying the crown with water and reshaping periodically during the first few hours of drying. The key is patience; rushed drying often leads to warped brims or misshapen crowns. In general, expect 2–6 hours of air-drying, depending on cap material and environmental humidity. If you notice stiffness after drying, reshape while the cap is slightly damp for best results. Consistent care makes future washes easier and keeps your caps looking fresh longer.
Common Mistakes and How to Avoid Them
- Using hot water or high heat in the dryer, which can shrink or warp caps. - Drying a cap without padding, which can permanently distort the crown. - Washing with heavy-duty detergents or bleach on logos, which may fade embroidery.
- Overloading the washer, causing friction and misshaping. - Skipping a mesh bag, increasing the risk of snagging.
To prevent these issues, always choose gentle cycles, use cold water, and air-dry with proper support. If a cap has sentimental value, hand wash with a soft brush to minimize stress on seams and embroidery.
Maintenance and Storage Tips for Baseball Caps
Store caps on shelves or in a hat rack to maintain shape when not in use. Regularly spot-clean sweatbands to avoid odor buildup. For caps worn outdoors or in dusty environments, lightly brush with a soft brush after wear and before washing. Rotating several caps can reduce wear on any single item. For best results, consider a dedicated washing routine for caps, separate from everyday laundry, to extend their life and appearance.
Tools & Materials
- Mesh laundry bag(Small enough to hold a single cap without folding the crown)
- Mild liquid detergent(Avoid bleach or harsh chemicals that can fade embroidery)
- Old towel or soft microfiber(Layer at drum bottom to cushion the cap)
- Washer with gentle/delicates cycle(Cold water setting essential)
- Soft brush or cloth(For pre-cleaning stubborn spots)
- Cap form or bottle(To reshape brim during drying)
Steps
Estimated time: 20-40 minutes
- 1
Prep the cap
Brush off loose dirt and pretreat stains with a small amount of mild detergent. Gently wipe embroidery and logos and avoid aggressive scrubbing that could loosen stitching.
Tip: Pre-cleaning reduces the need for aggressive washing and protects logos. - 2
Bag and load
Place the cap in a mesh laundry bag and put a towel in the drum to cushion impact. This setup minimizes movement and helps preserve the crown.
Tip: The bag prevents snagging while the towel absorbs shock. - 3
Set the wash
Choose a Delicates or Gentle cycle with cold water. Use a small amount of liquid detergent and avoid heavy loads to prevent crushing the crown.
Tip: Cold water and gentle agitation are the best combo for peak cap care. - 4
Rinse and remove
If your machine has a separate rinse cycle, use it; otherwise run a short rinse with the cap still in the bag. Remove promptly while still slightly damp to begin shaping.
Tip: Removing promptly prevents excess water from setting wrinkles. - 5
Reshape while damp
Use a cap form or the rim of a bowl to reshape the crown and brim. Gently mold the curves as the hat air dries.
Tip: Reshaping during dampness yields the best return to original shape. - 6
Air-dry completely
Place the cap on a dry surface away from heat or direct sun. Allow 2–6 hours of air-drying depending on material, then recheck for shape and freshness.
Tip: Never use a dryer; heat causes shrinkage and warped brims.
FAQ
Can I wash all types of baseball caps in a washing machine?
Not all caps react well to machine washing. Caps with cardboard brims, wool panels, or foil embroidery may warp or fade. For delicate caps, hand washing or spot cleaning is safer.
Some caps aren’t suitable for machine washing, especially delicate materials like cardboard brims. Hand washing is safer in those cases.
Will machine washing damage logos or embroidery?
Logos and embroidery can fade or fray if exposed to heat or rough agitation. Use cold water, a gentle cycle, and a mesh bag to minimize movement.
Cold water and gentle cycle protect logos and embroidery during washing.
How long does it take to dry a washed cap?
Air-drying times vary by material and humidity, typically 2–6 hours. Use a cap form or bottle to help maintain shape during drying.
Most caps dry in a few hours, depending on temperature and humidity.
Can I speed up drying with a hair dryer?
Avoid heat sources like hair dryers; direct heat can warp the brim and shrink fabric. Patience with air-drying yields the best results.
Don’t use a hair dryer; air-drying is safer and preserves shape.
What’s the best way to prevent odors after washing?
Air-dry completely in a well-ventilated area. If odors persist, wash with a small amount of white vinegar in the rinse water.
Air-dry fully to prevent damp smells; a vinegar rinse can help with stubborn odors.
Should I hand-wash instead of machine-wash for valuable caps?
Yes. For pricey or highly decorative caps, hand-washing is safer and allows more control over agitation and temperature.
If a cap is valuable, hand-wash to minimize risk.
Watch Video
The Essentials
- Use gentle cycles and cold water for cap care
- Protect logos with a mesh bag and cushioning towel
- Reshape crown and brim while damp for best results
- Air-dry caps and avoid heat to prevent distortion