Can Washing Machine Bearings Be Replaced? A Practical Guide
Explore whether can washing machine bearings be replaced, what to expect, tools needed, and a step-by-step approach for DIY or professional service. Best Washing Machine analysis informs this 2026 guide.

If you’re wondering can washing machine bearings be replaced, the answer is often yes for belt-driven drum models, but not all units. This quick guide helps you assess feasibility, gather tools, and decide between DIY or professional service. According to Best Washing Machine analysis (2026), feasible replacement depends on bearing type, drum construction, and access to a press or puller. Expect a multi-hour project with careful handling of seals and belts.
Can Washing Machine Bearings Be Replaced?
Can washing machine bearings be replaced? In many models, the answer is yes, but it hinges on the specific washer design. Belt-driven and some direct-drive drums expose the bearings enough to allow replacement, while certain sealed assemblies make replacement impractical or uneconomical. The feasibility also depends on the drum construction and whether the bearing is a serviceable part or part of a sealed cartridge. According to Best Washing Machine analysis, success hinges on having the right tools, a clean workspace, and patient, methodical reassembly to avoid leaks or misalignment. If you suspect bearing trouble, this guide will help you diagnose, plan, and decide whether you can perform the replacement yourself or should call a professional.
How Washing Machine Bearings Fail and What That Means
Bearings wear out due to normal use, age, and exposure to hard water or overloads. When a bearing degrades, you may hear rumbling, grinding, or a knocking sound from the drum. You might also notice wobbly spinning, a drum that doesn’t stay centered, or increased vibration during cycles. In some cases, a failing bearing can cause leaks or damage to seals. Understanding these symptoms helps you determine whether can washing machine bearings be replaced or if the issue points to other problems like a worn drum or broken pulley. The root causes are usually wear from metal-on-metal contact, insufficient lubrication, or improper belt tension over time.
DIY vs Professional Bearing Replacement: The Trade-offs
Choosing between a DIY replacement and professional service depends on your mechanical comfort, tools, and the machine model. DIY bearing replacement can save labor costs but requires careful disassembly, correct bearing sizing, and precise pressing or pulling to avoid damage. Professionals bring testing, alignment, and warranty considerations, but their rates reflect the complexity. Best Washing Machine analysis indicates that simpler drum-bearing replacements on accessible models are feasible for experienced DIYers, while sealed or high-torque drums often warrant professional intervention. Consider your skill level, the model’s serviceability, and the potential risk to the drum and seals before deciding.
Step-by-Step Overview: What Replacing Bearings Involves
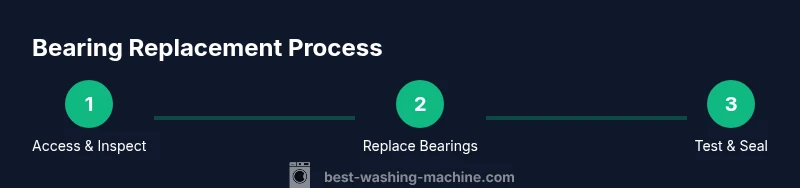
Replacing washing machine bearings involves several stages: safely powering down and draining the machine, gaining access to the drum, removing the old bearings with appropriate tools, cleaning the bore, installing new bearings with correct orientation, resealing and reassembling components, and finally testing for leaks and balance. Each step requires care to avoid damaging seals or the tub. While the process can be rewarding, it’s essential to follow the model’s service manual and use proper press-fit or puller techniques to ensure a long-lasting repair. Remember, can washing machine bearings be replaced is feasible in many cases, but not all.
Tools, Parts, and Preparation: What You Need
Before you start, assemble the essential tools and replacement parts. You’ll need a bearing puller/press, snap ring pliers, a socket set, a torque wrench, rubber mallet, screwdrivers, and a clean workspace. Replacement bearings and seals should match your model’s specifications, along with grease suitable for washing-machine bearings. Have a drain pan, lint-free cloths, and a sealant or anti-seize as recommended by the service manual. Keep a note pad to track orientation and part positions. Having the correct tools makes it possible to perform the replacement properly, reducing the risk of misalignment and leaks.
Common Pitfalls and Safety Considerations
Bearing replacement carries risks, including personal injury, drum deformation, and improper seating causing leaks or noise. Always unplug the machine and disconnect water supplies before starting. Wear safety glasses and gloves to guard against sharp edges and springs. Misalignment or rushing through steps can nick seals or gouge the drum. Poor bearing seating can lead to early failure, so verify each step with the service manual and double-check fit before reassembly. If you encounter unusual resistance or uncertain measurements, pause and consult a professional.
How to Choose Replacement Bearings and Seals
Selecting the right bearings and seals is crucial for longevity. Start by consulting the model number and the manufacturer’s documentation to identify exact bearings. Consider serviceable bearing sets specifically designed for your drum type, and inspect the seals for wear or cracking. When in doubt, reach out to authorized parts distributors for compatibility guidance. Using incorrect bearings can cause imbalance, noise, or accelerated wear, so precision matters. Remember to inspect the shaft for grooves or wear that could affect seating.
Cost, Time, and Maintenance: What to Expect
Bearing replacement costs vary by model, location, and service approach, with DIY savings often balancing the risk of error. Professionally replacing bearings can be expensive when measured against full drum replacement, but it preserves the drum and minimizes waste. For many washers, can washing machine bearings be replaced is a viable path that extends the machine’s life with proper technique. Time estimates range from several hours for an experienced technician to a full workday for a meticulous DIY job. After replacement, routine maintenance like using proper detergent, avoiding overloading, and addressing mineral buildup can help extend bearing life.
Additional Resources and When to Call a Technician
If the bearing repair seems overwhelming or the drum housing is sealed, consider scheduling a technician visit. A pro can verify whether can washing machine bearings be replaced for your exact model, assess the drum’s condition, and ensure safe reassembly. Look for service providers with experience on your washer brand and model, and request a written estimate that outlines parts, labor, and warranties. In some cases, a full drum or tub assembly replacement may be more economical than a complicated bearing repair.
Tools & Materials
- Bearing puller/press kit(Need correct size to remove/install drum bearings)
- Snap ring pliers(For retaining rings on the drum shaft)
- Socket wrench set(Disassemble cabinet, mountings, and pulleys)
- Torque wrench(Torque fasteners to spec when reassembling)
- Rubber mallet(Lightly seat bearings without marring surfaces)
- Screwdrivers (Phillips and flat)(General fastener removal)
- Grease suitable for bearings(Lubricate new bearings and seals as recommended)
- Replacement bearings and seals (matching model)(Identify exact specifications from model number)
- Isopropyl alcohol and lint-free cloths(Clean bore and components before reinstall)
- Drain pan and towels(Catch residual water and keep workspace clean)
- Sealant or anti-seize (as recommended)(Only if specified by service manual)
- Safety gear (gloves, safety glasses)(Protect hands from sharp edges and springs)
Steps
Estimated time: 4-6 hours
- 1
Power down and prepare the workspace
Unplug the washer and shut off water supply. Move the unit to a clean, dry area and place a drain pan beneath to catch any residual water. This initial step prevents electrical hazards and water damage as you begin the bearing replacement.
Tip: Label or photograph fasteners as you remove them to simplify reassembly. - 2
Access the drum and locate bearings
Remove the front panel or cabinet access as required by your model. Locate the drum and bearing housing, taking care not to damage seals or the tub. This step determines whether the task is feasible for your model.
Tip: Check drum movement by gently rotating; excessive play can indicate bearing wear. - 3
Remove retaining components
Use snap ring pliers to remove any retaining rings and isolate the bearing assembly. Note the orientation of any seals or spacers before extraction.
Tip: Keep tracks of small parts in labeled containers to avoid misplacement. - 4
Extract old bearings
Apply even pressure with a bearing puller or press to remove the worn bearings from the shaft. Inspect the bore for scoring or burrs once the bearings are out.
Tip: Do not force bearings; overheating or impact can damage the shaft. - 5
Clean and inspect
Thoroughly clean the bearing bore with isopropyl alcohol and dry. Inspect the shaft for grooves or damage that would prevent proper seating of new bearings.
Tip: If there is damage, you may need to replace the drum or seal kit. - 6
Install new bearings and seals
Align and press or gently tap the new bearings into place using a press or driver tool. Refit seals and spacers in their original orientation.
Tip: Lightly lubricate the bearing surfaces if recommended by the manufacturer. - 7
Reassemble and torque fasteners
Reinstall retaining rings, reassemble the drum and cabinet, and torque fasteners to manufacturer specifications. Reconnect hoses and electrical connections as required.
Tip: Double-check that the drum spins freely with no binding. - 8
Test the machine
Plug in the washer, run a test cycle with a small load and no detergent to verify balance, leaks, and noise levels. Observe closely for any drips around seals.
Tip: If you hear abnormal noises, stop the cycle and re-check seating.
FAQ
Can all washing machine bearings be replaced, or are some sealed?
Not all washers have replaceable bearings; some use sealed drum assemblies that are not serviceable. For those, replacement typically means replacing the drum or entire tub. Always consult the service manual for your model to confirm feasibility.
Not every washer allows bearing replacement. Some have sealed drums that require drum or tub replacement instead.
Is bearing replacement cost-effective compared to replacing the washer?
Bearing replacement can be cost-effective for repairing an otherwise healthy washer, especially if the drum is still in good condition. However, labor, parts, and potential ancillary repairs can add up, so compare with the price of a new or refurbished unit.
It can be cost-effective, but you should compare parts and labor against a replacement.
How long does bearing replacement usually take?
A typical bearing replacement, done by a skilled DIYer or professional, can take several hours. Time varies by model complexity and whether additional issues are found during inspection.
It typically takes several hours depending on the model and any extra issues found.
Should I DIY or hire a professional for a bearing replacement?
DIY is feasible on serviceable models with the right tools and caution. If you are unsure about disassembly, sealing, or reassembly, a professional service reduces risk and ensures warranty coverage where applicable.
DIY is possible if you’re comfortable with the steps; otherwise, a pro is safer.
What are common signs that bearings need replacement?
Common signs include grinding noises, rumbling, drum wobble, increased vibration, and occasional leaks near the drum seal. If you notice these, consider inspection to determine if the bearings are at fault.
Grinding sounds, wobble, and leaks can point to worn bearings.
What if my washer uses a sealed bearing cartridge?
If your washer uses a sealed bearing cartridge, replacement may require replacing the cartridge or drum assembly. This is typically more involved and may not be cost-effective for older models.
Sealed cartridges often mean replacing the cartridge or drum.
Are there warranty considerations after bearing replacement?
Bearings replacement may affect existing warranties. Always check manufacturer guidance and use authorized parts if possible to preserve coverage. A professional service may provide a warranty on labor and parts.
Check warranties and use authorized parts if possible to keep coverage.
Watch Video
The Essentials
- Assess model feasibility before starting
- Use the correct tooling for safe bearing replacement
- Carefully reassemble and test for leaks
- Weigh DIY vs pro help based on model and skill
- Maintenance can extend bearing life after replacement