Can You Still Use a Washing Machine If Bearings Have Gone?
Urgent troubleshooting guide from Best Washing Machine on bearing wear in a washer. Learn symptoms, safety steps, and when to repair or replace, with a clear diagnostic flow and step-by-step fixes for homeowners, renters, and technicians.

Can you still use a washing machine if bearings have gone? According to Best Washing Machine, bearing wear is a common failure that often means the drum is unstable and can rub on the cabinet, creating loud grinding, leaks, and safety risks. The safest approach is to stop using the machine, unplug, and contact a qualified technician or consider replacement if the drum is damaged.
What bearing wear means for your washer
Bearings are the quiet part of the drum that allow it to spin smoothly. When bearings wear, you can hear grinding or rumbling during cycles, the drum may wobble, and you might notice increased vibration or water leaks around the bottom. This is a sign that the shaft and drum are no longer aligned. Worn bearings can cause metal-to-metal contact, which speeds wear on other components, and may allow the drum to rub against the cabinet or pulleys. If you hear thick grinding on spin, see noticeable wobble, or observe rust or metal shards in the drum, treat the issue as urgent. Best Washing Machine's team notes that continuing to run a washer with worn bearings risks further damage, higher repair costs, and safety hazards such as electrical faults or water leaks. In most cases, anyone asking can you still use a washing machine if bearings have gone should assume the answer is: stop using it and get it inspected. For homeowners and renters, this is also a signal to avoid DIY drum bearing replacements unless you have professional training, because misalignment can create dangerous friction or misbalanced loads that can damage the motor or cause a fire risk.
Safety first: should you keep using a washer with bad bearings?
No. Do not continue to operate a washer with suspected bearing wear. The risk of drum detachment, major leaks, and electrical faults increases as the bearings degrade. If your unit is under warranty, check with the manufacturer or authorized service first; performing DIY bearing work can void coverage. unplug the machine, turn off the water supply, and move it away from children and pets. If you must leave the space, secure the area and avoid any live electrical sources. When in doubt, pause and contact a licensed technician. Continuing to try to spin or hand-rotate a faulty drum can worsen the problem and raise repair costs.
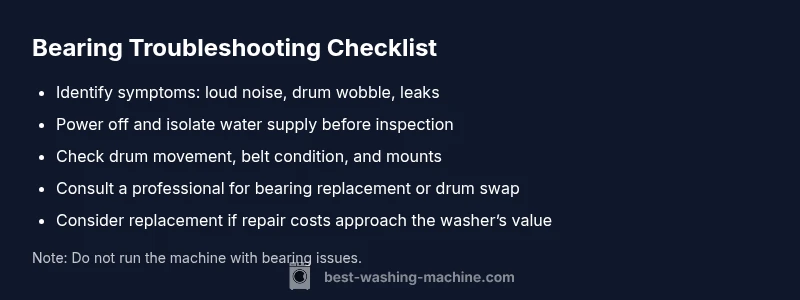
Quick checks you can do before calling a pro
- Listen for loud grinding during spin
- Check if drum has side-to-side wobble when you rock it
- Look for leaks around the bottom or pump area
- Check that the belt (if accessible) is intact and not slipping
- Verify the motor mounting screws are tight
Diagnostic flow: symptom → diagnosis → solutions
Symptom: Loud grinding, heavy vibration, or drum wobble during spin; possible leaks.
Causes:
- bearing wear or drum bearing failure — likelihood: high
- drum misalignment or loose mounting — likelihood: medium
- damaged belt or pulley (less common) — likelihood: low
Fixes:
- Stop using the machine and arrange professional replacement of bearings or drum — difficulty: hard
- Realign or secure mounts if you are skilled; otherwise leave to pro — difficulty: medium
- Replace belt if accessible and safe — difficulty: easy
Steps
Estimated time: 2-6 hours
- 1
Power down and unplug
Turn off the machine and unplug from the wall. If you can reach it, shut off the water supply to prevent leaks. This reduces the risk of electric shock and water damage while inspecting for obvious issues.
Tip: Always assume any water around electrical components means you should pause and wait for a professional. - 2
Move to a safe workspace
Relocate the washer to a dry, clear area with easy access to panels. Clear the area of obstacles and place a tray or towel to catch any residual water.
Tip: Use a helper if you’re unfamiliar with appliance handling. - 3
Open access panels and inspect
Remove the back or top cover as appropriate for your model to visually inspect the drum and belt. Look for loose screws, obvious wear, or obvious drum movement when you gently turn the drum by hand.
Tip: Only handle panels you’re confident you can safely remove. - 4
Check for abnormal drum movement
Rotate the drum slowly and listen for grinding. If the drum feels rough or wobbly, the bearings or drum attachment are suspect. Note any metal fragments or rust.
Tip: Document what you observe to share with a technician. - 5
Decide on repair path
If the bearing issue is confirmed, plan for professional repair or drum replacement. Replacement of bearings is typically a specialized service and may require specific parts.
Tip: Avoid DIY bearing replacement unless you have formal training. - 6
Schedule professional service
Contact a licensed appliance technician or the manufacturer’s service line. Discuss your model, observed symptoms, and whether the drum is repairable or better replaced.
Tip: Keep the model number and purchase date handy for quicker service.
Diagnosis: Loud grinding, drum wobble, and/or leaks during spin; possible heat or burn smell
Possible Causes
- highWorn drum bearings or bearing failure
- mediumDrum misalignment or loose mounting
- lowDamaged belt or pulley (less common)
Fixes
- hardStop using the machine immediately and schedule professional bearing replacement or drum assembly replacement
- mediumIf you have service experience, attempt a careful realignment and securing of drum mounts; otherwise leave it to a pro
- easyIf accessible and safe, replace the belt to rule out belt slip as a source of noise; do not run the machine until verified
FAQ
Can you still use a washing machine if bearings have gone?
No. Bearing wear usually makes a washer unsafe to operate due to detachment risk, leaks, and electrical hazards. Seek professional diagnosis or replacement.
No, bearing wear makes the washer unsafe to run; get a professional diagnosis or consider replacement.
What are the most common signs of bearing failure in a washer?
Common signs include loud grinding or rumbling during spin, drum wobble, increased vibration, and occasional leaks near the base.
Look for loud noises, wobbling, and leaks to indicate bearing trouble.
Is a bearing replacement worth it, or should I replace the washer?
Bearings can be replaced, but the cost and age of the unit matter. If the washer is old or repairs approach the replacement cost, replacement may be smarter.
Bearings can be replaced, but consider age and repair cost when deciding on replacement.
How long can a washer run with bad bearings before it’s dangerous?
Running a washer with bad bearings is not recommended. Prolonged use can damage the tub, motor, and electrical components and increase risk of leaks.
Not recommended to run; it can damage other parts and poses safety risks.
Should I try DIY repair or hire a pro for bearing issues?
For bearing issues, professional repair or drum replacement is generally advised. DIY bearing work can be dangerous and may void warranties.
It’s safer to hire a pro for bearing problems and avoid DIY fixes.
Watch Video
The Essentials
- Stop using the washer immediately if you suspect bearing wear.
- Bearings wear often require professional replacement or drum assembly swap.
- Repair may be costlier than replacement for older models; evaluate value before proceeding.
- Prevent future issues by not overloading and by keeping the drum balanced.