Drum Bearing on Washing Machine: Troubleshooting Guide
Urgent troubleshooting guide for drum bearing on washing machine failures. Learn symptoms, causes, safe checks, step-by-step fixes, and when to call a pro. Practical tips and maintenance to prevent future bearing issues.

A worn drum bearing on a washing machine usually manifests as grinding or a loud rumble during spin. The quickest path to relief is to unplug the unit and perform a quick check: manually turn the drum to feel for roughness, inspect for loose pulleys or a wobbling belt, and ensure the tub isn’t seized. If grinding continues after basic checks, plan professional repair to avoid further damage.
What a drum bearing on washing machine is and why it fails
A drum bearing on washing machine is a support that allows the inner tub to rotate smoothly with minimal friction. Over time, bearing surfaces wear from repetitive loads, detergent residue, and water ingress. When the bearing deteriorates, you may hear grinding, rumbling, or a high-pitched squeal during the spin cycle. The issue can worsen if the pulley, belt, or tub support are also compromised. Regular maintenance helps, but a worn bearing almost always demands attention to prevent water leaks and further damage to the drum shell. In this guide, we focus on diagnosing the problem safely, outlining common causes, and outlining practical fixes from quick checks to professional bearing replacement.
Warning signs you might have a failing drum bearing on washing machine
A worn drum bearing on washing machine often reveals itself through several telltale symptoms: persistent grinding or rumbling when the drum spins, a wobbling drum that makes contact with the cabinet, unusual heat near the motor area, and increased moisture around the door boot due to misalignment. If you notice loud noises that change with load size or spin speed, don’t ignore them. Early signs can prevent a catastrophic tub failure and costly water damage. For homeowners, renters, and technicians, recognizing these cues helps prioritize safe shutdown and repair decisions.
Common causes of drum bearing failure in washing machines
Several factors contribute to drum bearing wear in a washing machine. Over time, normal use can wear races and balls, causing roughness and noise. Foreign objects or tangled laundry can unbalance the drum and accelerate bearing wear. Water leaks or detergent residue can corrode seals, allowing moisture to reach the bearing. Poor installation, worn drive belts, or misalignment of the tub can also lead to accelerated bearing wear. Acknowledge that a drum bearing issue often travels with other worn components, such as the counterweight, shock absorbers, or the tub spider, which may also require inspection.
Safe quick checks you can perform before disassembly
Before you start any disassembly, ensure the machine is powered off and unplugged. Check that the drain is clear and the lid switch functions correctly. Rotate the drum by hand to feel for roughness or catching; if you hear grinding, note the position of the belt and pulleys. Inspect for obvious leaks around the door boot and bottom seal. If you can access the front panel, lightly tap the drum to listen for hollow sounds indicating a loose bearing. Do not attempt to run the machine without addressing safety concerns like water exposure and electrical risk.
How professionals diagnose drum bearing issues in washing machines
Certified technicians diagnose drum bearing problems by listening for abnormal sounds during spin, assessing drum wobble, and checking bearing play with feeler gauges or micro-meters. They inspect the tub support, spider, and counterweights, and test drive the appliance to observe how the drum interacts with the belt and pulley system. If a leak is present, they check seals and possible seal failures. Diagnosis often involves disassembly to verify bearing wear and measure runout, followed by a repair plan that may include bearing replacement or tub replacement depending on the extent of damage.
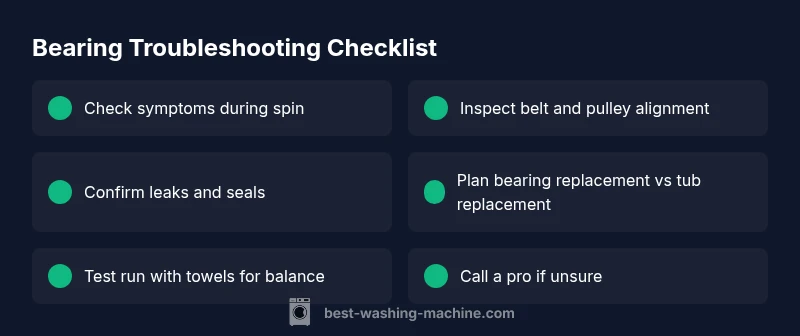
Step-by-step overview for addressing a drum bearing issue in a washing machine
- Power down and unplug the unit; ensure the area is dry and safe before work begins. 2) Access the rear or front panel to locate the drum bearing housing and support assembly. 3) Inspect the belt, pulley, and tub for signs of wear, misalignment, or wobble. 4) If bearing wear is confirmed, determine if the entire tub must be removed or if a partial bearing kit is available. 5) Follow the manufacturer’s instructions for bearing replacement or consult a professional for tub-bearing service. 6) Reassemble the unit, test the spin cycle, and monitor for leaks or abnormal noises. 7) After successful repair, perform a controlled test run with towels to ensure even balance and prevent future damage. 8) If safe checks fail or the noise persists, stop and call a pro to avoid irreparable damage to the drum or shell.
Safety tips and common mistakes to avoid
Always unplug the machine and disconnect the water supply before starting any work. Do not force components or pry with metal tools, which can damage seals. Avoid running the unit if you suspect a compromised tub or bearing, and never attempt bearing replacement with water inside the tub. If you’re unsure about your repair skills, contact a licensed technician. Remember: bearing replacement is a complex task that often requires a precise torque specification and alignment checks to prevent future failures.
Steps
Estimated time: 60-120 minutes
- 1
Power down and secure workspace
Unplug the machine and shut off the water supply. Remove any nearby objects and place towels to catch potential leaks. This is your first safety step before inspecting mechanical components.
Tip: Label screws and connectors to simplify reassembly. - 2
Access the drum area
Depending on your model, you may need to remove the back panel or the top/front console to access the drum and bearing housing. Keep track of fasteners and seals to avoid reassembly issues.
Tip: Take photos during disassembly to aid reassembly. - 3
Inspect the bearing housing and belt system
Check for visible wear on the bearing race, signs of water intrusion, and belt wear or misalignment. Rotate the drum by hand to assess smoothness and listen for grinding.
Tip: If the belt feels loose or glazed, replace it to rule out belt-related issues. - 4
Assess the need for replacement parts
If bearing play is excessive or you hear pronounced grinding, plan for bearing replacement or tub replacement. Confirm compatibility with your model and the availability of a bearing kit.
Tip: Consult the manufacturer’s service manual for torque specs. - 5
Decide on DIY vs. professional repair
Bearing replacement can be risky and may require specialized tools. If you are unsure about proper alignment or tub integrity, contact a licensed technician.
Tip: Better to pay for a pro than risk water damage. - 6
Perform the repair or schedule service
Follow the chosen approach. If replacing parts yourself, follow step-by-step manufacturer guidelines and verify seals are intact before testing.
Tip: Always test with towels first to check for leaks and balance. - 7
Test run and verify
Run a short cycle with a small load to verify noise levels and balance. Check for leaks and re-tighten any fasteners if needed.
Tip: Document any residual issues and schedule follow-up if noise persists.
Diagnosis: Machine makes grinding noise or rumble during spin, with possible tub wobble
Possible Causes
- highWorn drum bearing on washing machine
- mediumLoose or worn pulley/belt causing misalignment
- lowImbalanced load or washed-in foreign object
- lowDamaged tub spider or tub support
Fixes
- easyStop use, unplug, inspect drum rotation, and check for roughness and wobble
- mediumCheck belt/pulley alignment and tension; replace if worn
- hardIf bearing wear is confirmed, plan professional bearing replacement or tub replacement
FAQ
Can I replace the drum bearing on my washing machine myself?
DIY bearing replacement is possible on some models with bearing kits, but it’s complex and risks tub damage. If you’re not mechanically experienced, hire a technician to avoid costly errors.
DIY bearing replacement is possible for certain models, but it’s a complex repair. If you are unsure, hiring a technician is the safer option.
How can I tell if the bearing is the actual problem and not the belt or pulley?
If the noise persists after checking the belt and pulley and the drum shows wobble or rough rotation, the bearing is likely the culprit. A professional can confirm with a precise inspection.
If the noise remains after belt checks and the drum wobbles, the bearing is likely the problem. A pro can confirm.
What is the typical cost range for drum bearing repair?
Costs vary by model and region; plan for parts and labor with professional service. Avoid estimates from unverified sources; request a formal quote before any work.
Costs vary widely by model and location; ask for a formal quote before any repair.
Will replacing the drum bearing fix leaks?
Bearing wear can contribute to leaks if seals are compromised, but leaks can also come from hoses or door seals. A full diagnosis ensures the right fix is applied.
Bearing wear can contribute to leaks if seals are damaged, but hoses and door seals can leak too. A full diagnosis is needed.
How long does a typical drum bearing repair take?
Labour times vary by model and access; expect 1-3 hours for bearing replacement, plus time for testing and cleanup. Complex tubs may take longer.
Most bearing replacements take about 1-3 hours, depending on the model, plus testing.
Watch Video
The Essentials
- Identify the symptom and unplug the machine before any inspection
- A worn drum bearing is a common cause of spin noise and drum wobble
- Assess if DIY replacement is feasible or if a pro should handle the repair
- Ensure proper testing after repair to prevent leaks and future failures