How to Troubleshoot F9 E1 on a Whirlpool Washer
Urgent guide to diagnosing and fixing the F9 E1 error on Whirlpool washers. Learn fast, safe steps, cost ranges, and when to call a pro from Best Washing Machine.

The F9 E1 code on a Whirlpool washer signals a fault detected by the control system or sensor circuit. This means the machine cannot complete the current cycle safely. Quick fixes include power-cycling the unit, inspecting the drain path for clogs, checking hose connections, and verifying door latch and water supply. If the code reappears, seek professional service to prevent damage.
Understanding the F9 E1 Code on a Whirlpool Washer
If you own a f9 e1 whirlpool washer, you’re not alone. According to Best Washing Machine, this error typically indicates a fault detected by the control system or a sensor circuit, which stops the machine to prevent damage. The Best Washing Machine team found that most F9 E1 messages arise during a wash cycle when the washer cannot confirm proper sensor readings or drainage status. This is a signal to stop, diagnose, and verify several components rather than guessing. The goal of this guide is to give you a clear, urgent path to restore function while protecting your appliance and your safety. Expect a mix of quick checks you can do safely at home and situations that require professional service.
Immediate Quick Fixes You Can Try Now
- Power cycle the washer: Unplug for at least 60 seconds, then plug back in and run a test cycle. This resets the control logic and can clear transient faults that trigger F9 E1.
- Check the water supply: Ensure hoses are fully connected, screens aren’t clogged, and the cold and hot lines have adequate flow. A restricted supply can trigger sensor alarms and the F9 E1 code.
- Inspect the drain path: Look for kinks in the drain hose and verify the pump filter is clear. A clogged path can fool the sensors into thinking draining isn’t happening.
- Examine the drain pump and hose clamps: Loose or cracked clamps can cause leaks or air gaps that confuse sensors; tighten or replace as needed.
- Confirm the door latch and lid switch are functioning: If the machine believes the door isn’t securely closed, it may halt the cycle and display F9 E1.
- Run a short diagnostic test if your model supports it: Use the control panel’s diagnostic mode to monitor sensor readings and error history. If the code persists after these checks, control-board faults or wiring issues may be at fault and require a pro.
How We Diagnose F9 E1 in Whirlpool Washers
From a diagnostic perspective, the F9 E1 code usually points to a fault in the control logic or a sensor input, rather than a single mechanical failure. The symptom, as reported by homeowners, is the washer stopping mid-cycle with the F9 E1 code displayed. The most common causes, in order of likelihood, include a drainage obstruction, a clogged or failed drain pump, or loose sensor connections. Less common but possible are wiring harness faults and a failing control board. Solutions typically start with the simplest checks and progress toward component replacement if needed. Our approach emphasizes safe, incremental testing to confirm the exact failure mode and avoid unnecessary part replacement.
Root Causes and How to Address Them
Drainage problems are the most frequent culprits for F9 E1 on Whirlpool washers. A clogged filter or pump impeller can cause a false sense of blockage, triggering the error. Sensor or wiring issues, such as loose connectors or corroded terminals, are next in frequency and are often resolved by reseating connectors and cleaning contacts. A malfunctioning control board is less common but can produce persistent, recurring F9 E1 errors, sometimes requiring board replacement. Finally, door latch failures or lid switch issues can prematurely halt cycles and display the error code. This section translates typical faults into actionable steps you can take, while keeping safety front and center.
Safety, Warnings, and When to Call a Pro
Always unplug the washer before inspecting internal components. Avoid using metal tools near electrical parts and never run the unit with exposed wiring. If you’re not confident in testing electrical connections or if the code reappears after the quick fixes, it’s time to call a professional. Cost estimates for common repairs vary by region and model, but you can expect ranges such as drain-pump replacement in the low-to-mid hundreds and control-board work in the mid-to-high hundreds, plus a service call. For many homeowners, the safest and most cost-effective path when in doubt is professional diagnosis and repair.
Maintenance to Prevent F9 E1 in the Future
Establish a simple routine to prevent F9 E1 reoccurrence: clean the pump filter monthly, inspect the drain hose for kinks, and run the tub clean cycle periodically to reduce residue buildup. Use the appropriate detergent amount to prevent suds that can affect sensors, and avoid overloading the drum. Keep the area around the washer dry to reduce corrosion on connectors. A proactive maintenance mindset reduces surprises and can extend the life of your Whirlpool washer.
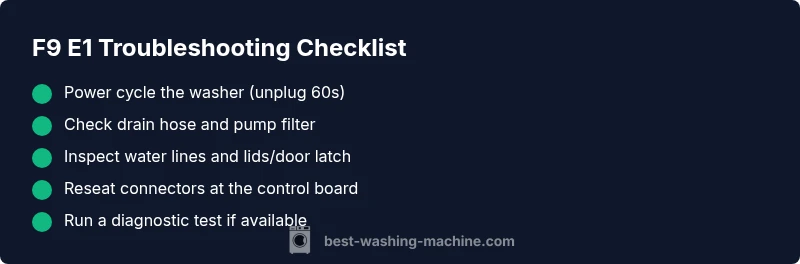
Quick Troubleshooting Checklist
- Power cycle the unit and test a cycle; - Verify water supply and hoses are clear; - Inspect drain hose, filter, and pump for clogs; - Check door latch and lid switch; - Ensure all electrical connections are snug and clean; - Consider running a diagnostic self-test if available
Steps
Estimated time: 25-45 minutes
- 1
Power down and unplug
Safety first: unplug the machine, wait 60 seconds, and then reconnect to reset the control board. This quick step handles transient faults that can trigger F9 E1.
Tip: If the machine is installed behind a pedestal, make sure you can reach the plug safely. - 2
Inspect the drain system
Check the drain hose for kinks and the pump filter for debris. Clear any blockages with gentle, non-metal tools and reassemble securely.
Tip: Do not use force; a pinched hose can be repaired by rerouting rather than replacing. - 3
Test water supply and lid switch
Confirm both hot and cold valves are open and water flows freely. Verify the lid switch engages properly when closed.
Tip: Run a short wash cycle to test lid switch engagement after adjustments. - 4
Reset and run diagnostic
Power cycle again, then enter the model’s diagnostic mode (if available) to read sensor data and error history.
Tip: Document any error codes shown during diagnostics for future reference. - 5
Check connections and reseat harnesses
Disconnect and reconnect harnesses at the control board and sensors, ensuring solid, corrosion-free contacts.
Tip: Use a flashlight and be gentle; avoid bending pins. - 6
Decide on repair path
If the code clears after these steps, monitor performance. If F9 E1 returns, part replacement may be required, starting with the drain pump and progressing to the control board.
Tip: Balance cost and risk; prioritize the lowest-cost, highest-impact fixes first.
Diagnosis: Error code F9 E1 displayed, washer stops mid-cycle
Possible Causes
- highClogged or restricted drain path (filter/pump)
- mediumLoose or corroded sensor connections
- lowControl board fault
Fixes
- easyClean the drain filter and check the pump
- easyRe-seat sensor wiring and clean contacts
- hardReplace the control board
FAQ
What does the F9 E1 code mean on a Whirlpool washer?
F9 E1 indicates a fault detected by the washer's control system, often related to drainage, sensors, or control wiring. It halts operation to prevent damage. Review the quick fixes and diagnostic flow outlined here.
F9 E1 means a fault was detected by the control system, usually drainage or sensor related. Start with the simple checks and escalate if needed.
Can I fix F9 E1 myself safely?
Yes for several steps like power cycling, draining path checks, and reseating connectors. If the code recurs, or you’re unsure about electrical testing, contact a professional.
Some fixes are safe to do yourself, but persistent issues should be handled by a pro.
Is F9 E1 dangerous for the washer or home?
The code is a fault signal, not an immediate danger. It mainly risks water damage or electrical issues if ignored. Unplug during inspections and proceed with care.
It’s a fault signal, not a fire hazard, but take care and unplug before any inspection.
How much does it cost to fix F9 E1?
Costs vary by fault type. A drain-pump replacement typically runs in the hundreds, while a control-board repair can be higher. Expect a service call fee to apply.
Costs depend on what’s wrong; pumps are usually cheaper than boards, plus service charges.
Will resetting the washer clear the F9 E1 code for good?
Resetting can clear transient issues, but if the fault recurs, the underlying cause must be addressed. Follow the diagnostic path and escalate if necessary.
Reset can clear it temporarily, but persistent faults need proper diagnosis.
Watch Video
The Essentials
- Follow the quick fixes before deep repairs
- Clogged drain components are the most common cause
- Sensor connections are a frequent source of F9 E1
- Call a pro if the code persists after basic steps
- Budget for common repairs with ranges for pump or board replacements