Front Load Washing Machine Repair: A Step-by-Step Guide
Learn how to diagnose and repair common front-load washers with a practical, safe, step-by-step approach. Includes tools, parts, troubleshooting, and maintenance tips for homeowners and renters.

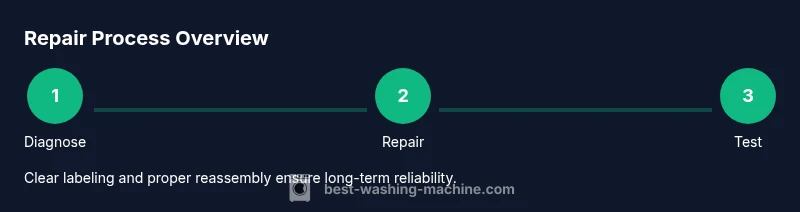
You're here to repair a front-load washing machine. This guide walks you through diagnosing common faults, safely unplugging the unit, and replacing components like door seals or pumps. You’ll learn a step-by-step repair workflow, what tools you need, and how to test the machine after each fix. Whether you’re DIYing a quick seal replacement or a more involved pump repair, this article gives practical, safe instructions for homeowners and renters.
Why front load washing machine repair matters
Front-load washers are efficient and offer excellent cleaning performance, but their sealed design and high spin speeds can make certain wear issues more likely. Leaks around the door boot, worn bearings, or a failing drain pump can disrupt daily laundry routines and cause water damage if left unaddressed. Understanding the common failure modes helps you prioritize fixes that restore reliability, energy efficiency, and overall performance. This section explains typical wear patterns, the difference between user-serviceable parts (like door boots and filters) and components usually handled by a technician (such as motors or control boards), and why a thoughtful repair plan matters for households and small businesses alike. By recognizing symptoms early and following a safe repair approach, you can extend the life of a front-load washer while protecting your home from damage.
Common symptoms and their causes
Leaks around the door boot are often due to a worn or torn gasket or a loose clamp. A washer that won’t drain can be caused by a clogged pump filter, a kinked drain hose, or a blocked impeller. A unit that won’t spin may suffer from a defective lid switch, a worn belt (in belt-driven models), or an unbalanced load sensor. Loud noises during agitation can indicate bearing wear or worn drum components. Understanding symptom timing (during wash vs. spin), water temperature, and load size helps map symptoms to probable causes without unnecessary disassembly. Always document what you observe before taking apart the machine to avoid misdiagnosis and repeated trips to the parts store.
Safety-first basics for DIY repairs
Safety is the foundation of any repair. Start by unplugging the machine and turning off the water supply. Work in a well-lit area with a dry surface, use protective eyewear, and keep towels handy for leaks. Do not touch electrical components if you smell burning insulation or see signs of arcing. Allow capacitors to discharge, typically by waiting a moment after unplugging, before touching internal parts. Use a sturdy work surface and keep track of fasteners with labeled containers or magnetic mats. If you’re ever unsure about a step, step back and consult the model’s service manual or seek professional guidance.
Diagnostic approach: how to identify root causes
Begin with simple checks: inspect hoses for kinks, verify water supply, and examine the door boot for signs of wear. Look for water pooling near seals and listen for unusual sounds during a test cycle. Use a multimeter to test electrical components such as the lid switch and door interlock for continuity. If the pump hums but fails to move water, the impeller or housing might be blocked. Keep a notebook of observations, test results, and any parts you remove to help correlate symptoms with likely causes. This methodical approach reduces guesswork and speeds up repairs.
Replacing common wear parts safely
Door boot or gasket replacement usually requires removing the front panel or toe kick, loosening clamps, and sliding out the worn boot before installing a new one. Replacing a drain pump involves disconnecting power, removing the lower front cover, unplugging electrical connectors, and mounting the new pump with its screws. If belts are used (belt-driven models), inspect and replace the belt if it shows cracks or glazing, then realign pulleys. Always verify part compatibility with your model and check for hidden screws behind the control panel. Before powering back up, dry the work area and reconnect all hoses and wires exactly as they were.
Tools and workspace setup
You’ll need a basic tool kit: flathead and Phillips screwdrivers, a set of hex/Allen wrenches, pliers, a multimeter, a small socket wrench, and a putty knife for panel release. Have a towel or shallow tray for catching leaks, a labeled container for fasteners, and a clean workspace with adequate lighting. A model-specific parts diagram or service manual is invaluable for identifying screws, clips, and component placement. Keeping the area organized minimizes missteps and speeds the repair process.
Drain systems and hoses: what to check
Drain hoses should be free of cracks, bulges, and kinks. A clogged drain pump or a blocked filter can prevent water from exiting, leading to standing water or overflow. Inspect the pump impeller for debris and clear blockages from the pump housing. Ensure the drain hose is correctly positioned and securely clamped to prevent leaks. After any hose work, run a short test cycle with a small load to verify proper draining and to catch any leaks at hose connections.
Bearings, belts, and pulleys: wear patterns to spot early
Worn drum bearings typically produce rumbling or grinding sounds during the spin cycle. A deteriorating belt in belt-driven models may crack, glaze, or slip, reducing motor efficiency. Inspect pulleys for wobble or looseness and ensure the belt is properly seated in the pulley grooves. Replacing bearings or belts usually requires more advanced disassembly and precise reassembly, so consult the service manual or a professional if you’re unsure. Proper alignment and retightening are critical to prevent future issues.
Preventive maintenance tips to extend life
Schedule regular inspections of door boots, seals, hoses, and filters. Run a maintenance cycle monthly with hot water and a manufacturer-approved cleaner to prevent soap scum and mineral buildup. Avoid overloading the drum and ensure even distribution of clothes to prevent imbalanced loads. Wipe the door boot dry after each cycle and leave the door slightly ajar when not in use to promote ventilation. Annual checkups can catch wear before it leads to leaks or poor performance.
When to call a professional
Certain repairs require specialized tools, knowledge, and safety considerations. If you encounter persistent leaks after a replacement, recurrent error codes on the control board, electrical faults, or if you’re uncomfortable with disassembly and testing, contact a licensed appliance repair technician. If the unit is under warranty, check coverage terms before attempting any repair to avoid voiding protection. For critical components (control boards, motors, sealed refrigerant-free systems), professional service is the prudent choice.
Tools & Materials
- Multimeter(Test continuity on switches and coils)
- Flathead screwdriver(For removing panels and clamps)
- Phillips screwdriver(For screws in front panel and frame)
- Nut driver set(Fasteners and clamps)
- Pliers (needle-nose)(Grasping small parts and hoses)
- Socket wrench(Accessing mounting screws)
- Bucket and towels(Control water output and clean spills)
- Replacement parts (door boot, pump, belt)(Model-specific — verify compatibility)
Steps
Estimated time: 60-90 minutes
- 1
Power down and unplug the washer
Unplug the power cord and shut off the water supply. Wait 60 seconds to discharge residual energy, then remove any external panels as needed. This prevents electric shock and protects your components during inspection.
Tip: Take a photo of hose and wire connections before you disconnect anything to help with reassembly. - 2
Access the fault area and secure the workspace
Remove the toe-kick and any front panel screws to access the door boot, hoses, and pump. Keep fasteners organized and avoid forcing panels. A dry, uncluttered workspace reduces the risk of losing small parts.
Tip: Label hoses and connectors as you remove them to simplify correct reassembly. - 3
Test pumps and seals with safe electrical checks
With power disconnected, remove the pump and inspect the impeller for blockages. Use the multimeter to check continuity on the pump and lid switch. Clear blockages and replace faulty components as needed.
Tip: Only perform electrical tests when the unit is fully disconnected from power to avoid shocks. - 4
Replace the faulty component
Install the new door boot, pump, or belt as required. Ensure seals seat evenly, clamps are tight, and wiring is connected to the correct terminals. Recheck alignment before reassembly.
Tip: Lubricate door seals lightly with a small amount of silicone-safe lubricant to improve seating and reduce future wear. - 5
Reassemble and run a test cycle
Reattach panels, reconnect hoses and wires, and restore power. Run an empty cycle to verify there are no leaks and that water drains properly. Observe for 1-2 full drum fills to confirm stability.
Tip: Place towels under the area during the first test to catch any unexpected leaks. - 6
Evaluate results and document next steps
Check for leaks after the test cycle, listen for abnormal noises, and ensure the drum spins smoothly. If issues persist, note symptoms and consider scheduling professional service or requesting parts support from the model’s manual.
Tip: Keep a repair diary: symptoms, parts replaced, test results, and cycle outcomes.
FAQ
What are common signs of a faulty door boot in a front-load washer?
A leaking door boot typically shows water around the door seal or damp spots along the boot. Inspect for cracks, tears, or loose clamps. Replacing the boot usually resolves leaks and protects the drum shaft from water exposure.
Look for water around the door and any cracks in the boot; replace the boot to stop leaks.
Can I replace a worn pump myself?
Yes, replacing a pump is a common DIY task if you are comfortable with disassembly and electrical testing. Ensure you have the correct pump model for your washer and follow the service manual steps for safe removal and installation.
Yes, with the right pump and manual, you can replace it yourself after disconnecting power.
Is it safe to work on a washing machine without professional training?
Basic repairs are possible with careful attention to safety: unplug power, shut water supply, and avoid live circuits. For electrical faults beyond simple tests, or if you encounter unfamiliar components, seek professional help.
Basic repairs are doable if you’re safe; for complex faults, hire a pro.
How do I know if a part is compatible with my model?
Check the washer’s model number and consult the official parts diagram or retailer listings. If in doubt, contact the manufacturer or a parts supplier with the model number to confirm compatibility.
Use your model number to verify compatibility in diagrams or with a supplier.
What maintenance can prevent problems in a front-load washer?
Regularly inspect hoses and seals, clean the pump filter, and run a maintenance cycle with hot water and cleaner. Avoid overloading and ensure even distribution of clothes to prevent strain on bearings and belts.
Do routine checks, clean filters, and run maintenance cycles to prevent issues.
When should I replace the washer instead of repairing it?
Consider repair if costs are low, parts are readily available, and the unit is otherwise reliable. If major components fail repeatedly or energy efficiency is poor, replacement may be more economical in the long run.
If repairs keep recurring or efficiency is poor, replacement might be best.
Watch Video
The Essentials
- Diagnose symptoms before disassembly to avoid unnecessary parts.
- Safety is non-negotiable: unplug, dry, and test with power off.
- Keep track of fasteners and connectors to ensure proper reassembly.
- Replace only compatible parts; double-check model specifics.
- Document results to inform maintenance and future repairs.