How to Drain Washing Machine Water: Step-by-Step Guide
Learn safe, practical methods to drain water from a washing machine, troubleshoot clogs, and prevent floods with this comprehensive, beginner-friendly guide from Best Washing Machine.

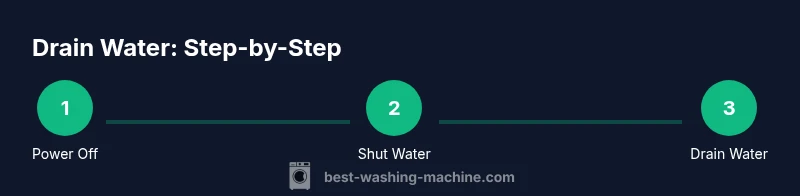
To drain the water from a washing machine safely, power off the unit, unplug it, and shut off the water supply. Place towels, then locate the drain hose and a bucket. Lower the hose to gravity-drain or remove the filter as needed, letting the water flow out before reconnecting everything. This quick guide covers front- and top-load models.
Why draining water correctly matters
If you’re seeking a reliable way to perform this maintenance task, you’ve come to the right place. The exact phrase you’re using—how to drain washing machine of water—is a common concern for homeowners who want to prevent basement spills, mold growth, and expensive water damage. According to Best Washing Machine, mastering this skill not only saves time but also protects your laundry area. In practice, draining water promptly reduces standing water that can strain hoses, pumps, and the drum gasket. This article outlines practical, model-agnostic methods, safety precautions, and shopping tips so you can handle emergencies with confidence. You’ll learn to assess your machine’s layout, decide between gravity drain and pump-assisted routes, and reassemble without leaks. The goal is a quick, controlled drain that minimizes mess while keeping you safe around electrical components.
Safety first: hazards and precautions
Draining a washer involves both water and electricity, so prioritize safety. Always unplug the machine and switch off the circuit if available. Wear protective gloves and use absorbent towels to catch splashes. Keep children and pets away from the work area, and avoid stepping on wet floors. If you notice damaged hoses, loose clamps, or signs of mold around the drum, stop and address those issues before proceeding. Best Washing Machine emphasizes safety as the foundation of any drainage task. If you’re unsure about electrical connections, consult the user manual or a licensed technician. Remember: electricity and standing water are a dangerous combination, so proceed only when you’re certain you can do so safely.
Common drainage scenarios and approaches
There isn’t a single universal method for draining water because washers vary by design. Front-load machines typically use a gravity drain hose that empties into a standpipe, drain, or bucket. Top-load models may rely more on the drain pump and trap filters. In either case, your approach should be to (a) locate the drain path, (b) prepare the receiving container, and (c) control the flow rate to avoid splashes. If your washer has a visible pump filter, you may need to access and clear it to remove residual water or lint. For stubborn cases, lowering the drain hose below the tub level creates a natural siphon-like effect, but do so carefully to prevent backflow. Always check for leaks at connections after reassembly.
Tools and setup: what you’ll need
Having the right tools ready makes the process smoother and safer. Gather a bucket large enough for several quarts, towels, gloves, and a flashlight if you’re working in a dim space. A wrench or screwdriver can help if you need to loosen clamps or panels. Keep a separate container for any hot water to prevent scalds. If you expect to drain frequently or want a quick reset after a flood, consider purchasing a short drain hose extension or a spare hose. Setting up a dry workspace with a mat under the washer prevents slips and protects the floor from water damage. Finally, place the bucket in a location that won’t block the washer’s movement or create a tripping hazard.
Troubleshooting common drainage problems
If your washer won’t drain, start with the simplest explanations. Check the drain hose for kinks, clogs, or improper routing. Inspect the pump filter or trap for lint, coins, or small garments that block flow. If the hose is properly connected but water still remains, you may be dealing with a faulty pump or a blocked valve. In this case, avoid forcing parts or using tools aggressively; instead, consult the user manual for model-specific guidance or contact a professional. For temporary relief, position the drain hose lower than the tub and allow gravity drainage to do the work, while monitoring for leaks. If you find persistent issues, capture a few photos of the hose and connections to share with a repair tech or a customer support line.
Maintenance and prevention tips
Preventing future drainage problems saves time and reduces risk. Regularly clean the pump filter if your model has one, and inspect hoses for cracks or bulges. Ensure hoses are free of kinks and routed to minimize bending. Do not overload the washer, which can stress the pump and extend draining time. After completing a drain, run a short cycle with no clothes to verify that the system drains cleanly and re-seals properly. Keeping these habits will help you avoid recurring issues and keep your laundry space safe and efficient.
Tools & Materials
- Bucket or basin (capacity at least 2 gallons)(To catch drained water.)
- Absorbent towels or old rags(Place around the washer to prevent slips.)
- Heavy-duty gloves(Protect hands from sharp edges and dirty water.)
- Flashlight(Illumination if the area is dim.)
- Adjustable wrench(If you need to disconnect stubborn fittings.)
- Screwdriver (Phillips and flat-head)(Useful for removing panels or screws on drain pump.)
- Drain hose extension or spare hose (optional)(In case you need extra length.)
- Floor mat or towel under work area(Prevents slipping and protects floor.)
Steps
Estimated time: 25-40 minutes
- 1
Power off and unplug the washer
Unplug the machine from the wall outlet and, if feasible, switch off the circuit breaker to eliminate any risk of electric shock. Remove any clothes and ensure the drum is at rest before handling hoses. This initial step protects you and confirms there is no active circuit flow while you work.
Tip: Always test the outlet with a dry hand before touching the plug; never pull by the cord. - 2
Shut off the water supply
Close both hot and cold water valves to prevent new water from entering the tub while you drain. If the valves are hard to reach, turn off the main water supply to the home temporarily. This reduces the chance of water pouring into the drum during the draining process.
Tip: If the valves leak after turning off, wait for them to cool before inspecting or replacing washers. - 3
Move the washer for hose access
Gently pull the washer away from the wall to access the drain hose and any clamps. Place towels on the floor and keep a bucket handy. A second person can help steady the appliance, especially on heavy models.
Tip: Have an old blanket or mat under the washer to protect flooring and dampen movement. - 4
Prepare the drain hose
Locate the drain hose and disconnect any end-cap or clip if present. Position the hose end into a bucket or near a floor drain, and ensure the end is lower than the drum to promote gravity drainage. Do not kink the hose as that can trap water inside.
Tip: If the end is stiff, loosen clamps carefully with the appropriate screwdriver. - 5
Drain the water
Open the end of the hose and allow water to flow into the bucket or drain. If the machine has residual water in the drum despite the hose, check the pump access panel or filter (per your model’s manual) and drain or clean as needed. Maintain a ready bucket and wipe up spills promptly to prevent slips.
Tip: Keep a rhythm of letting water drain and then checking for air pockets to avoid splash back. - 6
Reconnect and test
Reattach the drain hose and secure it, reconnect power, and turn on the water supply. Run a brief rinse or spin cycle with no clothes to verify there are no leaks at hose connections. If leaks appear, reseat hoses and clamps and re-test.
Tip: Watch for drips during the first 60 seconds of the test cycle; tighten connections if necessary.
FAQ
What should I do first before draining water from a washing machine?
Always unplug the machine and shut off the water supply. Put towels down and have a bucket ready. These steps reduce the risk of electric shock and water damage before you start.
First, unplug the machine and shut off the water, then prep towels and a bucket.
What if water keeps flowing even after I detach the hose?
A continuous flow usually means a clog in the pump or drain line. Stop and inspect the pump filter and hose for blockages. If water still drains slowly, contact a professional.
If water keeps flowing after detaching the hose, check the pump filter and hoses for clogs and consider a professional if unresolved.
Can I drain into a bucket?
Yes. Use a sturdy bucket that holds at least 2 gallons and pour carefully. For large loads, multiple fills may be necessary. Ensure you stand on a dry surface to prevent slips.
Yes, you can drain into a bucket, just be mindful of size and spills.
Is it safe to drain hot water?
Hot water can cause burns, so let it cool to a safe temperature before draining. If you need to drain quickly, use cold water first and mix with warm water afterward.
Hot water can burn you, so cool it before draining.
Do I need to call a professional if water won’t drain?
If you suspect a faulty pump, persistent clogs, or you can’t reach the drain path, it’s wise to consult a technician. Do not force parts or attempt risky disassembly.
If drainage issues persist or you suspect a pump failure, call a pro.
How can I prevent future drainage problems?
Regularly clean the drain pump filter (if equipped), inspect hoses for kinks, and avoid overloading the washer. Schedule periodic checks to catch issues early.
Keep the filter clean, hoses straight, and avoid overloading.
Watch Video
The Essentials
- Unplug and shut off water before draining.
- Use a bucket and towels to control spills.
- Check hoses and pump for clogs if drainage stalls.
- Test for leaks after reassembly.
- Regular maintenance prevents future floods.