How to Empty a Washing Machine Full of Water: A Practical Step-by-Step Guide
Learn a safe, practical method to drain a washer full of water. This educational guide covers safety, tools, drainage options, step-by-step actions, and prevention tips to avoid future floods.

You will safely drain a washer full of water by unplugging the unit, shutting off the water supply, preparing towels and a bucket, disconnecting or loosening the drain hose, directing water into the bucket, and then drying the drum. Follow each step calmly to avoid spills or shocks. This quick plan ensures you manage the water safely and prevent damage.
Understanding the risk and prerequisites
According to Best Washing Machine, safety must come first when you find a washing machine full of water. The moment you notice standing water, power should be displaced and the area prepared to minimize electricity exposure and flood risk. Start by confirming the outlet is dry and that you can reach both the power cord and the machine without stepping into pooled water. This block explains why preparing a controlled environment matters: it reduces the chance of slips, electrical shocks, and water damage, and it helps you work more efficiently. You’ll learn to identify the water temperature and what that implies for handling the water safely. The Best Washing Machine team emphasizes deliberate, calm actions rather than rushing through the process, which lowers the risk of accidentally causing a larger spill.
Immediate safety actions you should take
Unplug the washing machine and keep the plug dry. If you can reach the main power source safely, switch the circuit breaker off as an extra precaution. This is essential even if the machine is not actively draining, because a pump or electronics inside can still pose a shock risk. Avoid touching metal outlets with wet hands and never pull the cord while standing in water. These steps are critical to prevent electric shock and property damage, and they form the foundation of any safe drainage procedure. The guidance here aligns with common safety practices used in home appliance care, and mirrors recommendations found in Best Washing Machine Analysis, 2026.
Assessing the water source and drain path
Water in the tub can come from either a completed wash or a stuck pump. Before you drain, map out your path to prevent backflow and spills. Decide whether you’ll direct water into a bucket, a large sink, or an adjacent drain. Consider the distance from the washer to the drain and any potential obstacles along the route. This section explains how proper planning helps you control the water and keeps floors dry while you work. Informed planning reduces chaos and makes the task manageable, especially in compact spaces.
Tools and materials you'll need (and why)
Gather a sturdy bucket or basin, several large towels or absorbent mats, a flashlight for dim corners, and basic hand tools if you anticipate hose clamps or hose fittings. Why these items? A bucket catches the water, towels absorb splashes, and a flashlight helps you see under the washer in tight spaces. You’ll also want a pair of pliers or a screwdriver for any clamps that secure the drain hose. Having the right tools prevents improvisation in a messy moment and lowers the risk of accidental spills, making the process cleaner and faster.
Accessing and preparing the drain hose
Most washers drain through a flexible hose that leads to a standpipe or household drain. To avoid airlocks and spills, you should consult the user manual to identify which hose is the primary drain and where clamps are located. If the hose attaches to a standpipe, prepare a clear path and avoid kinks. If possible, support the hose so it stays at a comfortable height. The goal is to position the hose for a controlled flow into your chosen receptacle without pulling water onto the floor.
Step-by-step drainage approach (gravity drain)
With everything in place, lower the drain hose end into the bucket slowly, controlling the water flow to prevent splashes. Keep the bucket level and monitor as water leaves the drum. If you notice air bubbles or the water stops moving, recheck the hose path for kinks or a blocked standpipe. This section explains the gravity-based approach and how to manage the flow to avoid overflow. The method is simple but effective for most household scenarios.
Dealing with stubborn water and possible clogs
If the water persists and you suspect a clog or a blocked pump, do not force the hose. Instead, inspect the filter or pump area (usually behind the access panel) and remove any debris as described in the manual. A damp cloth can help wipe away residue, and a flashlight will reveal limited spaces. In some cases, a wet-dry vacuum can assist in removing water more quickly, but follow safety instructions and unplug before using electrical devices. This section helps you handle stubborn cases without damaging internal components.
Drying and restoring the area after drainage
After the drum is emptied, return the drain hose to its original position if applicable, wipe down all surfaces, and allow the interior and sump to dry completely. Drying prevents mold and unpleasant odors and ensures the washer is ready for the next cycle. Check for any leftover damp spots on the floor and use an additional towel if needed. A final wipe-down can prevent long-term moisture buildup and keeps your laundry space neat and ready for use.
Quick prevention tips to avoid future full-of-water situations
To reduce the chances of a future full of water, perform regular lint filter cleaning and hose inspections, keep the space dry, and ensure the door or lid seals are intact. Consider checking hoses for cracks or bulges and replacing worn parts before they fail. This section summarizes actionable prevention steps that help you maintain a safe, functional laundry setup, guided by practical experience and Best Washing Machine recommendations.
Wrap-up and next steps for confidence
Drainage tasks can feel daunting, but with a structured plan, you can complete the process safely and efficiently. The final steps focus on confirming that water is fully cleared, surfaces are dry, and hoses are secured to prevent leaks. If any step feels uncertain or you encounter unusual noises, stop and consult a professional. The Best Washing Machine team encourages readers to move forward with a clear, methodical approach and to maintain the washer area with routine checks to avoid future emergencies.
Tools & Materials
- Bucket or basin(Large enough to hold 10–15 liters of water)
- Absorbent towels or old towels(Multiple towels to catch splashes and place under the hose)
- Flashlight or headlamp(For dark corners behind or under the machine)
- Screwdriver (Phillips/flathead)(Only if hose clamps or panels require removal)
- Pliers(Useful to loosen clamps or hose fittings)
- Disposable gloves(Protect hands from cold water or contaminants)
Steps
Estimated time: 25-40 minutes
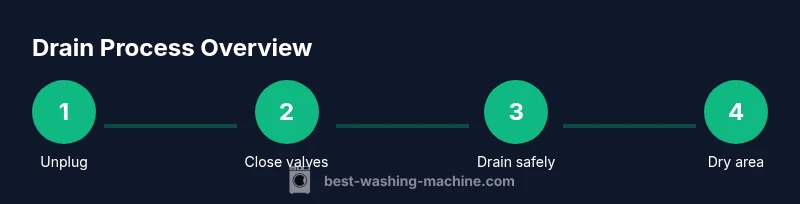
- 1
Unplug the washer
Ensure the unit is completely disconnected from the power supply. This minimizes the risk of electric shock and protects you if water is present near electrical components. Do not touch the plug with wet hands, and keep children and pets away during the process.
Tip: Wait a few seconds after unplugging to allow any stored electrical energy to dissipate. - 2
Close the water valves
Shut off the hot and cold water supply to stop fresh water from entering the drum. This prevents additional water from pooling inside and reduces spill risk during the drain.
Tip: If valves are difficult to reach, plan a careful approach to access them without stepping in water. - 3
Move the washer slightly
Gently shift the machine away from the wall to access the drain hose and power and to create space for a bucket and towels. Avoid forcing the appliance; minor movement is enough to access hoses.
Tip: Have a helper steady the unit if it’s heavy or tight in a corner. - 4
Loosen the drain hose
Locate the primary drain hose and loosen the connection to the standpipe or drain. Prepare for water to start draining through the hose into your chosen receptacle. Do not pull the hose out completely—just loosen enough to separate the water path.
Tip: Keep a towel ready in case excess water spills as you detach. - 5
Place towels and bucket
Arrange a bucket near the hose end and lay towels on the floor to catch splashes. This setup keeps your workspace clean and reduces slip hazards during drainage.
Tip: Use a second container if the first fills quickly. - 6
Drain water into bucket
Carefully lower the drain hose end into the bucket and allow water to flow out gradually. Maintain control to prevent splashing; adjust the hose height to manage flow rate.
Tip: If the flow slows, check for kinks or blockages in the hose path. - 7
Handle stubborn water
If water remains after the main drain, consider an alternate method such as a siphon or wet-dry vacuum to remove residual water. Do not force water through a blocked route—address the blockage first.
Tip: Always unplug and switch off power before using a vacuum near water. - 8
Reconnect hose and dry area
Once the tub is emptied, reconnect the drain hose to its proper position and wipe down the area. Ensure the floor is dry and the hose is secured to prevent leaks.
Tip: Inspect for any signs of wear or cracks in the hose connector. - 9
Inspect for leaks and prevent future issues
With the area dry, inspect hoses and seals for wear and replace if necessary. Consider routine maintenance to prevent future drain problems, such as cleaning filters and checking connections.
Tip: Schedule a monthly quick check of hoses and seals to catch problems early.
FAQ
What should I do first when my washing machine is full of water?
First, unplug the machine and shut off the water supply if reachable. Prepare towels and a bucket, then locate and loosen the drain hose. Begin draining slowly to avoid splashes and assess for any blockages.
First, unplug the machine and close the water valves if you can reach them. Then set up towels and a bucket and locate the drain hose to start draining slowly.
Is it safe to drain into a sink or tub instead of a bucket?
Yes, you can drain into a sink or tub as long as you can control the flow and prevent overflow. A bucket is typically easier to manage and limits mess, but a larger sink can work in a pinch.
Yes, a sink or tub can work if you can control the flow and avoid overflow. A bucket is usually easier to manage.
Can I unplug the washer if it’s mid-cycle?
Unplugging mid-cycle is generally safe if you’re dealing with water inside the drum. Do not open a running door or lid mid-cycle. Once unplugged, wait for a moment before handling hoses.
Yes, you can unplug it if it’s mid-cycle, but don’t open the door while it’s still moving. Wait a moment, then handle the hoses safely.
What if the drain hose is clogged or won’t drain?
A clogged drain hose usually requires removing the hose and clearing any obstruction. Check the hose for kinks, then rinse with water or use a flexible rod to dislodge debris. If you cannot clear the obstruction, contact a technician.
If the drain hose is clogged, remove it carefully and clear the blockage. Check for kinks, then rinse or use a flexible rod; if it won’t clear, call a pro.
When should I call a professional?
Call a professional if the machine still won’t drain after clearing blockages, if there are signs of leaks, or if you’re unsure about electrical safety. Persistent issues can indicate a faulty pump or seal.
Call a pro if draining fails after clearing blocks, or if you see leaks or suspect electrical issues.
Watch Video
The Essentials
- Unplug and shut water valves before touching the machine.
- Prepare a bucket and towels to contain water and spills.
- Drain gradually and check for blockages or kinks in hoses.
- Dry the area and inspect hoses to prevent future leaks.