How to Fix Washing Machine: A Complete Step-by-Step Guide
Learn how to fix a washing machine with a safe, practical, step-by-step approach. Diagnose common issues, identify faulty parts, and perform at-home repairs or know when to call a pro. A comprehensive guide for homeowners, renters, and repair enthusiasts.

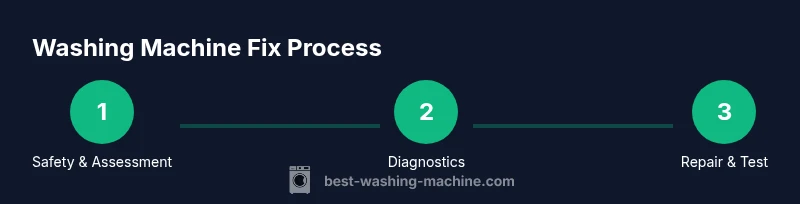
In this guide you will learn how to fix washing machine problems safely and effectively. We'll cover safety basics, quick diagnostics, common parts to inspect, and when to replace components. A practical, step-by-step approach applies to most front- and top-load models. By following these steps you can save time and avoid unnecessary service calls.
How a washing machine works and why issues occur
A modern washing machine uses a drum, belt or direct-drive motor, water inlet valve, pump, door or lid switch, and a control board. When any part fails or becomes blocked, cycles stall or leaks can occur. According to Best Washing Machine, most household failures stem from simple wear, clogged filters, or blocked drains rather than wholesale component failure. Understanding the flow helps you identify symptoms quickly: fill, wash, drain, spin, and rinse depend on specific parts working in harmony. For example, a washer that fills slowly may have a clogged inlet screen or a kinked hose; a drum that won’t spin could indicate a broken belt or a faulty lid switch. By mapping symptoms to likely causes, you can plan targeted checks rather than random tinkering.
Safety first: unplug power and shut off water
Safety is non-negotiable when working on appliances. Always unplug the machine before any inspection. If your model is hard-wired, switch off the circuit at the main panel. Shut off the water supply valves to prevent accidental leaks during inspection, and never work with wet hands around electrical components. Protect yourself with dry, insulated gloves if you’ll touch metal parts. The quick rule is: power off, water off, and then proceed with cautious checks. The goal is to minimize risk while you diagnose the root cause.
Quick-at-home diagnostics: symptoms and meanings
Keep a simple log of symptoms as you test the machine. The most common issues include not draining, not spinning, leaks, improper filling, and loud noises. Not draining often points to a clogged pump or filter; a non-spinning drum can indicate a broken belt or faulty lid switch. Leaks are usually hose or pump-related, while slow filling can stem from blocked inlet screens. By correlating symptoms with probable causes, you narrow your diagnostic scope and avoid unnecessary part replacements. Remember: if any problem involves electricity, stop and seek professional help.
Tools and basics: what you’ll need
Prepare a basic toolbox with a few essential items before you start: a screwdriver set (Phillips and flathead), a socket wrench, needle-nose pliers, a multimeter for safety checks, a bucket, towels or rags, and replacement parts you may need (filters, hoses, or a lid switch). Having these on hand reduces interruptions and helps you stay organized. It’s also wise to have the machine’s manual or model diagram accessible for specific screw placements and part numbers. If your model has a direct-drive motor, take extra care not to strain wiring during inspection.
Maintenance to prevent future breakdowns
After you’ve fixed the immediate issue, perform a preventive maintenance routine. Clean the lint filter and pump screen, check hoses for kinks or wear, and ensure the door or lid seal is intact. Run a maintenance cycle with a washing machine cleaner or a hot water and vinegar rinse to reduce buildup. Keeping drains clear, hoses uncrimped, and seals intact will extend the life of your unit and reduce the likelihood of recurring problems. Regular checks every few months can catch wear before it becomes a full breakdown.
When to call a professional and what to expect
Some problems require specialty tools, diagnostic software, or safety expertise beyond basic DIY. If you encounter a burned smell, sparking wires, a buzzing motor that prevents safe operation, or water pooling around the base after replacement parts, don’t continue—contact a licensed technician. A professional can provide a precise diagnosis, ensure safety compliance, and discuss warranty implications. The Best Washing Machine team notes that many repairs are cost-effective if addressed early, while more complex issues may require part replacements or a full component upgrade.
Tools & Materials
- Screwdriver set (Phillips & flathead)(Assorted sizes; magnetic tip helps pickups from tight spaces)
- Socket wrench(Often needed to remove drum bolts or base panels)
- Pliers (needle-nose)(Useful for hose clamps and small fittings)
- Multimeter(For basic electrical checks; not always required for simple mechanical fixes)
- Bucket, towels, rags(Contain any residual water and keep area clean)
- Replacement parts (filters, hoses, lid switch)(Only purchase after confirming the exact model and symptoms)
Steps
Estimated time: 30-60 minutes
- 1
Unplug and secure the area
Begin by unplugging the washer and turning off the water supply. Move the machine away from the wall and place towels to catch any spills. This step is essential to prevent electrical shock and water damage while you inspect components.
Tip: If you can’t reach the plug easily, switch off the breaker for a safer, guaranteed power cut. - 2
Inspect hoses and connections
Check the inlet hoses for kinks, cracks, or loose connections. Ensure the drain hose is free of clogs and that clamps are secure. Replace any damaged hoses before re-testing.
Tip: Run a slow, careful pull on hoses to detect hidden cracks; even small leaks matter. - 3
Check the pump and filter
Access the pump and pull the filter or screen to inspect for lint, coins, or hair. Clear any obstructions carefully, then reassemble. A clogged pump can stop draining and leave water in the drum.
Tip: Use a flashlight to spot debris in hard-to-see pump housings. - 4
Test the lid/door switch
For top-load models, test the lid switch with a multimeter or through a careful press of the switch itself. A faulty switch can prevent spinning or draining.
Tip: If you hear a click when closing the lid, the switch may still be failing; you may need to replace it. - 5
Inspect the drive belt (if applicable)
If your washer uses a belt, check for wear or fraying. A broken or loose belt will stop the drum from turning and should be replaced.
Tip: Only attempt belt work if you are comfortable with belt routing and tensioning. - 6
Check the control and wiring
Inspect accessible wires for loose connections or obvious damage. Do not disconnect connectors unless you’re sure how to reconnect. Some models require service panels off for advanced diagnostics.
Tip: If you see scorching or melted insulation, stop and call a pro. - 7
Dry run and observe
With all panels reassembled, plug back in and run a test cycle on a small load. Listen for abnormal sounds and observe for leaks, improper spins, or error codes on the display.
Tip: Note any error codes; they help guide future repairs or professional guidance. - 8
Document and plan the next steps
Record what you inspected, what you replaced, and the outcome of the test run. Use this log to decide if a pro is needed or if you can continue with self-service.
Tip: Keep replacement parts in their packaging until you’re sure you won’t need another round.
FAQ
What should I do first if my washing machine won't start?
First ensure the unit is properly plugged in and the circuit is on. Check the door or lid switch and any fuses or breakers. If the display is blank or there are error codes, note them for reference and consult the manual or a professional.
First, verify power and lid switch. If error codes appear, jot them down and consult the manual or a pro for safe troubleshooting.
Why is my washing machine leaking from the bottom?
A bottom leak is often due to a loose hose connection, a cracked hose, or a faulty pump seal. Inspect all hoses, clamps, and the pump housing. Replace damaged components and run a test cycle to confirm.
Leaks usually come from hoses or seals; check connections and pump housing, replace if needed, and test again.
My washer not draining; what checks should I perform?
Check the drain hose for kinks and blockages, inspect the pump and filter for debris, and ensure the impeller is free of obstructions. Clear clogs and re-test with a short cycle.
Look for clogs in the pump and filter, and ensure the drain hose isn’t blocked.
Is it safe to repair a washing machine myself?
Basic maintenance and non-electrical tasks are generally safer for DIY. Electrical diagnostic work, high-voltage components, or internal wiring should be handled by a licensed technician to prevent risk.
DIY is fine for simple steps, but avoid electrical work unless you’re qualified.
How long does a typical DIY repair take?
A straightforward diagnosis and part replacement can take from 30 minutes to a few hours, depending on familiarity and model. More complex issues may extend this timeframe and require professional service.
Time varies—simple fixes can be under an hour, complex problems may take longer or need a pro.
Watch Video
The Essentials
- Start with safety: unplug and shut off water.
- Diagnose using symptom-to-cause mapping.
- Keep a simple tool kit handy for quick fixes.
- Know when to call a professional to avoid risk.
- Regular maintenance reduces major breakdowns.