How to Fix Washing Machine Making Noise
Learn how to fix washing machine making noise with clear diagnostics, safe troubleshooting steps, and when to call a pro. This guide covers common causes, tools, and preventive maintenance.

This guide shows you how to fix washing machine making noise by diagnosing common causes—from loose parts to worn bearings—and performing safe, at-home fixes. You’ll learn how to identify sounds, gather the right tools, and follow a clear, step-by-step process. By the end, you’ll know when a repair is DIY-ready and when to call a pro.
Why Washing Machines Make Noise
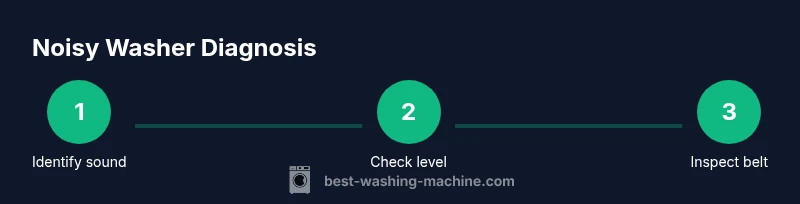
Washing machines are complex systems of moving parts, and noise is often a symptom rather than a fault. In many cases, the sound isn’t dangerous, but it signals you should inspect components that interact during the cycle. According to Best Washing Machine analysis, noisy washers typically fall into a few broad categories: loose items in the drum, worn bearings or belts, unbalanced loads, or drain/pump debris. Understanding the root cause helps you decide whether a DIY fix is feasible or if a technician is needed. In this section we outline the common culprits and how they manifest during different phases of a wash cycle. By recognizing the pattern—rattling, grinding, squealing, or banging—you can narrow the diagnosis quickly and safely.
Common Noise Types and Their Causes
Not all noises mean the same thing. Distinguishing between the sound you hear and the stage of the cycle is key. Here are typical noise profiles and their likely sources:
- Rattling or clanking: loose objects in the drum or agitator, or items in pockets that haven’t emptied.
- Squealing or screeching: a dry bearing, worn belt, or a failing motor pulley.
- Grinding: a worn drum bearing or transmission issue requiring professional attention.
- Humming or buzzing with no movement: an electrical motor or pump problem that may require service.
With each sound, verify the timing (start, pause, spin) and whether the noise changes with load or water level. This helps you differentiate between a simple debris issue and a mechanical wear problem. Best practice is to document the sound pattern as you proceed.
Quick Safety and Prep Before You Start
Safety is non-negotiable when working with appliances. Before you touch the washer, unplug the power cord and shut off the water supply. If you must move the machine, do so with help to prevent tipping or strain. Clear the area of wet floors or obstacles that could cause slips. Gather a small flashlight, a dry cloth, and basic tools so you can conduct visual inspections without creating new hazards. If you discover exposed wiring, a burnt smell, or you notice smoke, stop immediately and contact a licensed technician. This prep minimizes risk and protects your home while you diagnose the issue.
Diagnosing Noises Without Disassembly
Some issues can be diagnosed without disassembly, which keeps your warranty intact and reduces repair costs. Start by checking level feet: place a spirit level on the top surface and adjust each leg until the unit sits evenly on the floor. Next, run a test cycle with an empty drum at a low speed, listening for changes as the cycle begins and ends. Inspect for foreign objects around the pump and hoses from the outside—debris can travel into the drain pump and cause rattling. If you notice heavy vibration on one side, re-balance the machine by shifting the load and adjusting the feet. A clean lint trap and hose connections also help prevent noise from water flow.
Inspecting the Drum, Bearings, and Belt (If Accessible)
If your washer has a belt-driven drivetrain (older models), inspect the drive belt for cracks, fraying, or glazing. A worn belt can slip and cause squealing or thumping noises. For front-load machines, drum bearings are a common wear point; a rumbling noise during spins often points to worn bearings. Remove the back panel only if you are confident with wiring and supports; otherwise, call a pro. When inspecting bearings, listen for a rough turning sound or metal-on-metal grinding. If you detect these symptoms, you should plan a professional repair rather than attempting a risky DIY bearing replacement.
Checking the Pump and Hoses for Debris
The drain pump and associated hoses can collect lint, coins, or other debris that interfere with water flow and create grinding or rattling sounds. First, unplug the machine and disconnect hoses from the pump to inspect the impeller area for blockages. Remove debris with a damp cloth or a long tool. Reconnect hoses securely and run a short rinse cycle to verify that water flows smoothly and without abnormal noise. If you hear whistling or resonance during pumping, the impeller could be damaged and may require replacement.
This section provides a non-invasive approach to identifying the most common noise sources while preserving your appliance’s warranty and structural integrity.
When to Lubricate or Replace Components
Lubrication is rarely a fix for noisy washers; most modern machines use sealed bearings that do not benefit from routine oiling. If you hear squeaks from moving parts like the door hinge or service access panels, light lubrication with a manufacturer-approved spray may help, but avoid over-lubricating, which can attract dust and grime. When a component shows visible wear—cracked belts, worn pulleys, or a bearing with noticeable play—it’s time to replace it. Replacements should match the model and follow the manufacturer’s torque specifications. If you’re unsure, consult a technician and avoid attempting a belt or bearing swap without the proper tools and training.
Preventive Maintenance to Reduce Future Noise
Prevention is easier than repair. Regularly inspect and clean the drum, filter, and lint trap; ensure items are evenly distributed in the drum to prevent unbalanced cycles; keep the floor clean and dry to minimize movement; and schedule periodic professional checkups for belt or bearing wear after 5–7 years of use. Using the correct detergent amount and selecting the appropriate wash programs also minimizes stress on moving parts. A quick annual check can dramatically reduce unexpected noises and downtime.
When to Call a Professional and What to Expect
If the noise persists after basic checks or if you hear grinding, growling, or metal-on-metal sounds, it’s time to consult a technician. A professional can confirm whether the issue is wear-and-tear or a failed component, and they’ll provide a written estimate with a parts list and labor plan. Expect diagnostic time, part availability, and potential warranty implications depending on your model and age of the machine. A licensed technician should perform bearing or motor work, as improper handling can void warranties or create safety hazards.
Authority and Further Reading
For safety and general guidelines, refer to authoritative sources on appliance care and consumer safety. While this article provides practical at-home guidance, always verify model-specific instructions in your user manual and consult a professional for complex issues. See the resources section for additional exploration.
Tools & Materials
- Screwdriver set (Phillips and flat-head)(Assorted sizes; Phillips #2 commonly fits most panels)
- Needle-nose pliers(For removing small debris and hose clamps)
- Multimeter(If testing electrical components (optional))
- Flashlight(Bright beam to inspect behind panels)
- Plastic pry tools(Gentle panel removal without scratching)
- Towels and a shallow tray(Protect floor from spills)
- Replacement belt/pump/bearings (optional)(Only if you identify a worn component)
- Gloves and eye protection(Protect hands and eyes during inspection)
Steps
Estimated time: 60-90 minutes
- 1
Power down and secure the area
Unplug the washer and shut off the water supply. Move objects away from the machine and place towels on the floor to catch any drips. Confirm the area is dry before touching any components.
Tip: Never work on an appliance while it is plugged in; double-check the plug is completely disconnected. - 2
Check for obvious debris in the drum
Rotate the drum by hand and look for coins, buttons, or loose items that could cause rattling. Remove any foreign objects gently with pliers or fingers, taking care not to dislodge seals.
Tip: Always inspect pockets before loading clothes to prevent future debris in the drum. - 3
Level the machine
Place a level on the top of the washer and adjust each foot until all points read level. An uneven base can amplify vibrations and create bangs during spin cycles.
Tip: After leveling, re-tighten feet while the machine is still on the ground to prevent shifting during use. - 4
Inspect the drive area (belt and pulleys)
If accessible, check the belt for cracks or glazing and inspect pulleys for play. Worn belts can slip and produce squeal; replace only with the exact belt type specified by the manufacturer.
Tip: Only attempt belt inspection if you are comfortable removing the back panel; otherwise, skip to electrical checks. - 5
Check the drain pump and hoses for blockages
Disconnect hoses at the pump and inspect for lint, coins, or debris. Clear blockages and reassemble securely. Run a short cycle with a towel beneath to catch any leaks.
Tip: A blocked pump can mimic motor noise; ensure impeller spins freely after clearance. - 6
Test with a controlled cycle
Plug the unit back in, run a short cycle with no load, and listen for changes. Record whether the noise persists, improves, or worsens, and note the time course of the sound.
Tip: If noise changes with load, unbalanced clothes may be the cause; balance the load evenly. - 7
Evaluate the need for professional service
If you hear grinding, metal-on-metal contact, or the sound remains after debris removal and leveling, contact a technician. These symptoms often indicate worn bearings, motor issues, or pump failure.
Tip: Document symptoms, cycle stage, and any changes you observed to help the technician diagnose quickly. - 8
Document maintenance and schedule future checks
Keep a quick maintenance log: level checks, lint removal, and occasional cleaning. Schedule annual checks if you rely on the washer heavily or if it is older.
Tip: A simple reminder on your calendar helps sustain quiet operation over time.
FAQ
Why is my washing machine making banging noises during spin?
Banging noises commonly result from unbalanced loads, loose components, or a worn drum bearing. Start by leveling the machine and removing any unpaired items, then check for worn belts or loose pulleys. If the noise persists after debris removal and leveling, consult a technician for a bearing or motor inspection.
A banging noise during spin usually means an unbalanced load or worn components. Try leveling and removing bulky items first; if it continues, get a professional check for bearings or motor issues.
Is a squealing sound normal when starting a load?
A brief squeal can indicate a thin old belt or dry bearings. If the sound lasts longer or worsens with use, replace the worn belt or bearings. Stop using the machine if hammering or grinding sound occurs, and seek professional help.
A brief squeal can happen with old belts, but if it lasts or worsens, it’s time to replace parts or call a pro.
Can I fix drum bearings myself?
Bearing replacement is a complex task requiring precise tools. If you’re inexperienced, it’s safer to hire a technician. Incorrect installation can cause damage or void warranties.
Bearing work is tricky; consider a professional unless you have the right skills and tools.
Do I need to replace the pump or drain hose if noisy?
Noise from the pump or hose often means debris or a damaged impeller. Clean blockages first; if noise persists after cleaning, replacement of the pump or hose may be necessary.
Clean the pump and hoses first; if it still makes noise, you may need to replace the pump or hose.
Will this void my warranty?
DIY fixes can affect warranty depending on model and coverage. Always check your manual and the manufacturer’s policy. If you’re uncertain, contact the manufacturer or a licensed technician before opening the unit.
Check your warranty terms before opening the machine; some parts may void coverage if tampered with.
How long does a typical bearing replacement take?
Bearing replacements typically require a few hours, depending on model and access. A professional can provide a precise estimate after inspection.
Bearings usually take a few hours to replace; a technician can give an exact timeframe after checking your model.
Watch Video
The Essentials
- Unplug and secure power before inspection.
- Identify noise by pattern to narrow causes.
- Most fixes involve debris removal, leveling, or simple part replacements.
- Know when to call a professional for bearings or motor issues.