How to Fix Washing Machine Not Draining: A Troubleshooting Guide
Learn how to fix washing machine not draining with a step-by-step diagnostic flow, common causes, and safe, practical fixes you can try today.

The most likely drains-issues are a clogged pump filter, a blocked drain hose, a kinked standpipe, or a failing drain pump. Start by unplugging the machine, inspecting the drain hose for kinks, and clearing the pump filter. If water still won’t drain, the pump or control board may be at fault and professional help is advised.
Why Not Draining Happens
Washing machines not draining is a common problem with several straightforward culprits. The pump filter can accumulate lint, coins, or small clothing fibers over time, reducing flow or stopping drainage entirely. A kinked or clogged drain hose can trap water, especially in front-loading models where the hose travels a short distance to the standpipe. In some cases, the drain pump itself may be weak or failed, or the washer’s lid switch or control module may misread the cycle end. Regular maintenance minimizes these issues, but when they occur, you can usually diagnose and fix many causes with basic tools and sensible safety steps. The most important factor is to work methodically—from simple to complex and from easy fixes to ones that require tools or replacement parts.
According to Best Washing Machine, most drain problems are solvable with common household tools and careful inspection. This means you can often restore drainage without a costly service call. Keep in mind that not all issues are user-serviceable; if you encounter exposed wiring, a damaged pump housing, or a control-board fault, stop and seek a professional.
Safety First: Before You Start
Always unplug the washer and, if applicable, switch off the circuit breaker before touching any internal components. Water and electricity are a dangerous mix, so wear protective gloves and have a towel nearby to catch any residual water. If your machine is in a cabinet or tight space, clear the area so you can access hoses, panels, and filters without bending or twisting in awkward positions. Never attempt to disassemble components beyond your comfort level or without the right replacement parts. If you smell burning plastic, hear buzzing from the motor, or notice sparking, stop immediately and unplug the unit.
Quick Home Checks You Can Do Today
These checks cover the most common, easiest fixes. They require no special tools and can be done in under 30 minutes.
- Check the power: Ensure the outlet is live (plug into a known-good outlet or reset the GFCI). A tripped breaker or blown fuse can make a drain problem feel like a malfunction.
- Inspect the drain hose: Look for kinks, twists, or crushed sections near the back of the washer and at the standpipe. Straighten the hose and ensure it slants slightly downward to allow gravity-assisted drainage.
- Examine the pump filter: Locate the filter (often behind a small access panel at the bottom front or behind the toe panel). Have towels ready. Remove the cap, pull out debris, rinse, and reassemble carefully.
- Look for clogs in the standpipe: If the standpipe is clogged, water won’t drain out even if the hose is clear. You may need to snake the pipe or remove the blockage with a pliers or a long flexible tool.
- Run a drain test: With the hose positioned into a bucket and the panel closed, run a short drain cycle (if your model supports it) to confirm water clears the drum.
Diagnostic Flow: Symptom to Diagnosis
A logical, symptom-driven approach helps avoid unnecessary part swapping. Start with power and positioning, then the hose, then the pump, and finally the control mechanisms. If water remains after the drain step, move to the pump and filter area; if the pump sounds weak or stalls, you likely have a pump issue. If the problem persists after these checks, control electronics or wiring could be involved.
Key steps:
- Symptom: Water remains after drain cycle.
- Diagnosis: Check hose for kinks; inspect filter; test pump operation.
- Solution: Clear debris, straighten hose, replace pump if it fails the test.
If you’re unsure at any point, it’s safest to pause and contact a professional to avoid risk of electric shock or water damage.
Step-by-Step Fix: Clean the Pump Filter and Hose
Step 1: Unplug and prepare. Move the washer to a safe workspace and gather towels. Step 2: Access the pump filter. Remove the filter cap and slowly pull out the debris. Rinse the filter under running water and reinsert it fully. Step 3: Inspect the pump inlet and impeller for obstructions; remove any blockages with needle-nose pliers. Step 4: Reinstall the filter, run a drain test, and observe water flow. Step 5: Reconnect all hoses securely and power up the machine to run a short wash with a drain test. Step 6: If the pump hums but water does not move, the impeller may be broken and replacement is needed.
Pro tip: Do not force the pump cap back in if threads are damaged—stripping the housing will make the problem worse and could require a professional replacement.
What If the Filter Is Clean but Water Still Won’t Drain?
If the pump motor sounds normal but no water drains, the problem may be a failed or stuck impeller, a faulty lid switch that prevents cycling, or a blocked outlet in the drain line. Confirm the lid switch by gently pressing the switch with the door closed; you should hear a click. If you suspect a failed motor or control board, do not continue at-home troubleshooting; electrical components can be hazardous and require a licensed technician.
Additionally, check the drain hose's end at the standpipe to ensure it is not submerged or blocked by a standing water trap. A partial clog anywhere in the outlet path can mimic a pump problem.
Prevention: How to Avoid Not Draining in the Future
Regular maintenance is the best defense. Clean the pump filter every 1-3 months, especially if you have small children or if you wash a lot of lint-prone fabrics. Keep the drain hose free of kinks and ensure the standpipe or drain line is not blocked by debris or the lint trap. Use the recommended amount of detergent and avoid flushing large objects down the drain like coins or paper towels. Schedule periodic professional inspections if you notice recurring drainage problems or unusual noises.
Bottom Line: When to Call a Professional
If you’ve completed the above steps and the washer still won’t drain, or if you detect electrical burning smells, exposed wires, or a burnt motor, stop and contact a licensed appliance technician. Draining issues can quickly lead to water damage or electrical hazards if addressed incorrectly. A qualified technician can diagnose the pump, lid switch, or control board and perform a safe, lasting replacement.
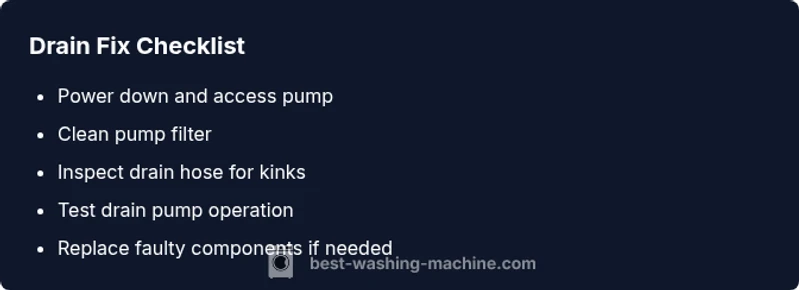
Steps
Estimated time: 30-60 minutes
- 1
Power down and access areas
Unplug the machine and move it to access the back and bottom panels. Remove any toe kick or front panel if needed to reach the pump and hoses.
Tip: Do not yank cables; disconnect at the socket to avoid shock. - 2
Locate and remove the pump filter
Open the filter access, place a towel, remove the cap, and carefully pull out the filter to clear debris. Rinse thoroughly before reinsertion.
Tip: Keep a small tray to catch drained water and debris. - 3
Clear debris and test the pump
Remove visible blockages from the pump area and check the impeller for obstructions. Manually rotate the impeller to verify it moves freely.
Tip: If the impeller doesn’t rotate, the pump may be seized and require replacement. - 4
Inspect drain hose and standpipe
Check for kinks, clamps, or crushed sections in the hose; ensure it feeds into the standpipe cleanly. Remove any debris in the hose.
Tip: Never run the machine with a damaged hose; replace if you see cracks. - 5
Reconnect and run a drain test
Reassemble everything, plug in, and run a short drain cycle to observe the water flow. If water drains, you’ve likely resolved the issue.
Tip: If there’s no drain, consider a professional assessment for the pump or control board. - 6
Evaluate need for part replacement
If the pump or lid switch shows signs of failure, plan for a replacement with compatible parts. Do not mix incompatible parts.
Tip: Note model numbers and check compatibility before buying replacements.
Diagnosis: Washing machine won't drain or water remains after the drain cycle
Possible Causes
- highPower issue (outlet, breaker, or cord)
- highClogged pump filter
- highBlocked or kinked drain hose
- mediumFaulty drain pump or impeller
- lowLid switch or control board fault
Fixes
- easyVerify outlet power and reset breaker; ensure the washer is getting power
- easyAccess and clean the pump filter; clear debris and rinse thoroughly
- easyInspect drain hose for kinks, blockages, and proper routing; straighten or replace as needed
- mediumTest the drain pump for operation; replace if it hums but doesn’t move water
- hardCheck lid switch and control module wiring; replace faulty components if indicated
FAQ
Why won’t my washing machine drain after a cycle?
Common causes include a clogged pump filter, blocked drain hose, or a faulty drain pump. Start with easy checks like unplugging, examining the hose, and cleaning the filter. If water still remains, the issue may be with the pump or control wiring.
Most drain problems come from clogs in the filter or hose or a bad pump. Start with the basics, and if it still won’t drain, a professional should check the motor and control board.
How do I locate and clean the drain pump filter?
For many front-load washers, the filter is behind a small panel near the bottom front. Place towels, unscrew the cap, and remove debris. Rinse and reassemble, then run a drain test.
Open the front panel, pull out the filter, clean off lint and debris, rinse, and reinsert properly.
Can a kinked drain hose cause not draining?
Yes. A bent or kinked hose can trap water and prevent drainage even if the pump is fine. Straighten or replace the hose and ensure it runs to the standpipe without sharp bends.
A kinked hose blocks drainage. Straighten or replace it and test again.
Is a faulty drain pump something I can fix myself?
Some simple pumps can be replaced by a confident DIYer with basic tools, but electrical components and warranties complicate DIY. If you’re unsure, contact a licensed technician.
If you’re handy, you can replace the pump, but if not, a pro should do it to avoid risks.
When should I call a professional?
Call a pro if you detect burning smells, visible damaged wiring, or if the pump and lid switch tests fail. Complex electronics or compression seals are best left to technicians.
Call a professional if there are electrical smells or you’re uncomfortable with inspection and replacement.
Will chemical drain cleaners help?
Chemical drain cleaners are not recommended for washers; they may damage hoses or seals and won’t fix a mechanical drainage problem. Stick to cleaning the filter and hose.
Chemicals aren’t the fix here—stick to mechanical cleaning and proper maintenance.
Watch Video
The Essentials
- Identify the drain issue quickly with simple checks
- Clean the pump filter and straighten the drain hose first
- Test the drain pump before replacing parts
- Know when to call a professional
- Prevent future clogs with regular maintenance