How to Fix Washing Machine Spinner: Step-by-Step Repair Guide
Learn to diagnose and repair a washing machine spinner not spinning. Step-by-step diagnostics, parts to check, safety tips, and maintenance to prevent future failures from Best Washing Machine.

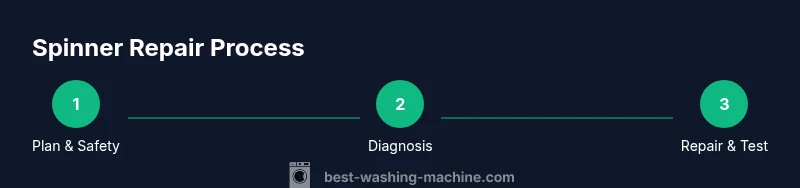
This guide shows you how to diagnose and fix a washing machine spinner problem. You’ll inspect the drive belt, pulley, motor coupling, lid switch, and spinner assembly, perform safe power-off tests, and install replacement parts as needed. Follow the steps to restore spin in 30-60 minutes at home today properly.
Understanding how a washing machine spinner works
Inside most modern washers, the spinner is the rotating part of the drum that removes water from clothes during the final spin. In belt-driven models, a drive belt connects the motor to the pulley that turns the basket. In direct-drive machines, the motor connects straight to the transmission or spin basket. The control board coordinates agitation, spin speed, and duration, shifting from washing to high-speed spinning. A healthy spinner should extract most of the moisture, leaving clothes only slightly damp. When spinning fails, the symptom often points to one component rather than several, guiding a cost- effective repair path. According to Best Washing Machine, understanding the mechanism helps homeowners distinguish between a quick belt replacement and a more complex transmission issue. This foundational knowledge empowers you to plan a safe, logical repair instead of guesswork, which saves time and money while preserving appliance longevity.
Why spin failures happen: common culprits
Spinner failures are frequently caused by wear and tear on several key parts. A worn drive belt can slip or break, preventing rotation. A damaged pulley can slip or crack, reducing torque. The motor coupling may fail in direct-drive units, decoupling the motor from the drum. A faulty lid switch can stop the spin cycle automatically as a safety feature. Other contributors include unbalanced loads that stress the basket, worn drum bearings causing grinding noises, and electrical faults in the control board intermittently halting the spin. By recognizing these common culprits, you can target the repair without unnecessary part replacements. Best Washing Machine analysis indicates that wear-related components and improper loads are frequent causes of spinner problems, reinforcing the value of a methodical diagnostic approach.
Safety and preparation: what you need to know before you begin
Before you touch any moving or electrical parts, unplug the washer and disconnect it from any power source. Move the unit away from walls if possible and lay towels to catch any residual water. If the unit is in a tight space, shut off the home water supply to avoid leaks when hoses are disconnected. Have a small flashlight handy and wear protective gloves. Take photos of wire connections before you unplug anything, and keep screws organized in labeled containers. The Best Washing Machine team emphasizes safety first: never work on a live outlet, always dry surroundings, and use insulated tools. If you detect a burnt smell, visible arcing, or corrosion, stop and consult a professional. Safety practices reduce the risk of shock, flooding, and further damage to the appliance.
Diagnostic flow: how to test each component
Start with a quick observable check: is the belt intact, is the pulley turning smoothly by hand, and is there any unusual noise during a gentle spin by hand? If the belt is frayed or cracked, replace it. If the pulley feels loose or wobbly, inspect mounting hardware and the pulley surface for cracks. Use a multimeter to test continuity on the motor winding and observe resistance within expected ranges for your model. For direct-drive units, test the coupling for signs of wear or cracking. Check the lid switch by pressing it with a screwdriver to see if the drum allows spinning; a failed switch usually prevents any spin. Follow a sequential path: belt condition → pulley integrity → motor coupling → lid switch. If a test reveals a fault in one component, plan that replacement before running a full test cycle.
How to Inspect the Drive Belt and Pulley
Remove the back or access panel to reach the drive belt and pulley, depending on your model. Inspect the belt for cracks, fraying, glazing, or missing ribs. A loose or stretched belt reduces torque, while a cracked belt can fail outright. Spin the pulley by hand to feel for roughness or binding, and check for cracks in the pulley face or hub. Ensure the belt tension is appropriate by applying mild finger pressure to the belt midway between the motor pulley and the drum pulley; it should have limited slack. If the belt shows wear or the pulley is damaged, replace both to restore reliable spin. Keep a record of part numbers and consult your washer’s manual for compatibility.
Checking the Motor Coupling and Transmission
In many top-load and some front-load washers, the motor coupling is the critical link between the motor and the transmission. Inspect the coupling for cracks, deformation, or broken pieces. On direct-drive machines, the issue may lie in the transmission itself or the internal drive hub. Look for oil leaks around the transmission seal, which can indicate worn internal components. If the coupling or transmission shows visible damage or if resistance is felt during hand rotation of the drum, replacement is typically required. A faulty coupling dramatically reduces torque transfer, causing the drum not to spin despite a healthy motor. When replacing, ensure parts are matched to your model and installed following the manufacturer’s torque specs.
Inspecting the Lid Switch and Wiring
A malfunctioning lid switch is a common cause of spin failure, since many machines won’t spin unless the lid is sensed as closed. Test the switch with a multimeter for continuity when the lid is closed. Inspect the wiring harness for damaged insulation, loose connectors, or burned contacts near the switch. Corrosion or bent pins can disrupt signals to the control board, stopping the spin function. If the switch or its wiring shows wear or damage, replace that component and re-check continuity. Ensure the switch aligns with the lid properly; misalignment can prevent engagement and halt spin.
Replacing a Damaged Spinner or Assembly
If you confirm a damaged spin basket, drum, or spinner assembly, replacement is often the most reliable solution. Disconnect power, drain any remaining water, and carefully remove the agitator or spinner assembly according to your model’s service manual. Install the new spinner with correct orientation and secure fasteners, reattach any hoses or wiring, and torque screws to the manufacturer’s specifications. After installation, run a short test cycle with a small load to verify rotation and balance. If you notice vibration or unusual noise, double-check belt tension, pulleys, and mounting hardware to prevent future wear.
Post-Repair testing, maintenance, and when to seek help
With the replacement parts installed, run a full wash cycle, then a dedicated spin cycle with a light load to confirm stable operation. Observe for smooth acceleration, consistent spin speed, and absence of grinding or rumbling. Recheck connections, hoses, and the pump for leaks during and after the cycle. Regular maintenance—like avoiding super-heavy loads, using balanced loads, and cleaning the pump filter—extends spinner life. If the unit still fails to spin after sequential checks or if you encounter persistent leaks, it’s wise to consult a certified technician or the manufacturer’s service network. The best outcomes come from a structured diagnosis, correct parts, and careful testing.
Tools & Materials
- Screwdriver set (Phillips and flat-head)(Phillips #2 and flat-head #3 recommended)
- Nut driver or socket set(3/8 inch or 1/4 inch depending on model screws)
- Multimeter(Set to continuity/ohms; test motor winding and switches)
- Replacement drive belt(Only if belt shows wear or damage)
- Motor coupling replacement(For direct-drive or beltless models)
- Replacement pulley (if damaged)(Check compatibility with your drum/pulley system)
- Towels/absorbent rags(Catch water and keep the area clean)
- Safety gloves(Protect hands during disassembly)
- WD-40 or lubricant (optional)(For squeaky pulleys; use sparingly)
Steps
Estimated time: 60-120 minutes
- 1
Power off and unplug the washer
Ensure the appliance is completely disconnected from any power source. Move the unit away from the wall if needed and place towels to catch any residual water. This initial safety step prevents electric shock and reduces the risk of water damage.
Tip: Label and store screws in a small container as you remove panels. - 2
Access the drive area and inspect obvious damage
Remove the back panel or bottom access door as your model requires. Visually inspect the belt, pulley, and drum mounting for cracks, fraying, or looseness. A quick visual check often reveals the most common issues.
Tip: Take a photo of any wiring or belt routing before disconnecting components. - 3
Test belt and pulley manually
Try to rotate the drive pulley by hand. If it binds, slips, or shows excessive play, the belt and/or pulley is suspect. Mark their position for alignment when reinstalling.
Tip: If the belt is tight and shows no cracks but still slips, replace it to rule out misalignment. - 4
Check motor coupling or transmission
For belt-driven machines, inspect the motor coupling for cracks or wear. For direct-drive units, inspect the transmission coupling. Replace if there is visible damage or excessive slack.
Tip: Ensure you have the correct part number for your model before purchasing. - 5
Evaluate the lid switch path
Inspect the lid switch and wiring. Use the multimeter to check continuity when the lid is closed. A faulty switch will prevent spinning and often cause error codes.
Tip: If the switch tests bad, replace it before proceeding with other repairs. - 6
Check for electrical issues and control signals
Examine wires to the motor and switch for damage or loose connections. Use the multimeter to verify control signals from the motherboard reach the motor during a spin command.
Tip: Unplug before testing any wires and avoid shorting terminals. - 7
Decide on replacement parts
If tests point to a failing belt, pulley, coupling, or switch, replace the defective part(s). Always confirm compatibility with your model’s exact serial and diagram.
Tip: Keep spare parts organized with corresponding screws. - 8
Reassemble and perform a dry run
Reattach all panels and connect power. Run a test cycle with a small, light load to observe spin behavior and balance. Listen for unusual noises and watch for leaks.
Tip: If you hear grinding, stop and recheck mounting hardware. - 9
Final test and maintenance plan
If the spin is stable, run a full cycle with a larger load to ensure reliability. Clean filters, check hoses, and schedule preventive checks every 3–6 months to extend spinner life.
Tip: Create a simple maintenance schedule to catch issues early.
FAQ
What are common signs my spinner is failing?
Common signs include not spinning, loud grinding, or clothes remaining wet after spin. Check drive belt, pulley, lid switch, and motor coupling as potential causes.
If your washer won't spin or makes unusual noises, it’s usually a worn part or a sensor issue that you can diagnose with a basic check.
Can I fix a spinner issue myself?
Many spinner problems can be addressed with basic tools and careful safety steps. Start with unplugging, then inspect the drive belt, pulley, and lid switch before replacing parts.
Yes, with the right parts and patience, you can often fix it yourself; stop if you’re unsure.
How do I know if I need a new belt or motor?
Visible wear on the belt or cracking indicates belt replacement. Motor issues typically require electrical testing and possibly professional diagnosis.
Look for fraying or cracks on the belt; motor problems may show in inconsistent speed.
Is a lid switch the likely cause of no spin?
A faulty lid switch is a common reason washers won’t spin. Test continuity with a multimeter and replace if not signaling correctly.
If the lid switch is defective, the machine won’t spin even if other parts are fine.
When should I replace the washer instead of repairing?
If multiple major components fail or the unit is old, replacing may be more cost-effective than ongoing repairs.
Consider long-term costs and the appliance’s age when deciding.
Watch Video
The Essentials
- Identify the exact spin symptom before pulling parts.
- Test belt, pulley, coupling, and lid switch in sequence.
- Replace only the faulty component to save time and cost.
- Conduct a safe dry-run before heavy loads.
- Keep a maintenance schedule to prevent recurrence.