How to Get Washing Machine to Drain: A Step-by-Step Guide
Learn how to get washing machine to drain safely and effectively. This educational guide covers diagnosing drainage problems, clearing clogs, inspecting hoses and pumps, and testing drainage with a step-by-step process and practical tips.

This guide shows how to get washing machine to drain safely and effectively. You'll diagnose common drainage problems, clear clogs, inspect the drain hose and pump, and run a test cycle. Follow the step-by-step process, gather essential tools, and regain proper drainage with confidence. This topic covers safety considerations and common mistakes to avoid, with practical checks you can perform without specialized equipment.
Assess Safety and Prep
Before you begin troubleshooting how to get washing machine to drain, make safety your first concern. Unplug the machine from the wall outlet and shut off both hot and cold water supplies to prevent any accidental leaks. Move the appliance away from the wall to access the rear panel and drain area without bumping into plumbing. Place towels and a shallow bucket around the work zone to catch spills. According to Best Washing Machine, most drainage problems start with a simple safety check and a quick hardware inspection. This section lays the groundwork: confirm power is off, water valves are closed, and your workspace is organized. Keeping a clear space reduces the risk of electrical shock and minimizes the chance of accidentally tipping water onto flooring. Remember, documenting what you see (hose condition, pump noise, or visible clogs) will help you decide which steps to tackle first.
- Gather your tools in advance.
- Read the model's manual for any special steps.
- If you feel unsure, stop and contact a professional.
If you want to proceed, you’ll next identify the drainage path and major components involved in draining.
Identify the Drain Path
To fix the problem efficiently, you must map out where water should exit and how it travels through your machine. Start with the tub outlet and locate the drain hose connecting the washer to the plumbing or standpipe. Next, trace the hose to its exit point at the wall or floor drain. Understanding the route helps determine whether a hose kink, a clogged standpipe, or a blocked pump is causing the water to pool rather than drain. In many cases, the drain hose is the first point of failure due to kinks, bends, or being pushed too far down into a standpipe where it can trap water and air, creating a backflow. Inspect both ends of the hose for cracks, holes, or loose connections. If your machine has a pump filter, locate and remove it to check for lint, coins, or threads that could block water flow.
- Check for visible leaks around hose connections.
- Note whether water drains freely from the tub into the hose when the drum agitates.
- If you have a standpipe, ensure it’s not blocked or too full.
Unplug and Protect
With the drainage path identified, perform a critical safety step: unplug the washer again and disconnect the power supply to the circuit. This double-checks safety as you handle water and metal parts near electrical components. Use a non-slip mat to keep tools in place and protect the floor from standing water. It’s also wise to wear gloves to prevent contact with any residual detergent or sharp edges when you reach into the pump area or hose connections. If your model is front-loading and the lower panel can be removed, do so gently to access the pump housing and filter.
- Maintain dry hands when working around electrical components.
- Double-check for any residual water in the drum before touching internal parts.
- Retain small screws and parts in a labeled container to avoid loss.
Inspect the Drain Hose for Kinks
Kinks or crushed segments in the drain hose prevent effective draining. Detach the hose where it exits the wall or standpipe and lay it straight on the floor to inspect for bends and blockages. If you see kinks, gently loosen them by repositioning the hose so it follows a smooth, gravity-friendly path to the outlet. Check for crushing at the point where the hose passes through the cabinet wall. A crushed hose reduces pressure and slows drainage. If the hose feels stiff or brittle, replace it with a new one of the same diameter. If your hose connects to a quick-connect fitting, ensure there are no leaks and that clamps are tight.
- Flush the hose with water to confirm no obstructions.
- Consider replacing the hose if cracks or bulges are present.
- After testing, reattach firmly to avoid leaks.
Clear the Drain Pump Filter and Clogged Detritus
Many washers use a sump pump with a filter or screen that traps lint, coins, buttons, and threads. If your drain is not producing a steady flow, this filter may be clogged. Follow your model’s manual to locate and open the filter housing. Place a towel to catch residual water and slowly remove the filter. Clean the filter screen under running water using a soft brush to remove debris. Reinsert the filter securely. If the pump is accessible, check for a jammed impeller by manually spinning it to ensure it moves freely. A stuck impeller will prevent draining and could damage the pump if forced.
- Never force the pump impeller; apply only gentle rotation.
- Replace any damaged seals or gaskets when reassembling.
- Re-test drainage after cleaning to confirm improved flow.
Check the Drain Pump Operation
If the filter is clear but drainage still stalls, the pump may be failing. Listen for the pump when you run a drain cycle; a loud grinding or humming noise often signals a failing impeller or motor. Use a flashlight to inspect the pump housing for signs of leakage. If the pump is behind a panel, you might access the wiring harness to check for loose connections or burned fuses. A failing pump can sometimes be revived by adjusting the impeller, but more often it requires replacement. Before replacing, verify the power and wiring are correct and that the fuse or breaker is not tripped.
- Do not run the machine if there are signs of burning smell or melted insulation.
- If you smell burning plastic, stop and consult a technician.
- Keep a record of any error codes shown on the display for diagnosis.
Clear Exterior Drain and P-Trap (if applicable)
Some washing machines drain into a standpipe or a building’s drain with a P-trap. Ensure that the exterior drain line is clear and that the standpipe vent is open. Use a plumber’s snake or a flexible brush to clear blockages in the standpipe if you can access it safely. Do not use chemical drain cleaners inside the washer as they can damage plastic components and pipes. If your home’s drain includes a trap that is accessible via a cleanout cap, open it to inspect for clogs and remove them carefully. After clearing, flush with a bucket of water to test flow through the standpipe or trap. Ensure the hoses and clamps remain secure.
- Avoid overfilling the standpipe with standing water.
- If you encounter stubborn clogs, call a licensed plumber for safe removal.
Test the Drain with a Controlled Cycle
With the major checks complete, perform a controlled drain test. Plug the machine back in and run a drain or spin-dry cycle (depending on model) with no laundry. Observe whether water exits the tub promptly and cleanly through the drain hose. If water drains slowly or resurges, repeat some steps or inspect the hose’s height and routing for gravity-assisted flow. Document any error codes and compare them to your manual or online guides. If the test reveals ongoing drainage issues, reassess the pump function, hose integrity, and trap condition.
- Allow extra towels to catch any overflow during testing.
- Do not run multiple cycles in quick succession if the machine overheats.
- Keep children and pets away from the testing area for safety.
Common Causes and When to Call a Technician
Often, drainage problems stem from simple causes like a clogged filter, a kinked hose, or a blocked standpipe. Persistent issues after performing the standard checks may indicate a faulty pump, a cracked hose, or a failing motor that requires professional repair. If you are uncomfortable working on electrical appliances or the plastic components show cracks, it is safer to contact a technician. The technician-can diagnose electrical issues, replace pumps, and ensure the drain lines meet local building codes. Regular maintenance reduces the chance of major failures and can extend the life of your machine.
- Don’t ignore unusual noises or burning smells from the pump area.
- Keep an ongoing log of drain performance and any error codes.
- Consider scheduling annual maintenance to prevent future clogs.
Maintenance Tips to Prevent Future Clogs
To minimize future drainage problems, perform small but consistent maintenance tasks. Clean the lint filter and pump screen monthly; this prevents buildup that can travel to the pump. Use a low-suds, high-efficiency detergent appropriate for your washer and avoid mixing fabric softeners with detergents that can create residue. Periodically check hoses for cracks or bulges and replace them every few years or as needed. Keep the area around the washer clean and dry to avoid mold and slippery floors that complicate maintenance. Finally, keep a simple maintenance checklist handy so you can address minor issues before they escalate into drainage problems.
- Schedule regular visual inspections of hoses and connections.
- Use the recommended detergent and avoid overloading the machine.
- Maintain a clean environment to simplify future checks.
Tools & Materials
- Bucket(Large enough to hold water from the drain; place beneath hose outlet.)
- Towels or absorbent mats(To catch spills and keep floor dry.)
- Adjustable pliers(Helpful for hose clamps.)
- Screwdrivers (Phillips and flat-head)(To remove access panels or filter housing.)
- Flashlight(Improve visibility inside the drain area.)
- Flexible brush or pipe cleaner(For cleaning filters and hoses.)
- Shop vac (optional)(Sucks out water or debris from the pump area if needed.)
- Replacement drain hose (if needed)(Have a spare of the same diameter on hand.)
- Gloves(Protect hands from sharp edges and detergents.)
Steps
Estimated time: 45-75 minutes
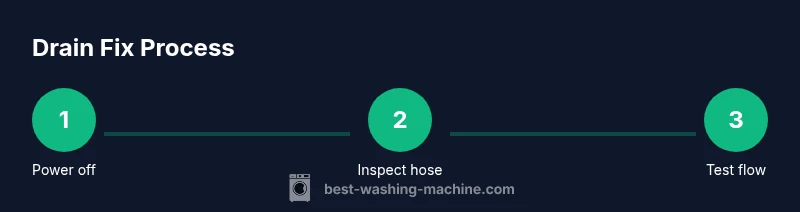
- 1
Power off and prepare the area
Unplug the washer, turn off water valves, and move the unit slightly to access the rear. Place towels and a bucket nearby to catch any residual water. This step reduces the risk of electric shock and makes the following steps safer.
Tip: Keep a clear, dry path to prevent slips. - 2
Identify the drainage path
Trace the drain hose from the tub to the wall or standpipe. Note any bends, kinks, or disconnections and inspect both hose ends for cracks. This helps pinpoint where draining is blocked.
Tip: Check for obstructions at the hose ends first. - 3
Inspect and straighten the drain hose
Detach the hose at both ends if needed and lay it straight to inspect for internal blockages. Replace or straighten any kinked sections and reattach firmly with clamps. A straight hose promotes gravity-assisted drainage.
Tip: Avoid forcing the hose through tight gaps. - 4
Access and clean the pump filter
Open the pump filter housing per your model’s manual, place a towel underneath, and remove the filter. Rinse under running water and remove lint, coins, and threads. Reassemble securely and reseal.
Tip: Never force the filter; if it’s tight, check for warps in the housing. - 5
Check the pump impeller
With the filter removed, manually rotate the impeller to confirm it moves smoothly. A stuck impeller indicates a faulty pump or debris jam; do not force it. If it won’t turn, the pump may need replacement.
Tip: If you hear grinding or see resistance, stop and assess wiring. - 6
Test the drain flow
Reconnect the hose, plug in the unit, and run a drain cycle with no laundry. Observe whether water exits the tub promptly and cleanly. If flow is slow or inconsistent, revisit hose routing, filter cleanliness, and pump function.
Tip: Take notes on any codes or unusual sounds. - 7
Inspect external standpipe or trap
If your setup uses a standpipe or an accessible P-trap, inspect for clogs. Clear blockages with a flexible brush or snake if safe, and ensure caps or access panels are secure after cleaning.
Tip: Do not use chemical drain cleaners inside the washer area. - 8
Re-test and secure connections
Run another drain cycle to confirm drainage. Check all hose connections and clamps for tightness, and replace any damaged parts. This final test ensures no leaks and proper drainage.
Tip: A second test catches minor resealing issues before they become leaks. - 9
Decide on next steps
If drainage remains poor after all checks, consider a professional service call. Persistent issues may indicate pump failure or complex plumbing problems that require licensed repair.
Tip: Document codes and symptoms to speed up diagnosis.
FAQ
What are the most common reasons a washing machine won't drain?
The most frequent issues are a clogged pump filter, a kinked drain hose, a blocked standpipe, or a failing drain pump. Simple fixes like cleaning the filter and straightening the hose resolve many cases.
Common reasons include clogged filters, hose kinks, and a faulty pump. Cleaning the filter and straightening the hose usually fixes it.
How do I know if the drain pump needs replacement?
If you hear grinding, humming without moving water, or the impeller won’t spin, the pump is likely failing. Visual signs of leaking seals or burnt smells also indicate replacement. A professional should confirm when in doubt.
If you hear grinding or the pump won’t spin, it’s usually time to replace it.
Can I use a plunger on a washing machine drain?
A plunger can be risky for washers due to the seal and internal components. Use it only if you can access the standpipe safely and gently, and preferably before opening the pump housing. If uncertainty remains, skip the plunger and try safe disassembly first.
A plunger is not always suitable for washers; use with caution or skip if unsure.
What safety steps should I follow before starting work?
Unplug the washer, shut off water valves, wear gloves, and place towels to catch spills. Keep children and pets away, and work on a dry surface to avoid slips.
Always unplug the machine and turn off water; wear gloves and keep kids away.
Is there a risk of water damage if the drain is blocked?
Yes. A blocked drain can overflow during cycles, causing water damage. Use towels and a bucket to control spills and test drainage gradually to prevent floods.
A blocked drain can overflow; prepare for spills and test drainage carefully.
When should I call a technician?
If you’ve cleaned filters, checked hoses, and tested the pump but drainage remains poor, or you notice electrical signs (burning smell, melted insulation), contact a licensed technician for safe, professional diagnosis.
If drainage still won’t work after checks or you smell burning, get a professional.
The Essentials
- Unplug before inspecting any internal components
- Identify and fix hose kinks to restore gravity-assisted drainage
- Clean the pump filter to remove debris that blocks flow
- Test drainage with a dedicated cycle to confirm fixes
- Call a technician if the pump or electrical components show signs of failure