How to Tell If Your Washing Machine Is Broken Right Now
Urgent, step-by-step troubleshooting to help homeowners decide if their washer is broken, with safe checks, diagnostics, and guidance on when to call a professional.

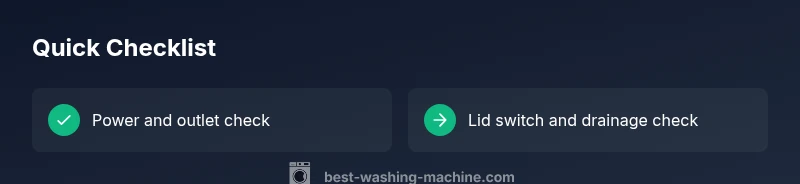
If your washer isn’t performing as expected, start with the basics: confirm the unit is plugged in, the outlet works, the lid switch engages, and the circuit breaker hasn’t tripped. Listen for unusual sounds, leaks, or failure to drain or spin. If none of these quick checks restore function, proceed with the detailed diagnostics below.
Quick reality check: is it broken?
If you’re asking how to know if your washing machine is broken, you’re in the right place. According to Best Washing Machine, most problems fall into a small set of scenarios you can test safely at home. Start with the simplest possibilities—power, door/lid status, and basic mechanical faults—and only move to disassembly if you have the right tools and instructions. This approach keeps you safe and saves you unnecessary service calls while you confirm whether a repair is truly needed.
Common signs your washer may be failing
Watch for audible banging, grinding, or screeching during operation, leaks around hoses, clothes remaining soaked after a cycle, the drum not spinning, or the washer not draining. Such symptoms point to different root causes, from a simple clogged filter to a faulty pump or a broken belt. Keep a log of which stages fail (wash, rinse, spin) and any error codes on the control panel, as these details guide the diagnosis and help you communicate clearly with technicians or retailers.
Safety first: power, water, and wiring checks
Before touching any internal parts, unplug the machine and turn off the water supply. Inspect the power cord for damage and ensure the plug is firmly seated in a known-good outlet. If you notice a burning smell, buzzing, or scorch marks, stop immediately—the risk of fire or electric shock is real. Check hoses for kinks or crimps and confirm the drain hose isn’t blocked. If you’re unsure about any step, skip to professional help—your safety comes first.
Diagnostic flow: symptom to solution
A structured diagnostic flow helps you map symptoms to likely causes and practical fixes. Begin with the most common, easiest issues: power/outlet, lid switch, and water supply. If the symptom is “not draining,” focus on the pump and drain hose. For “not spinning,” check the belt (if applicable) and drum bearings. Use a simple decision tree to go from symptom to diagnosis to a concrete fix, then verify by running a short test cycle.
Step-by-step fixes for common issues
- Power and outlet check: Unplug, reset the circuit breaker, and plug into a known-good outlet. 2) Lid switch test: Close the lid and listen for a satisfying click; if the switch feels loose or unresponsive, replace it. 3) Water supply: Confirm both hot and cold supply valves are open and hoses are not kinked. 4) Drain issues: Remove the drain hose and check for obstructions; clean the pump filter if present. 5) Spin problems: If the belt is visible and worn, replace it. 6) Reassemble and run a short test cycle to confirm the fix. Pro tip: label connectors before you disconnect anything so reassembly is straightforward.
Safety tips & common mistakes
Always unplug the machine before inspecting internal parts. Do not force doors or hoses if they resist; apply gentle pressure and re-check the fit. Never work on live electrical components with wet hands. If you encounter error codes that you cannot interpret, consult the manual or a professional rather than guessing. Remember to test with a light load after any fix to avoid overflow or damage.
Maintenance to prevent future breakdowns
Regularly clean the lint filter, check hoses for wear, and run a monthly cleaning cycle (or a vinegar/ baking soda flush if your manual approves). Keep the area around the machine clear to reduce vibration and wear. Schedule professional service at least once a year for a full inspection, especially if your model is older. This proactive approach minimizes surprises and can extend the life of your washer.
Steps
Estimated time: 25-60 minutes
- 1
Power down and safety check
Unplug the unit and turn off the water supply. Inspect cords and plugs for damage, and ensure the area is dry before handling any components.
Tip: If the plug or cord looks damaged, stop and use a professional service. - 2
Verify outlet and circuit status
Test the outlet with another device or use a voltage tester. If the outlet is dead, reset the circuit breaker or replace the outlet as needed.
Tip: Avoid using extension cords for appliances like washers. - 3
Check lid/door switch operation
Close the lid firmly and listen for the switch click. Use a multimeter to test continuity if you have the right tools.
Tip: A faulty switch often prevents the machine from starting. - 4
Inspect water supply lines
Make sure both hot and cold valves are fully open and hoses are not kinked. Replace any damaged hoses.
Tip: A restricted water supply can mimic many other issues. - 5
Assess drainage path
Detach the drain hose and inspect for clogs. Check the pump or filter for debris and clear obstruction.
Tip: Never force the pump impeller; use gentle tools to remove debris. - 6
Test run and observe
Reconnect everything, plug in, and run a short cycle with a small load to verify normal operation.
Tip: If you hear unusual noises or see leaks, power down and recheck connections.
Diagnosis: Machine won't start, stops mid-cycle, or won't drain/spin
Possible Causes
- highPower issue (unplugged, outlet fault, or tripped circuit breaker)
- highDoor/lid switch defective
- mediumControl panel or timer fault
- lowDrain pump or clogged hose
Fixes
- easyCheck outlet with a known-good device; reset the circuit breaker; ensure the plug is firmly seated
- easyInspect the lid switch by closing the lid and pressing the switch; replace if unresponsive or loose
- easyPower cycle the washer: unplug, wait 60 seconds, plug back in; if available, run a self-test mode
- mediumInspect and clear the drain hose and pump filters; remove debris and flush with water
- hardIf the problem persists, contact a professional for motor, belt, or motherboard diagnostics
FAQ
Why won’t my washer start even when it’s plugged in?
Check the power outlet, circuit breaker, and door/lid switch. If the button panel still doesn’t respond, there may be a control board issue requiring professional service.
First check the outlet and door switch; if it still won’t start, a professional may be needed.
My washer won’t drain. What should I check first?
Inspect the drain hose for kinks or clogs, clear the pump filter if present, and ensure the pump motor isn’t blocked. If drainage remains an issue, call a technician.
Check the drain hose and pump filter, and if needed, contact a professional.
What does it mean if there’s water leaking from the washer?
Leaks usually indicate a worn door seal, loose hoses, or a cracked tub. Tighten connections and replace damaged parts as needed, and consider a professional assessment for persistent leaks.
Look at hoses and seals; if leaks continue, seek a professional repair.
Are there common error codes I can interpret at home?
Many models display codes that point to specific issues (balance, door, drain). Refer to your user manual or manufacturer site for code explanations and recommended actions.
Check the manual for what error codes mean and the steps to fix them.
Should I repair or replace a failing washing machine?
Repair costs depend on the fault and appliance age. If repair costs approach or exceed half the price of a new unit, replacement may be more cost-effective.
Weigh repair costs against buying a new unit and consider efficiency gains.
Watch Video
The Essentials
- Identify signals early to avoid full breakdowns
- Start with power, lid switch, and water supply checks
- Move to drain and spin issues only after basics
- Call a pro if you encounter complex components
- Maintain regularly to extend washer life