What is Wrong with My Washing Machine? A Practical Troubleshooting Guide
Urgent, expert troubleshooting guide to diagnose what is wrong with my washing machine and fix common issues safely. Step-by-step checks, diagnostic flow, and prevention strategies for homeowners and renters.

Most likely, the issue is a clogged drain pump or filter, or a blocked drain hose, which prevents water from draining and keeps the drum from spinning. Begin by unplugging the unit, inspecting and cleaning the pump filter, and clearing the drain hose. If the water remains, proceed to the diagnostic workflow.
What is wrong with my washing machine and why it matters
If you are asking what is wrong with my washing machine, you’re not alone. Homeowners and renters rely on a washer every week, and a single fault can cascade into leaks, ruined clothes, or wasted water. Understanding the root cause starts with recognizing the most common failure modes: drainage issues, belt or motor problems, clogged filters, or electronic control glitches. In this guide, we focus on practical diagnostics you can perform safely, before calling a repair tech. The goal is to identify symptoms clearly, rule out simple causes, and decide when professional help is needed. By learning the typical patterns of failure, you can act quickly and minimize downtime. This article uses careful, step-by-step checks and emphasizes safety and prevention. Remember, what is wrong with my washing machine can often be narrowed down to a few predictable culprits, and early action saves money and stress.
Quick checks you can do safely (before you call a tech)
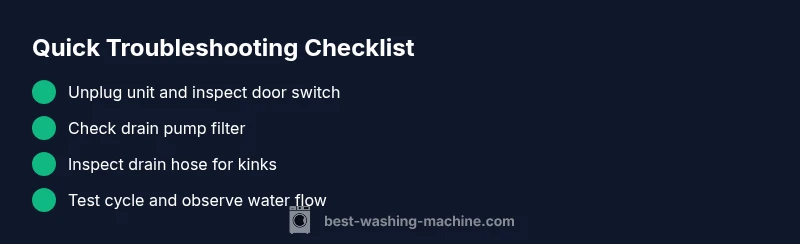
Safety first: unplug the unit and dry hands before touching any components. Start with simple checks:
- Confirm power: plug in a lamp or use a tester to verify the outlet works.
- Lid/door switch: ensure the lid is fully closed and the switch engages—many models won’t start if it’s loose or defective.
- Cables and hoses: inspect the power cord for damage and look for kinks or leaks in water hoses.
- Load and balance: redistribute heavy or bulky items, especially in top-load machines, to avoid constant unbalance.
- Short cycle test: run a quick cold wash to observe basic behavior and listen for obvious clunks or grinding sounds.
If these checks don’t restore function, you’ll move to deeper diagnostics. These quick tests cover the most common non-invasive issues and can prevent a service call when the fix is simple and safe.
Diagnosing the symptom: not draining, not spinning, leaks, or noise
Washing machines present a few distinct symptom clusters. Not draining means water remains in the tub after the cycle ends; not spinning leaves clothes soaking wet; leaks point to hoses, seals, or the drum; unusual noises often signal a worn belt, faulty pump, or mechanical obstruction. Start by noting exact symptoms, error codes, and the model type—these details guide the diagnostic path. Next, reproduce the symptom in a controlled way: run a short cycle with a small load and observe how water moves, when it stops, and whether the drum spins. Record any error codes that flash on the display. This precise symptom mapping reduces guesswork and accelerates fixes; it also helps you decide whether to fix in place or call a professional.
Diagnostic flow: symptom → diagnosis → solutions
- Identify the primary symptom (drainage, spin, leak, or noise).
- Run a minimal, controlled test to observe behavior and confirm when the issue occurs.
- Check the most likely culprits first (drain pump, filters, and drain hose).
- If the simple checks pass but the symptom remains, escalate to less common causes (belts, motor couplings, or control boards).
- Apply the appropriate fix or replacement, then re-test to verify operation.
- When in doubt, or when water exposure risks electric shock, contact a licensed technician.
This flow keeps you focused on symptoms and outcomes, reducing unnecessary parts replacement and unsafe experiments.
Common causes in order (and how to test them)
- Clogged drain pump or filter: Hear or see water sludge? The pump may be blocked. Test by locating and cleaning the filter, then running a drain cycle. This is typically an easy fix for many models.
- Blocked or kinked drain hose: Water may back up if the hose is bent or blocked. Detach and inspect for clogs or sharp bends; clear and straighten as needed.
- Faulty lid/door switch: Some machines won’t drain or spin if the switch fails. Test by gently pressing the switch during operation and listening for activation cues.
- Worn belt or damaged motor coupling: Older machines may lose drive. If you hear grinding or see the drum not turning despite motor running, this is a more involved repair.
- Electrical or control-board issue: Error codes can indicate a board fault. This typically requires a professional diagnosis to avoid further damage.
Testing in this order helps isolate the root cause with minimal disruption and cost.
Step-by-step fix for the most common cause
- Unplug the washer and move it to access the back panel safely.
- Locate and remove the drain pump filter; place a towel to catch residual water.
- Clean the filter thoroughly and remove any debris from the pump housing.
- Reassemble the filter and reconnect hoses, ensuring clamps are snug.
- Re-attach power and run a short drain cycle to confirm water exits freely.
- If water still doesn’t drain, inspect the drain hose for kinks or blockages and clear them.
- Test a full wash cycle with a small load. If the problem remains, proceed to professional help.
Tip: Always dry your hands and wear protective gloves when handling hoses or metal panels. If you see damaged wiring or burning smells, stop immediately and call a pro.
Safety tips and when to call a professional
- Always unplug before starting any inspection beyond the console area.
- Do not attempt to disassemble high-voltage components or water-in-contact areas without proper training.
- If you notice burning smells, warm or melted insulation, or exposed wiring, stop and contact a licensed technician.
- If the problem requires disassembly of the drum assembly, sealed bearings, or motor replacement, professional service is recommended.
- Consider the age and overall cost of ongoing repairs; when in doubt, a professional assessment can save money and prevent safety risks.
By adhering to safety guidelines, you reduce risk while you diagnose and fix common issues.
Maintenance to prevent future issues
- Create a routine: run a monthly maintenance wash with a descaler or mild cleaner to prevent mineral buildup.
- Clean the drum and door seal to prevent mold and odors; wipe away soap residue after cycles.
- Check hoses regularly for cracks, bulges, or leaks and replace as needed.
- Level the machine on a flat surface to avoid unbalanced loads; adjust feet if necessary.
- Keep the drain area clear and avoid forcing items into hoses.
Preventive steps save downtime and money while extending the life of your washing machine.
How to choose a repair tech and what to expect
Choosing a qualified technician involves checking licenses, reviews, and parts availability. Ask about the expected diagnostic fee, whether the price includes parts and labor, and whether they guarantee their work. Expect a hands-on assessment, a clear explanation of the root cause, and a written estimate before proceeding with any repair. A reputable pro should present options, including a recommended fix and timeline, and outline safety considerations. After service, request maintenance tips tailored to your model and usage. This ensures you get value from the visit and reduces the chance of repeated issues.
Steps
Estimated time: 60 minutes
- 1
Power down and safety check
Unplug the machine and move it to access panels safely. Verify the area is dry and free of standing water before touching any components.
Tip: Never work with an appliance powered or connected to water. - 2
Access drain pump and filter
Remove the access panel or filter cover. Place a towel to catch residual water and prepare a container for drainage.
Tip: Have rags ready; pumps can leak when opened. - 3
Clean filter and inspect pump
Clean the pump filter thoroughly. Look for debris that could block impellers; gently remove any obstruction from the housing.
Tip: Do not force debris through the pump; clear it gently. - 4
Check drain hose and connections
Detatch the hose from the wall or machine, inspect for kinks or blockages, and clear any clogs. Reconnect securely.
Tip: Keep hose clamps tight to prevent leaks. - 5
Run a test cycle
Plug in and run a short drain cycle, then a rinse and spin to verify proper operation.
Tip: Listen for smooth pump operation and drum rotation. - 6
Escalate if needed
If the issue persists after these steps, contact a licensed technician for a deeper inspection or replacement parts.
Tip: Document symptoms and error codes for the tech.
Diagnosis: Machine won't drain or spin; water remains in tub
Possible Causes
- highClogged or failed drain pump
- mediumBlocked or kinked drain hose
- lowWorn belt or damaged motor coupling
Fixes
- easyClean/replace the drain pump filter and verify the pump is operating
- easyUnblock or straighten the drain hose and check for clogs downstream
- hardInspect belts and motor couplings; replace if worn or broken
FAQ
What are the first signs my washing machine is failing?
Common early signs include draining or spinning problems, constant leaks, or unusual noises. Note any error codes and the cycle stage when issues appear to guide troubleshooting.
Watch for draining or spinning problems and any error codes. This helps you start troubleshooting quickly.
Why won’t my washer drain?
Drain failure is often caused by a clogged pump filter or hose, or a blocked drain hose downstream. Start by inspecting and cleaning the filter, then check the hose for clogs.
The most common drain problem is a clog in the filter or hose; cleaning fixes many units.
My washer won’t spin clothes dry. What should I check?
Check for unbalanced loads, a faulty lid switch, or a worn belt in older models. Correct load balance, test the lid switch, and inspect the drive belt if accessible.
Unbalanced loads or a bad lid switch are frequent spinning culprits.
Is it safe to troubleshoot a washer myself?
You can perform basic checks safely by unplugging and inspecting accessible parts. Avoid opening electrical components or hoses that carry water if you’re not sure what you’re doing.
Yes, for simple checks, but avoid risky disassembly of electrical parts.
When should I replace the washer instead of repairing it?
If repairs are frequent or the machine is old, replacement may be more cost-effective in the long run. Consider overall performance, energy use, and reliability.
If repairs pile up and the washer is old, replacement is often the better choice.
Can I replace a drain hose myself?
Yes, if you can match the correct hose type and securely connect it. Make sure the hose is free of kinks and rated for your washer.
Yes, replacing the hose is doable if you pick the right part and connect it properly.
The Essentials
- Identify the symptom clearly before acting
- Start with safe, simple checks first
- Drain-related issues are the most common culprits
- Test after each fix to confirm success
- Call a pro when risks or costs escalate