Local Washing Machine Repair: Quick Fixes & Finding a Pro
Learn safe, practical local washing machine repair strategies, when to DIY vs hire, and how to choose a trusted local technician. This guide covers safety, diagnostics, maintenance, and planning for service visits with clear checklists.

This guide helps you handle local washing machine repair by outlining safe diagnostic steps, when to DIY versus hire a pro, and how to compare nearby technicians. You’ll learn basic troubleshooting, essential safety practices, and how to prepare for a repair visit—so you can fix common problems efficiently and responsibly.
Understanding Local Washing Machine Repair
Local washing machine repair focuses on diagnosing and fixing issues with professionals who operate within your neighborhood. A local approach provides in-person assessment, faster response times, and easier warranty handling for parts and labor when compared to distant service options. According to Best Washing Machine, many households benefit from a targeted, in-person visit to confirm the problem before replacing parts or scheduling a full service call. This guide explains how to plan a local repair, what to expect from a technician, and how to compare options without sacrificing safety or results. By staying close to home, you can often coordinate follow-up visits more easily and support local businesses while protecting your daily laundry routine.
Understanding the scope of local repair helps you decide between quick DIY fixes and professional service. Minor clogs, filter cleanouts, and hose inspections are often within reach for careful homeowners. More complex issues—such as failing drum seals, faulty electronic controllers, or worn bearings—usually benefit from a licensed technician. Best Washing Machine’s analysis shows that homeowners value clear communication, transparent pricing, and a documented diagnostic plan when selecting a local service. Use this section as a framework to assess symptoms, gather model details, and compare nearby providers before committing to a repair path.
not_start_conclusion_markdown_to_avoid_duplication
Tools & Materials
- Screwdriver set (Phillips and flathead)(Include small Torx if present in your model’s fasteners.)
- Multimeter(Used to test switches and basic components safely.)
- Needle-nose pliers(Helpful for hose clamps and small connectors.)
- Flashlight(Inspect dark corners, drum area, and behind panels.)
- Owner’s manual and model/serial information(Have this on hand to verify parts and compatibility.)
- Bucket, towels, and rags(For catching any residual water during checks.)
- Smartphone or camera(Document wiring, hose routing, and codes for the technician.)
Steps
Estimated time: 60-90 minutes
- 1
Power down and secure the area
Unplug the washer and shut off the water supply to prevent leaks. Move the machine away from the wall if safe to access hoses and the back panel. This step minimizes the risk of electric shock and water damage during inspection.
Tip: Take a quick photo of all connections before disconnecting anything to aid reassembly. - 2
Check basic power and water supply
Verify the outlet is delivering power and the water valves are fully open. If the unit doesn’t respond to power, inspect a tripped breaker or a blown fuse. If water isn’t filling, ensure hoses aren’t kinked and that the inlet screens aren’t blocked.
Tip: Use a non-contact tester for a quick voltage check, then confirm with a meter if you suspect a switch issue. - 3
Inspect door/lid switch and seals
A faulty door switch or worn door seal can prevent operation or cause leaks. Gently press the switch manually to see if the drum responds and check gaskets for tears or residue that could impede sealing.
Tip: If the switch feels loose or sticky, note this for the technician as a potential cause. - 4
Examine hoses, pumps, and filters
Look for cracks, bulges, or leaks in inlet and drain hoses. Remove and clean any lint filters or debris that could impede drainage. Listen for abnormal pump noises that may indicate a clog or worn impeller.
Tip: Always unplug first and avoid pulling hoses out with force to prevent damage. - 5
Test drainage pathway
Run a short cycle or use the drain function to observe whether water drains properly. If the tub remains full, there may be a blockage in the pump, hose, or drain line.
Tip: Document the symptom with a quick video or photos for the technician. - 6
Check for error codes and fault indicators
Note any blinking LEDs or displayed fault codes in the control panel. Reference the manual to interpret common codes, and record them for your repair visit.
Tip: Some codes require a specific sequence to reset; avoid repeatedly clearing them without understanding the meaning. - 7
Decide on parts versus service
If a simple part can be replaced (like a hose or filter), you may handle it yourself or with a local technician’s guidance. For complex electronics or drivetrain issues, plan a professional diagnosis and part order.
Tip: Ask for a written estimate before ordering parts or scheduling service. - 8
Prepare for the repair visit
Gather model/serial numbers, symptom logs, and your preferred communication method. Provide access to the machine and, if possible, a time window for the technician’s visit.
Tip: Clear a workspace and ensure pets/pets are kept away during the appointment.
FAQ
Is it safe to attempt local washing machine repairs myself?
DIY can be safe for basic checks if you follow safety guidelines, unplug power, and avoid internal components. For electrical or sealed components, hire a professional.
DIY can be safe for basic checks if you follow safety guidelines and unplug the power. For electrical parts, hire a pro.
When should I hire a professional instead of DIY?
If you smell burning, hear grinding, notice persistent leaks, or suspect a faulty motor or control board, a professional repair is recommended.
If you smell burning or hear grinding, or if there are leaks, call a professional.
What is a typical cost range for local washing machine repair?
Repair costs vary by region, parts, and labor; ask for a written estimate before proceeding and compare two or three local options.
Costs vary by location and parts; get a written estimate and compare options.
How long does a typical repair take?
Diagnostics may take 30-60 minutes; depending on the issue, the full repair could require part delivery and a follow-up visit.
Diagnostics take about half an hour; full repair timing depends on parts availability.
What should I do to prepare for a repair visit?
Have your model and serial numbers ready, document symptoms, and make sure the machine is accessible; share contact preferences for the technician.
Have your model/serial ready and describe symptoms so the tech can prepare.
How can I verify a technician’s credentials?
Check licenses, insurance coverage, customer reviews, and request a written estimate and warranty details before work starts.
Ask for license, insurance, references, and a written warranty before any work.
Watch Video
The Essentials
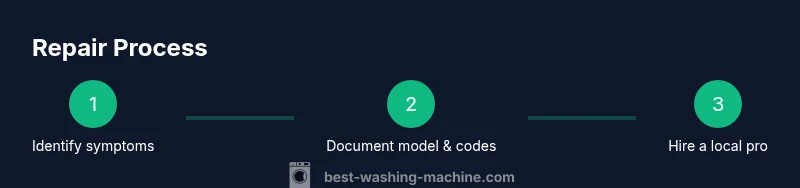
- Identify safety prerequisites before touching the machine
- Document symptoms and model data to speed up diagnostics
- Vet local technicians for licenses, warranties, and references
- Differentiate DIY-friendly tasks from complex repairs
- Prevent future issues with regular washer maintenance