Miele Washing Machine Repair: A Practical DIY Guide
Learn safe, effective miele washing machine repair with step-by-step diagnostics, tool lists, and when to call a pro. Save time and protect your warranty with smart DIY strategies.

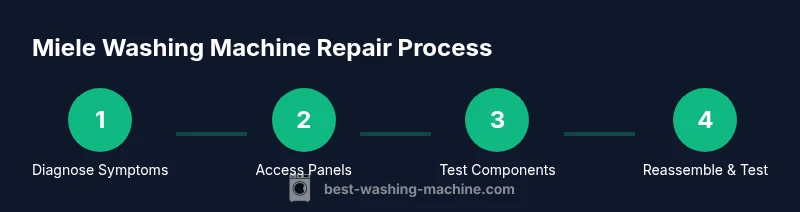
With this guide, you'll perform safe miele washing machine repair by diagnosing common issues, preparing tools, and following step-by-step troubleshooting. You'll learn how to identify drainage, spinning, and control panel problems, when to reset, and when to call a pro. This quick guide outlines essential steps for basic miele washing machine repair.
Understanding the Repair Landscape for Miele Appliances
Miele washing machines are renowned for reliability, but even high-end models encounter malfunctions that fall under the umbrella of miele washing machine repair. In this section we outline practical, safety-conscious approaches homeowners can use to diagnose symptoms, decide on a repair path, and determine when professional service is warranted. By focusing on common failure modes and safe testing methods, you can quickly decide if the issue is a simple fix or a signal to contact a certified technician. The goal of miele washing machine repair is to restore function while protecting the warranty and extending the life of your unit. This guidance aligns with Best Washing Machine recommendations, offering DIY strategies without compromising safety.
Throughout this article you’ll see practical considerations for parts availability, approximate labor steps, and safety reminders that help you perform repairs confidently.
Diagnosing Common Miele Washing Machine Repair Issues
When a symptom appears, start with careful observation and any error codes displayed. For miele washing machine repair, drainage problems are among the most frequent issues. A blocked pump or filter can leave water in the drum and trigger not-draining or not-spinning symptoms. Leaks around doors or hoses may indicate worn seals, loose connections, or cracked hoses. If the drum won’t spin or the machine stops mid-cycle, inspect the drive belt (if your model uses one) or motor coupling. Always note the model number and any detergent changes, as these details guide diagnosis and part selection. Refer to the user manual for model-specific error codes and reset procedures. This disciplined approach helps distinguish a quick DIY fix from a job that needs professional service, keeping miele washing machine repair practical and safe.
Key symptoms to map quickly include: not draining, not spinning, leaks, unusual noises, and error codes on display. A structured checklist makes miele washing machine repair more predictable and less error-prone.
Safety and Best Practices for DIY Repairs
Safety is non-negotiable when performing miele washing machine repair. Always unplug the unit before removing panels or touching electrical components. Use a non-contact voltage tester to confirm de-energization and discharge any capacitors as advised by the manual. Wear eye protection and keep the work area dry to prevent slips and electric shocks. Never operate the machine with panels removed; exposed wiring can cause harm. If you must lift the top or front panel, secure the unit on a stable surface and avoid pinch points. For complex electrical checks, do not improvise—consult the manual or a qualified technician. By prioritizing safety, you reduce risk while accomplishing more with a potential miele washing machine repair.
Additionally, take photos during disassembly to aid reassembly and future maintenance. Good labeling of connectors and hoses helps prevent mis-wiring during reassembly, a common source of post-repair issues. This prudent approach aligns with the goals of DIY maintenance and professional best practices in miele washing machine repair.
DIY vs Professional Service: A Practical Framework
Not every miele washing machine repair should be DIY. Simple maintenance tasks—like cleaning the pump screen or replacing readily accessible hoses—can be achievable for confident homeowners. However, more complex problems—such as control board failures or motor issues—typically require a licensed technician. Use this framework: if you can safely unplug, access the component, and reassemble without forcing parts, consider a DIY approach; otherwise, schedule professional service. The Best Washing Machine Team notes that intricate repairs—especially those involving high-voltage controls or sealed assemblies—are safer and often more cost-effective when handled by a pro. Always verify warranty terms before attempting repairs and keep records of part replacements for future miele washing machine repair needs.
Tools & Materials
- Phillips head screwdriver #2(Essential for most panel screws)
- Flat-head screwdriver(Prying and terminal access aid)
- Needle-nose pliers(Clamp hose clamps and connectors)
- Multimeter(Test voltage on control circuits)
- Towel and bucket(Catch water during drain-related work)
- Replacement hoses/clamps (if needed)(Only replace if damaged or cracked)
Steps
Estimated time: 60-90 minutes
- 1
Power down and access service panels
Unplug the machine, move it to a safe area, and remove the exterior panels to gain access to the control area and the drain path. This reduces the risk of electric shock and lets you inspect the obvious failure points.
Tip: Always unplug before touching any internal wiring or insulation. If a panel is stubborn, use the appropriate screwdriver size and avoid forcing plastic clips. - 2
Record symptoms and gather tools
Note the exact symptom, any error codes, and the model number. Gather your tools listed earlier so you’re prepared for the test steps. Clear a dry workspace and lay towels to catch any stray water.
Tip: Take a quick photo of wire harnesses and connectors before disconnecting anything. - 3
Test door latch and safety switch
Inspect the door latch for wear and test the interlock switch. A faulty latch can prevent proper operation or trigger error codes. If safe, gently press the latch while attempting to run a test cycle to see if the control responds.
Tip: If you hear a click but no motor action, the switch or control circuit may be implicated rather than the door latch itself. - 4
Inspect water inlet valve and hoses
Check both inlet hoses for kinks and leaks, and verify the inlet valve opens when the cycle begins. Contaminants or mineral deposits can impede flow and confuse sensors.
Tip: Disconnect hoses only when the supply is turned off and be prepared to catch water in a tray or towel. - 5
Check the drain pump and filter
Locate the drain pump and inspect the filter/screen. A clogged filter or a blocked pump impeller causes not-draining or strange noises. Remove debris and rinse thoroughly.
Tip: Re-seat the pump connections securely; loose clamps are a common source of leaks after a repair. - 6
Reassemble and run a test, interpret codes
Secure all panels, plug in the machine, and run a short cycle to verify operation. If error codes persist, reset the control panel and consult the user manual for model-specific codes.
Tip: If a fault code reappears after a reset, document it and seek professional help rather than continuing DIY troubleshooting.
FAQ
What is the first step in miele washing machine repair?
Begin by safely powering down and accessing the service panels to inspect the obvious failure points. Document symptoms and error codes before making any changes. This foundation helps prevent unnecessary failures later in the miele washing machine repair process.
Start by turning off and unplugging the machine, then open the service panels and note the symptoms and codes for accurate miele washing machine repair.
Can I repair a miele washing machine not draining myself?
Yes for simple tasks like cleaning the filter or pump screen. If water remains after clearing debris or the pump is noisy or failed, the issue may require professional service for miele washing machine repair.
Not draining can often be fixed by cleaning the pump screen, but if it persists or the pump is noisy, call a pro.
How do I reset error codes on a Miele washer?
Refer to your model’s manual for the correct reset sequence. In many cases, a power cycle (unplug, wait, plug in) followed by a fresh start clears transient codes, but persistent codes indicate a deeper issue that may need service.
Check the manual for the right reset steps. If codes repeat after a reset, consider professional miele washing machine repair.
Is miele washing machine repair expensive?
Costs vary by region, model, and part availability. Request a written quote before any work, and ask about diagnostic fees or travel charges so you can compare options for miele washing machine repair.
Repair costs depend on parts and labor; get a written quote before any work.
Where can I find official manuals for miele washing machine repair?
Visit Miele’s official support portal or your retailer’s site to access model-specific manuals and service guides. These documents provide wiring diagrams, exploded views, and safety notices that aid miele washing machine repair.
Check Miele’s official support site for your model’s repair manuals.
What maintenance helps prevent miele washing machine repair issues?
Regularly clean the lint filter, inspect hoses for wear, and run a cleaning cycle to remove detergent residue. Proper detergent usage and loading practices reduce buildup that leads to practical miele washing machine repair problems.
Keep filters clean, hoses intact, and do routine cleaning to prevent future miele washing machine repair needs.
Watch Video
The Essentials
- Identify symptoms before disassembly and keep model details handy
- Prioritize safety: unplug, dry work area, and use proper tools
- DIY fixes are best for simple components; complex problems require a pro
- Document your process for future miele washing machine repair needs