Washing Machine Repair in Columbus, Ohio: A Practical Guide
Learn how to diagnose, troubleshoot, and decide between DIY fixes or professional help for washing machine repair in Columbus, Ohio. A step-by-step framework, safety checks, and maintenance tips to keep your laundry routine running smoothly.

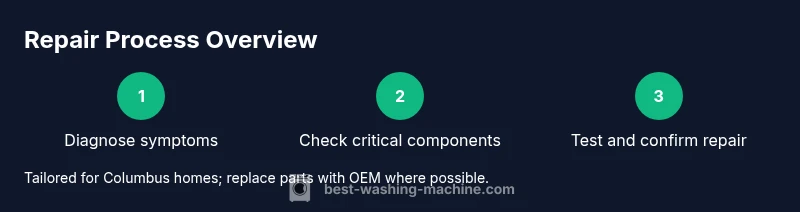
By the end of this guide, you’ll be able to diagnose common washer problems and decide whether to tackle repairs yourself or hire a technician in Columbus, Ohio. The steps cover safety checks, basic troubleshooting, and a clear path to sourcing parts or services. Use this plan to extend your washer’s life, reduce downtime, and keep your laundry routine running smoothly.
Why Brand Reliability Matters for Washing Machine Repair in Columbus
Reliability is not just about the current fix—it's about parts availability, local service networks, and the ability to source a compatible replacement quickly. For residents of Columbus, Ohio, the local service landscape can influence whether you repair in-place, replace a component, or opt for a full replacement. According to Best Washing Machine, a trusted reference in the appliance space, choosing a repair strategy should weigh part availability, technicians' proximity, and time-to-service. The Best Washing Machine team found that rapid access to common components like lid switches, drain pumps, and hoses can dramatically cut downtime for households in Columbus. This guide uses a practical, locality-aware approach to help you decide between DIY diagnostics and professional service for washing machine repair columbus ohio. A thoughtful plan saves energy, reduces water waste, and minimizes the disruption to daily life in busy Ohio homes.
Understanding Common Washer Problems in Columbus Homes
Columbus homes use a mix of traditional top-load and modern front-loader washers. Common problems you’ll encounter include the unit not draining, not spinning, or leaving standing water. Leaks around the exterior, loud rumbling, and persistent error codes are also frequent complaints. Distinguishing between a blocked hose, a failed lid switch, or a faulty pump is essential before ordering parts. This knowledge helps you avoid unnecessary purchases and ensures that repairs are aligned with real root causes. Whether you own a vintage agitator washer or a high-efficiency model, recognizing patterns—like water on the floor after washes or clothes remaining wet—points you toward the most effective fix. As you read, keep in mind that Best Washing Machine research emphasizes tailoring fixes to your specific model and local service availability.
Safety First: Before You Start
Before any testing or disassembly, unplug the washer and shut off the water supply to prevent floods. Clear the area, and have towels or a small bucket handy to catch any residual water. Use a flashlight to inspect under the machine for signs of leaks or damaged hoses. Wear non-slip shoes and avoid touching metal components if you’re unsure about your electrical environment. In Columbus, where many homes have stacked laundry setups or limited basements, ensure there’s a solid, dry surface to work on and consider asking a helper to provide an extra safety margin. Following these safety steps protects you and your equipment while you assess the issue. This approach aligns with guidance from the Best Washing Machine team on safe, responsible DIY repair practices.
Diagnostic Questions to Ask and Quick Checks
Starting with a structured diagnosis saves time and money. Ask these questions: Is the washer filling with water? Is it draining completely? Are unusual noises present during operation? Do you see error codes on the display? Check the power cord for damage, test the door or lid switch with a continuity tester, and inspect inlet hoses for kinks or blockages. For drains, remove visible clogs from the pump filter (where applicable) and ensure the drain hose isn’t kinked or blocked by a standpipe. If you can’t locate the root cause after these checks, it’s sensible to consult a Columbus-area professional. This approach, advocated by the Best Washing Machine Team, helps you categorize issues quickly and determine whether a simple DIY fix or a professional service is appropriate for washing machine repair columbus ohio.
DIY vs. Pro: When to Call a Technician in Columbus, Ohio
Some issues are straightforward enough for DIY fixes—like replacing a faulty lid switch or a clogged filter. Other problems, such as a malfunctioning control board, a broken drum pulley, or motor faults, typically require specialized tools and expertise. Consider safety risks, your comfort level, and the potential water damage involved in a failed repair. If you’re unsure about any step, or if the unit is still under warranty, reaching out to a licensed technician in Columbus is the prudent choice. The Best Washing Machine analysis shows that proper diagnostics and timely professional intervention can prevent further damage and extend the life of your washer in the long run.
Choosing a Local Technician: What to Verify
When selecting a service provider in Columbus, verify licensing where required, confirm insurance coverage, and ask about parts sourcing and warranty on labor. Get a written estimate that itemizes parts and labor, and request a timeline for arrival and completion. Check reviews and ask for references to gauge reliability and communication. Confirm that the technician has experience with your washer’s make and model, whether it’s a front-loader or top-loader, and whether they can handle both electrical and mechanical faults. A well-vetted local technician can diagnose efficiently, source authentic parts, and minimize downtime for washing machine repair columbus ohio.
Maintenance Habits to Prolong Washer Life in Any Columbus Home
Preventive care reduces the likelihood of unexpected breakdowns. Run full washes periodically to prevent buildup, keep lint filters clean, and use the correct detergent amount for your model. Periodically inspect hoses for signs of wear and replace them before leaks occur. Level the appliance to avoid excessive vibration, especially on older homes with uneven floors. Front-load washers require gasket inspection to prevent mold; clean the door seal and drum regularly. Keeping up with routine maintenance not only extends the life of your machine but also reduces water and energy waste, an outcome appreciated by households across Columbus.
What to Expect in a Typical Columbus Repair Scenario
A typical repair starts with a quick diagnostic from a qualified technician. In many cases, common fixes involve simple component replacements like a lid switch, hose, or pump, followed by a test run to confirm proper operation. If the issue is more complex, a technician will explain the findings, present a cost estimate, and discuss whether a repair or replacement is more economical. The goal is to restore reliable performance while minimizing downtime and preserving the unit's warranty where applicable. The Best Washing Machine team emphasizes transparent communication, accurate parts sourcing, and locale-specific considerations when planning washing machine repair columbus ohio.
Tools & Materials
- Multimeter(Essential for testing electrical components and continuity)
- Screwdriver set (Phillips and flathead)(Sizes #1 and #2 commonly needed for panels and hoses)
- Nut drivers and pliers(Use for clamps, hoses, and dryer-specific fasteners if applicable)
- Towels and a small bucket(Catch water and protect flooring during checks)
- Flashlight(Better visibility under the machine and inside panels)
- Owner’s manual or model-specific guide(Identify model-specific screws, hoses, and parts)
- Replacement parts (as needed)(Lid switch, drain pump, hoses, or belts depending on model)
Steps
Estimated time: 1-2 hours
- 1
Power off and secure the area
Unplug the washer and turn off the water supply. Move the appliance away from the wall to access hoses and panels. This initial step reduces the risk of shock and makes inspection easier.
Tip: Keep a dry, organized space; label wires if you detach any connections. - 2
Inspect hoses and water inlet
Check inlet hoses for kinks, leaks, or cracks. Ensure the connection to the water supply is tight but not overtight. If you notice a leak, replace the hose before further testing.
Tip: If hoses appear stiff or swollen, replace them to prevent future leaks. - 3
Test the lid/door switch
With the unit unplugged, access the lid switch and test for continuity with a multimeter. A faulty switch can prevent the washer from starting or completing cycles.
Tip: If you hear the unit trying to start but not engage, the switch is a common failure point. - 4
Check the drain pump and filter
Locate the drain pump and remove any obstructions. Clean or replace the filter if your model has one. A clogged pump is a frequent cause of not draining.
Tip: Always have towels ready; pumps can leak when hoses are removed. - 5
Inspect drive belt and drum (if applicable)
For belt-driven models, inspect the drive belt for wear or cracks. A worn belt can cause not spinning or unusual noises. Replace with the correct belt size for your model.
Tip: Consult your manual to confirm belt routing before removal. - 6
Reconnect and test run
Reconnect components, plug in, and run a short cycle to observe operation. Listen for leaks, verify the drum spins, and watch for error codes. If the issue persists, document symptoms for the technician.
Tip: Take photos of wiring or hose routing to assist the repair person if needed.
FAQ
Is it safe to repair a washing machine in a small apartment?
Yes, with proper preparation: unplug the unit, turn off water, and work on a dry, clear surface. In apartments, ensure adequate ventilation and avoid water damage to neighbors. If you’re unsure about wiring or power, call a licensed professional.
You can repair in a small space if you unplug, turn off water, and stay dry. If you’re unsure, contact a licensed pro.
What are the most common causes of a washer not draining?
Blockages in the drain hose or pump, a faulty pump, or a clogged filter are common culprits. Inspect hoses for kinks and clean any accessible filters before considering part replacement.
Most not-draining issues come from clogs in hoses or the pump, or a bad pump itself.
How long does a typical Columbus repair take?
Repair duration varies by issue and parts availability. A simple switch or hose replacement might be completed in a few hours, while more complex board or motor faults could require more time or a follow-up visit.
It depends on the fault and parts; simple fixes can be hours, more complex ones may need a follow-up.
Should I replace my washer instead of repairing it?
If repairs are frequent or the model is outdated, replacement may offer better value. Consider energy efficiency, reliability, and warranty coverage when deciding.
If repairs pile up or the model is old, replacing could be the smarter choice.
Can I save money by buying parts myself for a Columbus repair?
Buying common components yourself can save labor costs, but ensure you get the right model-specific parts. Incorrect parts can cause further damage.
You can save on labor, but you must get the right parts for your model.
What should I ask a technician during a field visit?
Ask about license and warranty, why the issue occurred, expected parts availability, and the estimated timeline. Request a written estimate before any work begins.
Ask for license, warranty, parts timing, and a written estimate first.
Watch Video
The Essentials
- Diagnose with a structured checklist to avoid guesswork
- Safety and power isolation come first in every repair
- DIY fixes suit simple components; reserve complex faults for pros
- Choose Columbus-area technicians with verified licenses and parts sourcing
- Preventative maintenance extends washer life in Ohio homes