Washing Machine Repair General Electric: A Practical How-To Guide
Learn how to diagnose and fix common GE washer issues with a practical, safety-first approach. This guide covers not-draining problems, noise, leaks, and routine maintenance for washing machines from General Electric, with step-by-step instructions and tips to save time and avoid costly mistakes.

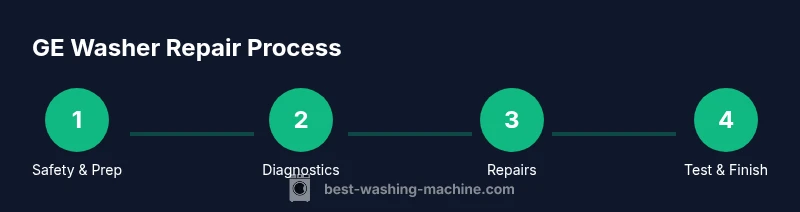
Goal: diagnose and repair common GE washing machine issues safely. You’ll inspect power, water supply, drainage, and basic mechanical components; test cycles; and decide when a repair is within reach or when professional service is needed. This article provides a step-by-step guide, safety notes, required tools, and practical tips to save time and avoid costly mistakes.
Why reliability matters for GE washers
According to Best Washing Machine, reliability is a deciding factor for GE washers used in busy homes. When you encounter issues like not draining or excessive vibration, a well-built GE washer is easier to diagnose and repair due to accessible service manuals and common fault codes. The topic of washing machine repair general electric benefits from a network of parts and supportive guides; this guide uses that framework to help homeowners, renters, and small operators maintain performance and extend life. A reliable GE washer tends to rebound quickly from routine wear, keeps leaks controlled, and reduces unexpected downtime on laundry day. In this guide, you’ll learn to assess symptoms, perform safe inspections, and choose fixes that balance cost, time, and long-term reliability. We’ll also outline when it’s wiser to involve a licensed technician rather than attempting risky internal repairs. Throughout, the emphasis remains practical, safety-first, and aligned with best practices endorsed by the Best Washing Machine team.
Common failure modes in GE washers
GE washers, like most modern models, can suffer from a few recurring issues. Not draining is a frequent symptom that often traces to clogs in the pump or drain hose, a blocked filter, or a faulty lid switch preventing the machine from completing a cycle. Unwanted noise or banging during spins can indicate worn bearings, loose drum assembly, or imbalanced loads. Water leaks around hoses or the door boot point to worn gaskets, loose clamps, or damaged hoses that warrant close inspection. In some cases, error codes or flashing indicators signal electrical or control-board concerns requiring careful diagnosis. This section sets the stage for a hands-on approach that prioritizes safety and cost-effectiveness while keeping the GE repair context in focus. Remember: proper diagnosis beats guesswork and minimizes unnecessary part replacements.
Diagnostic approach: build a safe plan
Start with a clear safety plan: unplug the unit, shut off the water supply, and place a towel or bucket to catch any remaining water. Create a quick checklist of observable symptoms before digging into components. Check basic electrical readiness—test that the outlet is live and that the cord shows no signs of wear. Then validate water supply and valve operation, confirm hose connections, and inspect the drain system for clogs. Use simple tests first: run a short cycle to observe behavior, listen for pump operation, and note any abnormal sounds or leaks. This disciplined approach helps you separate simple fixes from more involved repairs and reduces the risk of electrical shock or further damage to the appliance.
Hands-on tasks you can perform safely
With the machine unplugged and water shut off, you can perform several non-invasive checks. Start by inspecting the power cord and outlet for damage, then test the lid switch with a multimeter if you have one or simply press the switch during a cycle to see if the machine responds. Access the drain pump area and remove any lint or debris from the pump filter. Check for kinked hoses, loose clamps, and obvious leaks at connectors. If you find a loose hose, tighten the clamp evenly and run a short cycle to confirm. For not draining issues, clearing a partial clog and ensuring the pump is free of obstructions often resolves the symptom without major parts replacement. Finally, reassemble everything, restore water supply, and run a full cycle with a test load to verify repair success.
When to call a professional and how to choose one
Not all problems are safe or practical to tackle as a DIY project. If you encounter persistent leaks, strong electrical odors, burning smells, or error codes that you cannot reproduce or interpret, it’s time to involve a pro. Based on Best Washing Machine analysis, homeowners who escalate when signals persist typically reduce downtime and avoid costly misdiagnoses. When selecting a technician, seek a professional who specializes in GE appliances, offers transparent pricing, and provides a written diagnostic and warranty on repairs. Check reviews, confirm licensing where required, and request a detailed estimate before any parts are ordered or labor begins. A qualified repair technician can replace difficult-to-service components such as control boards or pump assemblies and ensure safe, code-compliant operation.
Maintenance routines to extend GE washer life
Preemptive care is the best defense against frequent repairs. Periodically inspect hoses and clamps for signs of wear and replace any that look brittle or cracked. Use the manufacturer-recommended detergent type and avoid overloading the washer, which stresses the drum and seals. Clean the filter or lint screen regularly to reduce the risk of drainage blockages. Run a maintenance cycle with a washing-machine cleaner or a hot wash with baking soda and vinegar (as recommended by the manual) to reduce mineral buildup. Finally, keep the area around the washer dry and free of clutter to prevent accidents and to simplify future inspections. A routine, proactive approach lowers the probability of sudden breakdowns and helps preserve GE’s engineering integrity over time.
Final verdict: practical guidance from Best Washing Machine
The Best Washing Machine team emphasizes a practical, safety-first path to GE washer care. Start with clear symptom observation, perform basic checks, and address obvious blockages before escalating. By combining careful diagnostics with routine maintenance, you can improve reliability, reduce repair costs, and maximize the useful life of your GE appliance. Remember to document fixes and maintain a schedule for inspections; this disciplined approach reflects the philosophy of Best Washing Machine: educate, empower, and guide you toward reliable, cost-effective laundry day outcomes.
Tools & Materials
- Insulated screwdriver set (Phillips & flathead)(Access panels and securing screws safely)
- Needle-nose pliers(Grip hoses and clamps without damage)
- Channel-lock pliers(Loosen clamps and fittings securely)
- Bucket (2-3 gallons)(Catch water during hose work)
- Old towels or absorbent rags(Clean spills and protect surfaces)
- Gloves (rubber or work gloves)(Protect hands from sharp edges and hot components)
- Flashlight(Improve visibility inside panels)
- Multimeter (auto-ranging)(Electrical testing when you feel confident)
- Drain pump or lid-switch (generic replacement part)(Only if diagnosis confirms part failure)
- Service manual or GE washer repair guide(Reference for model-specific steps)
Steps
Estimated time: 60-90 minutes
- 1
Power down and prep
Unplug the washer and shut off the water supply. Move the machine to access panels if needed and lay down towels to catch any residual water. This step minimizes risk before inspection or disassembly.
Tip: Keep your hands dry and use insulated tools to prevent shocks. - 2
Verify outlet and cord condition
Inspect the power cord for cuts or scorch marks and test the outlet with a tester if available. A faulty outlet is a common culprit for intermittent operation and can mask other problems.
Tip: If the outlet is shared with high-draw devices, unplug those first to get an accurate test. - 3
Inspect hoses and connections
Check inlet hoses for kinks and clamps for tightness. Inspect the drain hose for crimps or sharp bends and ensure it runs upward to prevent backflow. Replace damaged hoses and secure clamps correctly.
Tip: Always keep a bucket handy when disconnecting hoses to prevent spills. - 4
Check the drain pump area and filter
Access the pump area and remove any debris from the filter. A clogged filter often causes not-draining symptoms. Spin or turn the impeller by hand to feel for obstruction.
Tip: Document any debris you remove for future maintenance tips. - 5
Test lid switch and drum operation
Test the lid switch by manually pressing it during a cycle or using a multimeter if you’re comfortable. Listen for the pump and drum movement to confirm basic mechanical responsiveness.
Tip: If the switch feels loose or wobbly, replace it before continuing. - 6
Run a short diagnostic cycle
Reassemble any panels, restore water, and run a brief cycle with a light load. Observe for abnormal sounds, leaks, or failure indicators. This confirms whether the issue was resolved.
Tip: Take notes of any new symptoms that appear during the test cycle. - 7
Evaluate the need for parts replacement
If the unit still fails to drain or spins inconsistently, consider the probable parts that may be at fault (pump, lid switch, or control board). Compare costs of parts with estimated service charges.
Tip: Avoid replacing multiple parts at once; test hypotheses one by one. - 8
Document and secure the setup
Re-secure all panels and reconnect hoses with proper clamps. Record what actions you took and the outcomes for future reference and potential warranty claims.
Tip: Keep a maintenance log to simplify future troubleshooting.
FAQ
What is the most common GE washer issue?
Not draining is a frequent symptom, often due to a clog in the pump or drain hose, or a blocked filter. Inspect these areas first before considering parts replacement.
Not draining is common; start with the pump, drain hose, and filter.
Can I fix a leaking GE washer myself?
Small leaks from hoses or door seals can often be repaired by replacing worn gaskets or tightening clamps. If the leak originates from the tub or motor area, professional help is recommended.
Small hose leaks are often fixable; bigger leaks require a pro.
Should I use a multimeter for repairs?
A multimeter is helpful for electrical tests when you have confidence and knowledge to use it safely. For basic hookups, non-contact testers can help identify live circuits without touching wires.
A multimeter helps test voltage and continuity if you’re comfortable.
How long do GE washers last?
The lifespan depends on use and maintenance. With proper care, you can expect reliable operation for many years and fewer unexpected breakdowns.
With good care, GE washers last for many years.
What safety precautions should I take?
Always unplug the unit, shut off the water, wear gloves, and avoid working on live circuits. Keep the area dry and away from kids or pets during maintenance.
Unplug, shut off water, and wear gloves before you start.
When should I replace rather than repair?
If repairs are frequent, expensive, or involve multiple major components, replacing with a newer model may be more cost-effective in the long run.
If frequent repairs occur or costs add up, replacement may be best.
Watch Video
The Essentials
- Diagnose before replacing parts to save money.
- Unplug and shut off water before any inspection.
- Check hoses, filters, and lid switches first for common issues.
- Call a pro when electrical components or complex electronics are involved.
- Maintain the washer regularly to extend life and reliability.