Washing Machine Won't Stop Filling: Troubleshooting Guide
Urgent troubleshooting guide for the problem washing machine won't stop filling. Learn symptoms, causes, step-by-step fixes, safety tips, and when to call a pro.

The most likely cause is a faulty inlet valve or pressure switch that signals the tub to fill, along with a potential control board fault. Start by shutting off water and power, then test the inlet valve and pressure switch. If this doesn’t stop the filling, move through the diagnostic flow to secondary causes and safe fixes.
What this problem looks like in real life
If your washing machine won't stop filling, you're facing a flood risk and wasted water. The tub may fill to the top and continue running even after the cycle should end, and you might notice a loud hum from the inlet valve. This is a common emergency that homeowners encounter during busy laundry days. According to Best Washing Machine, shutting off the cold water supply at the faucet is a quick first step if you can reach it without tripping hazards. The root cause is usually a faulty inlet valve, a stuck pressure switch, or a control board fault that tells the machine to keep filling. The urgency is real: unchecked overflow can damage floors, cause water leaks, and increase your utility bill. So plan to work safely, unplug the unit when you are not actively testing, and keep children and pets away from the area. This article walks you through rapid triage, safe testing methods, and practical fixes you can perform before calling a technician.
Core causes of overfilling
There are several reasons a washer can continue to fill past the normal level. A failed water inlet valve can allow a constant trickle of water into the tub. A defective pressure switch or a pinched air line can signal the machine that the tub is not full, so it keeps filling. A clogged inlet screen at the valve can restrict or alter pressure readings, causing misreads. A malfunctioning timer or electronic control board can also override the fill limit, especially in older models. Finally, a kinked or leaky fill hose may give the washer a false sense of level, particularly when used with a high water pressure supply. For most homes, the first suspects are the inlet valve and the pressure switch, because they directly control the water level. Understanding these parts helps you prioritize tests and avoid replacing the wrong component.
Safety first: isolate power and water before touching anything
Safety is non-negotiable when dealing with electrical appliances near water. Always unplug the washer and shut off the main power to the laundry room if possible. Close both the hot and cold water valves to stop incoming water. Keep a towel handy for spills and avoid leaning or reaching into hot, wet surfaces. If you cannot safely access the valves, step back and wait for a professional. After power and water are isolated, you can begin a controlled inspection of components like the inlet valve, pressure switch, and tubing. Always handle plastic fittings with care to avoid cracking them, and never bypass safety switches to run a test. The Best Washing Machine Team emphasizes caution—safety first prevents injuries and further device damage.
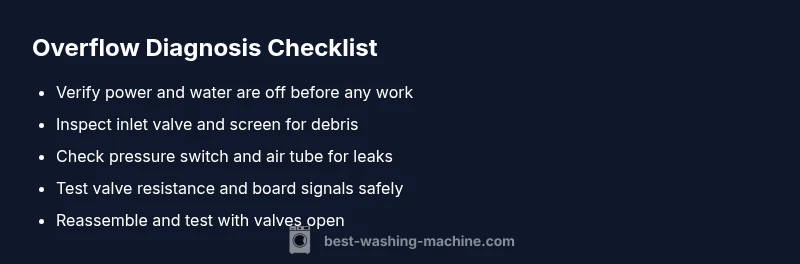
Diagnostic flow: symptom → diagnosis → solution
Start with the primary symptom – continuous filling. If the overflow occurs with both hot and cold fills, the pressure switch or its air tube is a strong suspect. If overflow occurs only with one inlet, inspect that valve and its wiring. Check the inlet screen for debris, test the valve resistance with the unit unplugged, and listen for a humming sound that persists after the cycle should end. Record any abnormal readings or sounds as you go. If you identify a stuck switch or a valve that can’t be controlled by the wiring, targeted repairs or replacements will be required. This flow keeps you focused and avoids guessing about what’s wrong.
Quick fixes you can try now
Before initiating component replacements, perform a few low-effort checks. First, gently wiggle and reseat the inlet valve connectors after unplugging the unit. Clean any debris from the inlet screen and ensure the fill hose isn’t kinked or crushed. Inspect the pressure switch tube for cracks or disconnections and replace if necessary. If you have basic electrical experience, you can measure the resistance of the inlet valve coil with a multimeter—compare to the manufacturer’s spec. After each fix, run a short test cycle with the valves open to verify whether the machine stops filling on its own. If overflow persists, escalate to more involved diagnostics or a professional service.
Prevention and maintenance to avoid overflow
To reduce the risk of future overfills, schedule regular maintenance: inspect the inlet screens every 6–12 months, check hoses for bulges or wear, and test the pressure switch annually. Use a water-softening system if you have hard water, as mineral buildup can affect fittings and sensors. Keep the laundry area clean and dry and check for any signs of leaks around the valve area. By keeping these parts in good condition, you’ll minimize labor and lower the chance of a sudden overflow interrupting your day.
When to call a pro and how Best Washing Machine can help
If you’re uncertain about electrical testing or you detect water damage beyond a basic fix, it’s time to call a professional. A qualified technician can safely test the pressure switch, valve coil, and control board, and replace components as needed. The Best Washing Machine team recommends prioritizing safety and professional diagnosis when the problem persists after basic troubleshooting. We offer guidance to help you choose the right service and ensure you receive accurate, timely repairs that restore proper water level control.
Steps
Estimated time: 1-2 hours
- 1
Power down and access
Unplug the machine and pull it away from the wall. Remove the rear access panel or top panel to reach the water inlet valve and level sensor.
Tip: Take photos of hose connections before removing fittings. - 2
Shut off water supply
Close the cold and hot water valves to stop incoming water. If one valve is hard to reach, don’t force it; unplug and reposition safely.
Tip: Have towels ready for minor drips. - 3
Check inlet valve wiring
Inspect the electrical connector at the inlet valve for corrosion or loose pins. Re-seat connectors and test for voltage per the manufacturer’s safety guidelines.
Tip: Use a multimeter with the machine unplugged. - 4
Test the pressure switch and tube
Locate the pressure switch and the small air tube leading to it. Check for cracks or disconnections; blow through the tube to ensure air can move freely.
Tip: Don't yank on the tube; detach gently. - 5
Inspect inlet screen and hoses
Disconnect the fill hose and clean the inlet screen. Check hoses for kinks and the proper routing to prevent pressure read errors.
Tip: Replace damaged hoses to prevent leaks. - 6
Reconnect, power up, and test
Reassemble the panels, plug in the unit, and run a test cycle with the water supply valves open. Monitor for any continued overflow.
Tip: If overflow recurs, document timing and sounds for the technician.
Diagnosis: Washing machine won't stop filling
Possible Causes
- highInlet valve stuck open
- highFaulty pressure switch or air tube
- mediumMalfunctioning timer or control board
- lowDefective water level sensor
Fixes
- easyReplace or reseat the inlet valve and check the wiring
- easyInspect the pressure switch and air tube for cracks, kinks, or disconnections; replace if needed
- hardTest and potentially replace the control board or timer module if signals are inconsistent
- mediumInspect the water level sensor; clean or replace as necessary
FAQ
What is the first thing I should do if my washer overfills?
Stop the fill by turning off the water supply and unplugging the machine. Check for any visible leaks and avoid running a full test until power and water are secured. This prevents further damage while you diagnose the issue.
First, unplug and shut off the water. This stops more water from entering and keeps you safe while you inspect.
Can high water pressure cause overflow?
Yes. Excessively high water pressure can push water into the tub beyond the normal level and confuse the sensor. If your home has notoriously high pressure, consider installing a pressure regulator.
Yes. High water pressure can cause overfilling; a regulator can help.
Is it safe to fix the inlet valve myself?
Replacing an inlet valve involves electrical work near water. If you have basic electrical skills and turn off power, you can inspect wiring and replace with a compatible valve. If not comfortable, hire a professional.
You can check wiring and replace the valve if you’re comfortable with electrical work; otherwise call a pro.
Will the problem occur with hot and cold fills or just one?
If overflow occurs with both hot and cold fills, the pressure switch or control circuitry is likely at fault. If it’s only one inlet, the valve for that side is suspect. Test both sides carefully.
If both fills overflow, the switch or board is likely to blame; if one side, test that valve.
How long does it usually take to complete a repair?
Simple fixes like valve or tube replacements can take 1–2 hours, while diagnosing and replacing a control board may take longer and require a service visit.
Most basic fixes take about an hour or two; complex board issues need a technician.
What safety steps should I follow during troubleshooting?
Always unplug the unit and shut off water before touching any components. Wear protective gloves and eye protection, and keep kids and pets away from the area. If you smell gas or see burning, stop and call a professional.
Unplug and shut off water, wear protection, and stay away from kids and pets while you troubleshoot.
Watch Video
The Essentials
- Shut off power and water before any inspection.
- Inlet valve and pressure switch are top suspects for overfill.
- Test wiring, screens, and tubes before replacing parts.
- Document symptoms to guide technician repairs.
- Safety first: call a pro if unsure.