What Plumbing Is Needed for Washing Machines: A Practical Guide
Learn the essential plumbing requirements for installing a washing machine, including water supply, drainage, venting, and code considerations. Practical guidance for homeowners.

Your washing machine requires a dedicated cold-water supply with an accessible shutoff valve, and a hot-water line only if your model uses it. It also needs a proper drain connection—typically a standpipe with a trap and vent as part of the home plumbing. Ensure the connections are secure, up to code, and the floor is level for safe operation.
Why the right plumbing setup matters
A reliable plumbing setup is essential for safe, efficient washing machine operation. The wrong connections can cause leaks, floods, mold, and significant property damage. In practice, what plumbing is needed for washing machine is a combination of a cold-water supply with an accessible shutoff, a drain connection that leads to a standpipe with trap and vent, and a level, sturdy floor. According to Best Washing Machine, taking a few minutes to plan before you install can save hours of trouble later. A typical installation includes securing hoses, verifying water pressure, and ensuring the machine can be leveled to prevent vibrations. For renters and homeowners alike, understanding these plumbing basics reduces the risk of costly calls to emergency plumbers and keeps laundry days running smoothly.
What counts as a cold-water supply and hot-water line
The plumbing for a washer begins with water supply lines. In most homes, you connect the machine to a cold-water shutoff valve via a flexible hose. Some models also require a hot-water hookup for cycles that use warmer wash temps; if your appliance does not need hot water, you can ignore this line. The essential idea is that the washer has a dedicated supply valve and hoses that fit standard fittings. Use color-coded hoses if possible, and avoid reusing old hoses that have kinks or bulges. Always install a backflow prevention device if your local code requires it. A reliable cold-water supply not only ensures thorough cleaning but also reduces the risk of leaks.
Drainage requirements: standpipe, trap, and vent
The drain connection is a critical part of the installation. A proper standpipe carries wastewater away from the washer and into the home's drain system. The standpipe should include a trap and be vented to prevent siphoning and odors. In many jurisdictions, dedicated drain lines must be sized and installed to prevent overflows during high-spin cycles. The drain hose from the washer should be securely inserted into the standpipe or a compatible standpipe adaptor. Do not cram the hose into a sink or tub drain; that can cause blockages and backflow.
Drain height and standpipe depth
The standpipe height must meet local building codes and the washer's drain hose design. If the standpipe is too short, wastewater can back up; if too tall, the washer may struggle to drain. In most setups, the drain connection sits above floor level and below the drum level to facilitate gravity drainage. If you are extending an existing drain, use proper piping and traps, ensuring all joints are sealed and tested for leaks. A simple rule is to keep the standpipe vertical and clear of any obstructions.
Venting and codes: why it's mandatory
Ventilation is required in many plumbing systems to prevent pressure changes that could disrupt drainage. Local codes typically require a vent to the home's main vent system, especially for laundry sinks and standpipes. Failing to vent can lead to slow drains, gurgling, and sewer gas entry. Always verify that your installation meets local code requirements and consider hiring a licensed plumber if you are unsure. The Best Washing Machine team emphasizes compliance with codes to keep your laundry area safe and functional.
Choosing materials: copper, PEX, and fittings
Material choice affects reliability and maintenance. Copper pipes offer durability; PEX is flexible and easier to install in tight spaces. When selecting fittings, aim for corrosion-resistant materials and compatible thread types for hoses and valves. Use Teflon tape on threaded connections and sealant where required by the chosen material. If your plumbing is older, you may need adapters or transition fittings to connect to existing lines. Proper material selection reduces leak risk and simplifies future maintenance.
Installing and verifying connections safely
Safety comes first. Start by turning off the main supply and releasing residual pressure. Attach the cold-water valve and (if needed) hot-water valve, then connect the hoses to the machine and valves securely. Route the drain hose into the standpipe, ensuring the end is fully inserted. Check all joints with soap and water for leaks, then run a short test cycle with the house water supply on. Best Washing Machine's guidance suggests checking for leaks with a simple soap-and-water test. Use a level to ensure the washer sits evenly.
Common mistakes and how to avoid them
Common missteps include skipping local code checks, reusing worn hoses, or forcing a drain hose into an inappropriate opening. Avoid these by following the recommended connections, replacing old hoses, and ensuring the standpipe has a proper trap and vent. Do not over-tighten fittings, which can crack threads, and never ignore venting requirements. Keeping the installation clean and dry around the base helps prevent long-term mold and corrosion.
Maintenance after install
Maintenance matters for long-term reliability. Regularly inspect all water supply hoses for signs of wear or bulges and replace them every five to seven years or sooner if you notice cracking. Test the drain connection after each major wash cycle for leaks. Keep the area around the washer dry and free of clutter to reduce slip hazards. Finally, document the installation for future service or resale.
Tools & Materials
- Cold-water shutoff valve (accessible)(Ensure compatibility with supply line; 1/2" or 3/4" connections depending on your setup)
- Hot-water shutoff valve (optional)(Only if your model uses hot water)
- Washer supply hoses (2)(Use high-quality hoses rated for washing machines; inspect for wear)
- Drain hose and standpipe kit(Standpipe requirement per local codes; ensure correct diameter)
- Transition fittings/adapters (if needed)(Used when connecting to older plumbing)
- Copper or PEX piping and fittings(Only if building new connections; otherwise flexible hoses may suffice)
- Teflon tape and pipe sealant(Seal threaded connections per material)
- Pipe cutter or saw(Clean cuts for reliable joints)
- Adjustable wrench and pliers(Tighten fittings without damaging components)
- Level and tape measure(Ensure washer sits level and aligned)
- Bucket and towels(Contain spills during install)
Steps
Estimated time: 2-3 hours
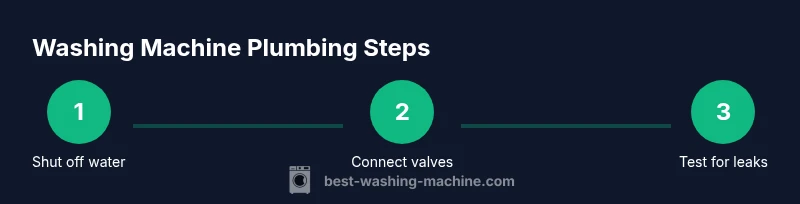
- 1
Inspect space and shut off water
Locate the water supply lines and the main electrical panel. Shut off the cold and, if present, hot-water valves before touching any fittings. Relieve pressure in the lines by opening a nearby faucet. This prevents sudden spurts of water during removal or connection.
Tip: Keep a bucket handy for any unexpected spills. - 2
Disconnect old connections
If replacing an existing washer, disconnect old hoses and drains carefully. Check for signs of corrosion on fittings and note the existing configuration before removing parts. This helps you replicate a safe, code-compliant setup with minimal surprises.
Tip: Document positions with photos to reference during reassembly. - 3
Install cold-water valve and hot-water valve (if needed)
Install the cold-water shutoff valve first, ensuring a straight, clean thread with Teflon tape. If your model uses hot water, install the hot-water valve on its corresponding line. Tighten fittings firmly, but avoid overtightening to prevent leaks.
Tip: Use a shutoff with a built-in backflow prevention if your code requires it. - 4
Attach hoses to valves and machine
Connect the cold-water hose to the cold valve and the hot-water hose to the hot valve if applicable. Attach the other ends to the machine’s inlet fittings, hand-tightening then snug with a wrench. Do not cross-thread or twist hoses excessively.
Tip: Color-coded hoses help prevent mix-ups. - 5
Route drain hose to standpipe
Insert the drain hose into the standpipe or compatible adaptor. Keep the hose end above the standpipe opening and avoid kinks. Secure with a strap or clip to prevent movement during cycles.
Tip: Check that the standpipe outlet is sized correctly for your drain hose. - 6
Set up standpipe and vent per code
Ensure the standpipe has a trap and is vented according to local codes. If you are extending an existing drain, use approved fittings and sealants, then test the system for leaks.
Tip: Consult local code guides or a plumber if you are unsure about venting requirements. - 7
Test for leaks with slow water flow
Turn on the water supply slowly and inspect all connections for leaks. If a leak appears, tighten gently and recheck. Run a short cycle to observe operation and confirm that draining occurs smoothly.
Tip: Use soap-and-water around joints to reveal small leaks quickly. - 8
Level and secure the washer
Use a level to check side-to-side and front-to-back alignment. Adjust the machine feet until level, then move it slightly to verify stability. This reduces vibrations and noise during cycles.
Tip: Place a rubber mat under the washer for extra stability on hard floors. - 9
Finalize and document
Ensure all connections are tight and documented for future service. Keep manuals and receipts with your installation notes. Run a final full cycle to confirm everything functions correctly.
Tip: Keep a record of the installation date for maintenance planning.
FAQ
Do I need hot water for my washing machine?
Most washers operate with cold water; hot water is only needed for certain cycles if your model supports it. Check your manual to confirm the required hookups.
Most washers use cold water, but some cycles may use hot water if your model supports it. Check your manual to be sure.
What is the role of a standpipe in washing machine drainage?
The standpipe provides a dedicated path for wastewater and helps prevent backflow. It should include a trap and be vented per local codes to avoid siphoning and odors.
The standpipe channels wastewater and prevents backflow, and it should be vented and trapped per local codes.
Can I install a washer myself or should I hire a plumber?
If your space complies with local codes and you have basic plumbing skills, a DIY installation is possible. Otherwise, hiring a licensed plumber ensures code compliance and peace of mind.
If you’re comfortable with basic plumbing and codes, you can do it yourself; otherwise, hire a licensed plumber.
What are common signs of drainage issues after install?
Look for slow draining, gurgling sounds, standing water, or unusual odors. These can indicate improper standpipe height, lack of venting, or a clogged drain.
Common signs are slow draining, gurgling noises, and bad smells—these point to venting or standpipe problems.
What tools are essential for installing a washer’s plumbing?
You’ll need basic hand tools, a level, measuring tape, and pipe fittings appropriate for copper or PEX, plus flex hoses designed for washers. Always include Teflon tape for threaded connections.
Essential tools include wrenches, a level, and the right fittings; don’t forget Teflon tape for tight connections.
How do I test for leaks after I install?
Turn the water on slowly and inspect every connection with soap and water for bubbles. Run a short cycle and re-check for drips around hoses and fittings.
Turn on the water slowly and check all connections with soap and water for leaks. Run a quick cycle to be sure.
Watch Video
The Essentials
- Plan cold-water supply and drain paths before starting.
- Verify standpipe and vent meet local codes.
- Secure all connections against leaks.
- Level and stabilize the washer.
- Test with a controlled, leak-free cycle.