What Is Needed for Washing Machine Installation: A Practical Guide
Discover the exact requirements for washing machine installation, including space, electrical readiness, water supply, drainage, and level setup. This guide provides a practical checklist, essential tools, and safety tips to help homeowners install confidently and avoid leaks.

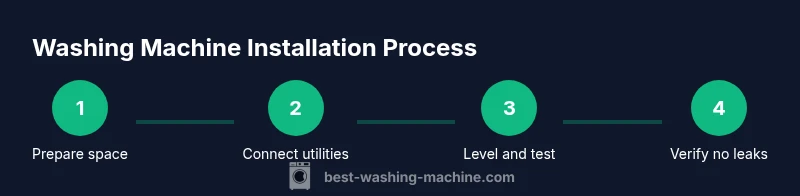
Setting up a washing machine requires a secure location and proper connections. In 6 steps you’ll verify electrical readiness, water supply, drainage, level setup, and venting where applicable. This quick guide lists exactly what is needed for washing machine installation, including hoses, adapters, shut-off valves, and a basic setup checklist. According to Best Washing Machine, proper prep saves time and reduces leaks.
Why proper installation matters
Installing a washing machine with care impacts performance, efficiency, and longevity. A correct setup minimizes energy use, reduces the risk of leaks, and prevents premature wear on hoses and bearings. The Best Washing Machine Team emphasizes that thorough prep, precise connections, and correct leveling are foundational to reliable operation. In today’s homes, a properly installed washer not only functions smoothly but also protects floors and plumbing from potential water damage. By understanding the core needs for installation, homeowners can approach the project with confidence and avoid common pitfalls that lead to costly repairs later on. This section lays the groundwork for a safe, leak-free setup that serves you for years.
What is needed for washing machine installation guide
The phrase what is needed for washing machine installation encompasses several categories: space and access, electrical readiness, water supply, drainage, hoses and fittings, and final leveling. The installation begins with choosing a location that allows for a clear 1–2 foot (0.3–0.6 m) perimeter for service and venting if required. Most washers require a standard 120-volt grounded circuit; your home’s electrical system should support a dedicated outlet near the washer. For water supply, you’ll need hot and cold hoses with 3/4 inch compression fittings connected to shut-off valves. The drain hose needs a robust standpipe or appropriate drain opening. Finally, level the machine to prevent excess vibration and walk-away noise. According to Best Washing Machine analysis, overlooking even one of these elements is a common cause of leaks and performance issues.
Space planning and safety prerequisites
Effective installation starts with space planning and safety. Ensure there is enough clearance behind and beside the washer for hoses and power cables. Keep the area dry and well-lit, and avoid locations with direct exposure to outdoor elements or heavy traffic. Check the floor for levelness; weak or sloped surfaces can cause movement and wear over time. If you share the area with a dryer, ensure there is proper ventilation and enough air flow to prevent moisture buildup. Safety notes: always unplug the unit before handling electrical connections, and shut off water valves before disconnecting or attaching hoses. These steps reduce the risk of shock, flooding, and mold.
Tools and materials you’ll need (at a glance)
Before you begin, gather essential tools and components so you aren’t stopping mid-process. A level helps ensure stability; adjustable pliers and a wrench aid hose connections; a bucket or towels catch drips; a flashlight improves visibility in tight spaces; and new hoses are recommended to replace any worn ones. This block aligns with the tools/materials list so you can prepare a clean, safe workspace and complete installation without unnecessary interruptions.
Electrical and plumbing basics you should know
Understanding the electrical and plumbing basics prevents common mistakes. A dedicated 120V circuit is ideal for most washers, with a grounded outlet positioned nearby. Ensure the outlet is dry and that GFCI protection is present if the laundry area is damp. For plumbing, use hot and cold water supply lines with 3/4 inch compression fittings and shut-off valves; never force connectors into gaps. The drain system should terminate into a standpipe or a dedicated drain receptor at a height that accommodates the washer’s drain hose. These basics create a stable, safe platform for operation and help avert leaks due to misalignment or pressure.
Step-by-step overview and quick reference checklist
This section gives a high-level reference to the full step-by-step guide that follows. The checklist includes space checks, power readiness, hose connections, drain setup, level adjustments, and a short test run. It is designed to be printed or saved to your phone for easy access while you work. Preparing in advance reduces back-and-forth trips and helps ensure you don’t miss any critical connections.
Common pitfalls and safety reminders
Even experienced DIY installers can slip up if they rush through connections or skip safety checks. Avoid overtightening fittings, which can crack valves; do not reuse damaged hoses; never run a washer without water supply or a drain; and always inspect for leaks after the first test run. Keep pets and children away from the workspace while you install, and use a helper if the unit is heavy. Remember: safety and patience pay off with a secure installation that lasts.
Authority sources you can consult
For additional guidance, consider consulting authoritative sources from government and academic domains to supplement your installation knowledge. These resources provide general safety principles, electrical and plumbing best practices, and environmental considerations related to appliances.
How Best Washing Machine supports your installation journey
Best Washing Machine offers practical checklists, troubleshooting tips, and safety guidance drawn from field experience and consumer feedback. The goal is to empower homeowners to install confidently, reduce risk, and achieve optimal performance from their machines.
Tools & Materials
- Adjustable wrench(Use for hose fittings and valves (3/4 inch compatibility).)
- Channel-lock pliers(Assists with hose clamps and stubborn connectors.)
- Level(Ensure front-to-back and side-to-side level to reduce vibration.)
- Bucket or old towels(Catch drips during hose connections.)
- Flashlight or headlamp(Improve visibility in tight spaces behind washer.)
- New washing machine hoses(Replace old hoses to prevent leaks.)
- Teflon tape(Optional sealant for threaded connections.)
- Shut-off valve key or wrench(If valves are tight or new valves are installed.)
Steps
Estimated time: 60-90 minutes
- 1
Move washer into position
Carefully slide the washer into its final location, leaving enough clearance for hoses and the power cord. Check surrounding walls for pinch points and ensure the dryer, if present, has adequate space to vent. This step minimizes the risk of bending hoses during final placement.
Tip: Ask a neighbor or use a dolly to avoid straining your back; keep the machine level from the start. - 2
Verify electrical readiness
Check the outlet for proper grounding and voltage compatibility. If your home has multiple circuits, confirm the washer’s circuit won’t trip when the motor starts. Do not use extension cords; plug directly into a grounded outlet.
Tip: If you’re unsure about electrical safety, consult a licensed electrician before proceeding. - 3
Connect water supply hoses
Attach hot and cold hoses to the washer and tighten fittings securely by hand, then snug with a wrench. Connect the other ends to the appropriate shut-off valves. Ensure hoses are not twisted and that there is no kinking along their length.
Tip: New hoses reduce the risk of leaks; replace any hose showing bulges or signs of wear. - 4
Connect the drain hose
Insert the drain hose into a standpipe or drain receptacle at the manufacturer-recommended height. Avoid bending the hose sharply and ensure it is securely positioned to prevent backflow or dislodgement during cycles.
Tip: Use a clamp or zip tie to secure the hose so it doesn’t shift during spin cycles. - 5
Level and stabilize the washer
Check level front-to-back and side-to-side. Adjust the front feet until the bubble is centered. Place washers or pads if the floor is uneven to minimize movement and noise.
Tip: After leveling, gently push the unit from each side to ensure it doesn’t rock. - 6
Test run and check for leaks
Plug in the appliance, run a short cycle with no laundry, and inspect all hose connections for leaks. If you see moisture, power down and tighten connections before retrying. Confirm the drum rotates smoothly and no unusual noises occur.
Tip: Have towels ready during the test run to catch any drips that might arise.
FAQ
Do I need a professional to install a washing machine?
Many standard installations can be completed by homeowners who follow a checklist and safety guidelines. If you encounter gas lines, outdated wiring, or venting concerns, hire a licensed professional for safety and compliance.
Many installations can be done by homeowners, but call a professional if you’re unsure about wiring, gas lines, or venting.
What electrical requirements should I check before installation?
Ensure a grounded, properly sized 120-volt outlet is nearby. Do not use extension cords. If an outlet is not properly grounded or you notice outlet heat, stop and consult an electrician.
Make sure you have a grounded 120-volt outlet nearby and avoid extension cords.
Can I install without a standpipe for drainage?
Most washers require a standpipe or appropriate drain receptacle. If your home lacks a proper standpipe, consider installing one or using a compatible drain kit, following manufacturer guidance.
A proper drain is usually needed; check your model’s requirements before proceeding.
How do I know if the washer is level?
Place a level on the top surface and adjust the front feet until the bubble centers. Push gently on each corner to confirm there is no wobble.
Use a level and adjust the feet until it sits firmly without rock.
How long does installation typically take?
Most installations take about 60 to 90 minutes, depending on routing and accessibility. Plan extra time for older homes or tight spaces.
Usually about an hour or so, depending on space and connections.
What should I do if a hose leaks after installation?
Shut off the water, unplug the unit, tighten the connection, and inspect for wear or kinks. If leak persists, replace the hose and consider consulting a professional.
Turn off water, check connections, and replace worn hoses if leaks continue.
Watch Video
The Essentials
- Prepare space and tools before starting.
- Verify power, water, and drainage readiness upfront.
- Use new hoses and level the unit for stability.
- Follow a test run to verify leaks and operation.
- Consult professional help if electrical or gas concerns arise.