Where is Washing Machine Drain Filter: A Complete Guide
Discover where to find your washing machine drain filter, why it clogs, and how to clean it safely. A complete guide with step-by-step instructions, maintenance tips, and troubleshooting from Best Washing Machine.

You’ll locate the drain filter behind the front kick panel or a bottom access door, depending on your washer. Remove the cover, twist or pull out the filter, and clean away lint and debris. Reinsert, run a short cycle, and check for leaks. This guide walks you through the steps.
Where is washing machine drain filter?
If you own a modern washing machine, the drain filter is not inside the drum. According to Best Washing Machine, most models conceal the filter behind a small access panel at the bottom front of the unit, or behind a toe-kick cover. Front-load machines often place the panel below the door, while many top-load models have a panel near the back or at the side. Before you start, unplug the machine and be prepared for a small amount of water to spill when the panel is opened. Familiarize yourself with your model’s manual; if you don’t have it, look for a diagram on the panel or inside the service door. The drain filter’s job is to trap lint, hair, coins, and other debris so it doesn’t reach the pump. Regular checks help prevent clogs and costly repairs. Best Washing Machine’s analysis indicates that routine attention to the drain filter correlates with smoother drainage and fewer emergencies, especially in households with pets or heavy laundry loads. The reader should feel empowered to locate the filter confidently across common configurations. The goal is to access safely, remove debris, and restore optimal drainage without causing leaks or damage to hoses.
Common locations by washer type
Washer designs vary, so recognizing the general pattern helps you locate the drain filter quickly. In front-load machines, you’ll usually find a small access panel just above the kick plate or behind a panel you remove with a screwdriver. Some models require you to lift a pull-out tray or unscrew a vanity panel. In top-load machines, the filter is frequently housed near the agitator base or along the rear interior wall, occasionally behind a removable side panel. If you cannot find the filter after checking the bottom front panel, search the user manual PDF for terms like “drain filter,” “pump filter,” or “lint filter.” Keep in mind that older units might use a different configuration or require access via the back panel. Regularly consulting the manufacturer’s guide ensures you don’t miss a hidden filter. Regardless of model, always dry the area and inspect hoses for cracks or kinks after opening the access point. This proactive approach reduces the risk of leaks and helps you identify other drainage issues early.
How drain filters work and why they clog
Drain filters are simple screening devices placed in the water path to trap debris before it reaches the pump and drain hose. They prevent coins, hair, lint, socks fibers, and other debris from causing clogs that hinder drainage. Over time, accumulated debris forms a compact, harder-to-remove layer, reducing water flow. This is why regular cleaning matters. Best Washing Machine’s analysis highlights that households with frequent shedding pets or high-efficiency loads can see faster clog buildup if filters aren’t cleaned routinely. A clogged filter can also cause longer drain times or, in severe cases, a wash cycle to stall. Understanding this helps you see the value of a quick maintenance routine rather than waiting for a visible overflow. By inspecting the filter and the surrounding housing, you catch early signs of wear, such as a slightly slower drain or odd vibrations during pumping. The goal is to keep the filtration path clear to maintain steady drainage and preserve pump longevity.
How to access and remove the filter safely
Accessing the drain filter requires a calm, methodical approach. Start with unplugging the machine and placing a bucket or towels under the door to catch any water. Remove the front kick panel or toe-kick panel as described in your manual. Carefully twist or pull the filter cap counterclockwise until it releases, or slide it out if it’s a push-style design. Have a towel ready for residual water, and don’t force components that resist gentle turning. Once the filter is free, pull it straight out to inspect for lint, coins, hair, and soap scum. Clean the filter under running water using a soft brush. If you encounter stubborn grime, soak the filter for a few minutes in warm water with a drop of dish soap. Reinsert the filter, ensuring it sits snugly and seals correctly. Replace the panel, plug the unit back in, and prepare to test. Following these steps helps prevent accidental water spills and ensures you don’t misalign hoses during reassembly. Pro tip: take a quick photo of the housing before removal to guide reassembly.
Cleaning and maintenance routine
Maintaining a clean drain filter is a simple habit that pays off with fewer drainage hiccups. Aim to inspect and clean the filter every 1–3 months, depending on usage and household factors such as pets or large laundry loads. Remove the filter, rinse it under warm running water, and scrub away any residue with a soft brush. Dry the filter completely before reinstalling to prevent mold growth. While the filter is out, wipe down the housing with a damp cloth to remove lint buildup and check for any signs of damage or wear on the seals. If you notice an unusual odor, a quick cycle with hot water and a splash of vinegar can help sanitize the interior, but follow your manufacturer’s guidelines to avoid chemical damage. Document your cleaning schedule so you can maintain consistency. Best Washing Machine notes that consistency matters more than intensity: regular small cleanups prevent larger, more disruptive clogs and help keep the pump running efficiently.
Troubleshooting tips if water won't drain
If water remains in the drum after a cycle, the drain filter might not be the sole culprit. Start by checking the drain hose for kinks or blockages near the connection, then inspect the pump for obstructions. A partial clog could occur in the hose, the filter housing, or the pump impeller. If the filter is clear but the drain still slow, there could be a blockage beyond the filter path, such as in the drain hose or sewer line, or the pump may be failing. Always unplug the machine before poking around and avoid forcing hoses. If you hear grinding sounds or see the motor running without draining, do not continue to run cycles—this could indicate a pump problem. In these cases, consult a professional technician. The Best Washing Machine team recommends documenting the symptoms (cycle type, load size, water level) to speed up diagnosis and avoid unnecessary disassembly. A calm, methodical check of each component helps you isolate the issue without creating new leaks or damage to the unit.
Reassembly and leak testing
After cleaning, reassemble the drain filter by placing the filter back into the housing with the correct orientation. Hand-tighten the cap until it seats firmly, then give a light twist to ensure it won’t loosen during operation. Reattach the front kick panel securely, plug the unit back in, and run a short drain and spin cycle with a small load of towels. Observe closely for any leaks around the filter housing, panel seams, and hose connections. If a leak appears, recheck the seal around the filter and tighten connections as needed, but avoid overtightening. If you still notice leaks after reassembly, it may indicate a worn seal, cracked hose, or pump issue that requires professional service. This careful testing helps confirm a successful maintenance routine and reduces the risk of water exposure on your floor. The reassembly process should take only a few minutes, but testing ensures you can trust the result.
Practical tips for ongoing care
Create a simple maintenance routine that suits your washing habits. Keep tools handy in a dedicated small box to reduce setup time for future cleanings. Use a flashlight to inspect inside the housing and consider a monthly quick wipe-down of the filter area to prevent soap scum buildup. If you have pets, be especially vigilant about hair accumulation in the filter. Consider labeling the maintenance dates on a calendar or setting a reminder so you won’t forget. Finally, always consult your user manual for model-specific guidance; if you’re unsure, a quick call to customer support or a video tutorial can provide reassurance without risking damage. A proactive approach saves you time, money, and the hassle of unexpected drainage problems.
Tools & Materials
- Screwdriver set (Phillips and flathead)(Needed for removing the access panel screws)
- Flashlight(To inspect inside the housing and filter well)
- Bucket or towels(Catch residual water and keep area clean)
- Old toothbrush or small brush(Scrub filter and housing gently)
- Gloves(Protect hands from dirty water)
- Pliers or channel-locks(Helpful if the filter or cap is stubborn)
- Replacement filter (optional)(Only if damaged or degraded)
Steps
Estimated time: 15-25 minutes
- 1
Power off and unplug
Unplug the washer and drain any standing water from the access panel area with a towel. This prevents electrical shock and avoids splashes during panel removal.
Tip: Keep the plug within arm's reach and have towels ready. - 2
Open the access panel or toe-kick
Remove the screws or clips holding the panel. If a toe-kick cover hides the panel, use a screwdriver to release it. Gently hinge the panel away to expose the filter.
Tip: Take a photo of the panel layout before removal for reassembly. - 3
Place towels and expose the filter
Position towels or a shallow tray to catch water. Slide or twist the filter cap counterclockwise to release it, depending on model.
Tip: If the cap is stiff, apply gentle pressure and avoid forcing. - 4
Remove and inspect the filter
Gently pull the filter out. Check for lint, coins, hair, and soap residues. Place the filter in a bucket for cleaning.
Tip: Note the orientation to ensure correct reinsertion. - 5
Clean the filter and housing
Rinse the filter under warm water. Use a soft brush to remove stubborn grime. Wipe the housing interior to remove residue.
Tip: Avoid harsh chemicals that could degrade rubber seals. - 6
Dry and reinstall the filter
Dry the filter completely and reinsert it with the correct orientation. Refit the cap and ensure it seats firmly.
Tip: Hand-tighten only to prevent leaks. - 7
Reattach panel and test
Replace the access panel, plug the machine back in, and run a short test cycle with towels.
Tip: Check for leaks around seams and the hose connection. - 8
Evaluate results and document
Observe drainage performance and note any persistent issues. If leaks or poor drainage persist, consider professional service.
Tip: Record dates of maintenance for future reference.
FAQ
What is a drain filter and why is it needed?
A drain filter traps lint, hair, coins, and debris before they reach the pump. Regular cleaning prevents clogs and extends the life of the drainage system.
Drain filters catch debris before it reaches the pump, preventing clogs. Regular cleaning keeps your washer draining smoothly.
How often should I clean the drain filter?
Clean the drain filter every 1–3 months, or more often if you have pets, heavy shedding loads, or notice slower drainage.
Clean the drain filter every 1–3 months, more often with pets or heavy shedding.
What if the filter is stuck or won’t come out?
If the filter is stubborn, ensure you’ve turned the cap fully and follow the manufacturer’s guidance. Do not use excessive force; some units require a specific twist or unlock mechanism.
If stuck, make sure it’s fully unlocked and follow your model’s manual. Don’t force it.
Can cleaning the drain filter prevent leaks?
Yes. Regular cleaning reduces the chance of clogs that can cause overflows and leaks. Always reseal the filter housing securely after cleaning.
Yes. Keeping the filter clean helps prevent leaks by avoiding clogs.
Do front-load and top-load washers have different drain filters?
Some models place the filter behind a toe-kick, others behind a back or side panel. Check your manual or search by model for the exact location.
Most models differ in location; check your manual for the exact spot.
What should I do if water leaks after reassembly?
Turn off power, unplug, and recheck the seal around the filter and all hose connections. If leaks persist, this could indicate a damaged seal or hose.
If leakage continues after reassembly, unplug and recheck seals. If it persists, seek service.
Watch Video
The Essentials
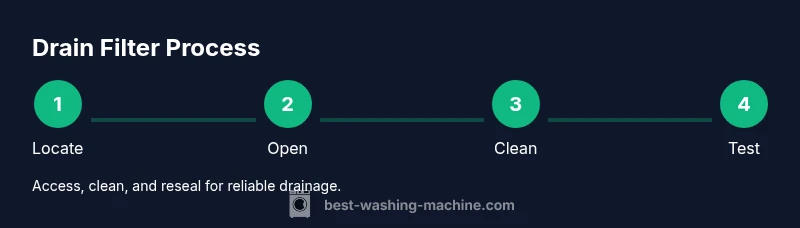
- Locate the filter behind the front panel or toe-kick
- Clean lint and debris to restore drainage
- Inspect hoses for leaks during maintenance
- Test drain function after reassembly