Why Washing Machine Sounds Happen: A Troubleshooting Guide
Diagnose and fix common washing machine noises quickly. Learn top causes, step-by-step fixes, safety tips, and prevention strategies from Best Washing Machine.

Most washing machine noises come from simple, fixable issues. First, check for an unbalanced load and redistribute clothes. Then look for loose items or foreign objects in the drum, and inspect drive components for wear. Run a short empty cycle to compare sounds. If the noise persists, follow the diagnostic flow for deeper fixes.
Why washing machine noises happen
According to Best Washing Machine, most noises come from a few practical, fixable sources rather than mysterious problems. At a high level, washers generate sound whenever the drum moves, water is pumped, or the motor engages. Variations in cycles produce different noises, but persistent rumbles, bangs, or squeals usually point to one of a small set of issues: load distribution, foreign objects, worn parts, or mounting problems. By understanding these categories, you can diagnose quickly and reduce wear on your machine. This article walks you through the most common noises and exact steps you can take to quiet a noisy washer without risking safety. We’ll also outline when professional service becomes the right choice. The Best Washing Machine team emphasizes a calm, methodical approach to diagnosis, so you can act confidently rather than guesswork.
Common noises and their meanings
No two washers sound the same, but most noises fall into recognizable patterns. A loud bang or thump during spin often signals an unbalanced load or a loose item hitting the drum. A high-pitched squeal usually points to a worn belt or a dry bearing. A grinding sound can mean a failing bearing or a foreign object entangled with the drum or pump. A consistent hum is commonly the pump or motor running without fault, while a rattling or metallic clank often indicates loose screws, feet, or mounting hardware. In many cases, simple fixes resolve the issue, but persistent or escalating noises warrant careful checks and possibly professional service. Best Washing Machine analysis shows that noise origins are frequently repeatable across models, giving homeowners a practical roadmap to diagnose and fix problems without guesswork.
Quick checks you can do before calling a repair
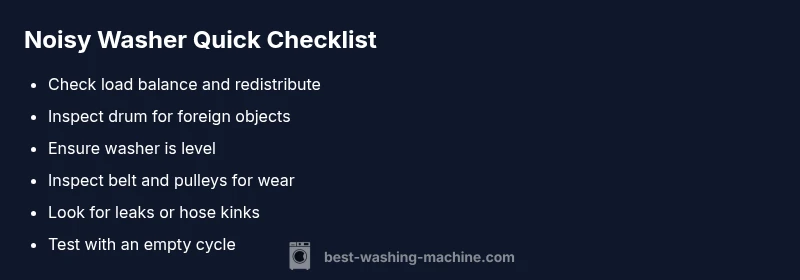
Before dialing a service number, run through a short, safe checklist. First, pause the cycle and unplug the machine. Redistribute the load so it’s balanced, or run a test with a small, even load to see if the sound changes. Look inside the drum for small objects (coins, buttons, hairpins) that might be bouncing around. Check that the machine is level on all feet and that the feet are firmly touching the floor. Inspect the door seal and hoses for kinks or leaks that can amplify vibration. If the noise stops on an empty cycle, the issue is likely load-related or a loose item; if it persists, move to deeper diagnostic steps.
Diagnostic flow you can follow to identify the cause
Begin with symptom recognition, then move to a probable cause and a recommended fix. If you hear grinding, focus on bearings or the belt. If you hear banging on spin, re-check load balance and level feet. If the noise occurs during drain, examine the pump and hose connections. For each potential cause, try the suggested fix and re-test. If the problem remains after basic checks, escalate to a step-by-step repair plan or a professional technician. This flow helps you avoid unnecessary parts replacements and keeps safety front and center.
Step-by-step fixes for the most common causes
Below are practical, structured fixes you can perform for the most frequent noise sources. Start with the easiest and safest actions. 1) Unbalanced load: pause the cycle, redistribute clothes, and restart on a shorter setting with a balanced load. 2) Foreign objects: unplug, open the drum, and remove coins, buttons, or hairpins. 3) Leveling: adjust the feet to stabilize the washer and dampen vibration. 4) Drive belt or pulley: inspect for cracks, looseness, or glazing; replace if necessary. 5) Bearings and tub supports: these are more complex and may require professional service. 6) Pumps and hoses: check for obstructions and secure fittings. If any step feels risky, skip to professional help.
Safety tips & warnings
Always unplug the machine before inspecting anything internal. Do not attempt to open sealed components while powered. If you detect water leaks, electrical smells, or a burning odor, stop using the machine and call a professional. Avoid using aggressive tools on belts or bearings, which can cause further damage. When in doubt, prioritize safety and professional diagnosis over DIY fixes.
Prevention tips to reduce future noises and extend life
Regular maintenance reduces loudness and wear. Keep loads balanced, avoid overloading, and periodically inspect feet, hoses, and the drum seal for wear. Clear the filter if your model has one, and run a monthly maintenance cycle with a mild cleaner designed for washing machines. Recording unusual noises when they first appear helps you guide technicians more accurately and reduces repair time. By staying proactive, you minimize downtime and prolong the life of your unit.
Steps
Estimated time: 30-45 minutes
- 1
Check load balance
Pause the cycle and redistribute clothing to form an even stack around the drum. Run a short test to see if the noise changes. Ensure the door or lid is secured and the cycle is appropriate for the weight.
Tip: An evenly distributed load reduces drum wobble and vibration. - 2
Inspect drum for foreign objects
Unplug the machine and remove the drum panel if accessible. Look for coins, buttons, hairpins, or small objects that could rattle against the drum or pump.
Tip: Small items can travel from pockets into the drum and cause noise. - 3
Level the washer
Check all four feet and adjust to ensure the machine sits flat. A wobbly unit amplifies vibration and noise during cycles.
Tip: Use a carpenter’s level to confirm the surface is even. - 4
Inspect the drive belt and pulleys
Access the belt area and look for cracks, glazing, or looseness. Replace worn belt and check pulleys for straight rotation.
Tip: Use the manufacturer guide for belt replacement steps. - 5
Test the pump and hoses
Look for kinks, clogs, or loose hose clamps. Run water through the drain system to ensure smooth flow and listen for abnormal sounds.
Tip: Clogs can multitask as noise sources during draining. - 6
Evaluate bearings and mounts
If you hear grinding or metallic noises after fixes, bearings or tub mounts may be worn. These parts typically require professional service.
Tip: Do not attempt bearing replacement unless trained.
Diagnosis: Machine makes unusual noises during operation (agitation or spin)
Possible Causes
- highUnbalanced load or loose items in drum
- highForeign objects stuck in drum or pump
- mediumWorn drive belt or pulley system
- lowWorn drum bearings or tub supports
- lowLoose mounting bolts or misadjusted feet
Fixes
- easyPause cycle, stop machine, redistribute load; run a small, balanced load test
- easyInspect drum and pump area for coins, buttons, or objects; remove safely
- mediumInspect drive belt tension and condition; replace if cracked or glazed
- hardCheck for worn bearings or loose tub supports; professional service recommended
- easyLevel the washer, tighten mounting bolts, and ensure solid floor contact
FAQ
Why does my washing machine make a grinding noise during spin?
A grinding noise during spin often indicates worn bearings, a failing belt, or a foreign object stuck near the drum or pump. Stop and inspect cautiously, and consider professional service if the noise persists.
Grinding during spin usually points to worn bearings or a belt issue. Stop use and inspect, and call a technician if it continues.
Is a loud banging noise during washing normal?
Loud banging typically means an unbalanced load or a loose object hitting the drum. Redistribute the clothes and run a test cycle with a balanced load to confirm.
Banging is usually due to an unbalanced load. Redistribute clothes and test again.
Can a squeaking noise be fixed at home?
A squeak often comes from a dry belt or worn pulleys. Lubrication is sometimes possible on older parts, but many fixes require replacement parts or professional service.
Squeaks can come from a dry belt or worn parts; some fixes are DIY, others need a pro.
When should I call a professional for washing machine noise?
If basic checks don’t quiet the noise, or if you hear grinding, clanking, or persistent buzzing, a professional should diagnose and safely repair the unit.
Call a professional if the noise lasts after basic checks or includes grinding or clanking.
Is it safe to continue using a washer that’s noisy?
Continuing use can risk further damage, leaks, or electrical hazards. Stop operating the machine and seek guidance if you’re unsure about the cause.
If you’re unsure, stop using it and seek guidance to prevent damage or hazards.
Watch Video
The Essentials
- Start with simple checks: balance, objects, and level.
- Unusual noises are often fixable without replacing the whole machine.
- Keep safety first; unplug before inspecting and call a pro for hard problems.
- Prevent noise with regular maintenance and mindful loading.