Why Are Washing Machines So Loud? An Urgent Troubleshooting Guide
A urgent, practical guide to diagnosing and fixing loud washing machines. Learn common causes, DIY checks, step-by-step fixes, safety tips, and when to call a pro—with insights from Best Washing Machine.

Most washing machines are loudest during the spin cycle because of imbalanced loads, worn bearings, or a loose drum. Start with a quick fix: pause the cycle, redistribute laundry, and level the machine. If the noise persists, inspect for worn belts or a failing pump and consider calling a technician.
Why the noise happens: the physics of a loud washer
If you’ve ever asked yourself, “why are washing machines so loud?”, the answer lies in the basic physics of a front- or top-load washer in motion. During spin, the drum executes high-speed rotations that generate significant centripetal forces. Any wobble or imbalance caused by a heavy item, uneven laundry distribution, or a frustratingly worn bearing will translate into banging, thudding, or a loud roaring. A well-tuned machine should sound like a steady hum with occasional soft thwacks when the load shifts. In practice, small changes in load size, floor rigidity, and drum condition can swing noise levels dramatically. According to Best Washing Machine, consistent noise is often a signal that something in the drive system or tub support is off. Keeping the drum quiet starts with understanding these core mechanics and being ready to test the obvious culprits.
Common culprits and how likely they are
The top causes of loud washers, listed from most to least likely in typical homes, are imbalanced loads, worn drum bearings, and loose components. An unbalanced load can create sharp, repetitive banging as the tub tries to spin at high speed. Worn bearings or a failing drum support will produce a low, grinding rumble, especially during slower cycles. A loose belt or pulley, a loose pump assembly, or unsecured hoses can also add high-pitched squeals or rattling. Foreign objects trapped in the drum or pump can cause sudden clunks. Finally, floor instability or missing anti-vibration pads can magnify normal operating noises. These categories help you triage quickly and avoid unnecessary replacements.
Based on Best Washing Machine analysis, 2026, most households find that simple adjustments address the majority of loud-spin complaints.
DIY checks you can do safely
Before you call a repair technician, run through a safety-first checklist that covers the most common issues. Start by unplugging the machine and ensuring the power is fully disconnected. Then inspect the feet to confirm the unit is level and firmly on a sturdy floor. Next, run a short wash with a small, evenly distributed load and pay attention to the sound: does it improve when the drum isn’t overloaded? Check for obvious drum wobble by hand (with the power off), inspect hoses for kinks, and listen for rattling from the cabinet. If you hear grinding from the bearings or the belt shows visible wear, that’s an issue you should not ignore. These checks form the backbone of a safe, fast diagnosis, and they are the first line of defense against unnecessary repairs.
Diagnostic flow: symptom to solution
A practical diagnostic flow helps you map symptoms to likely causes and practical fixes. Start with the most obvious: is the load balanced? If yes, move to mechanical checks like the drum bearings and belt tension. If you hear a grinding roar, suspect bearings or drive components. If you hear a clank when the drum starts, check for loose parts or foreign objects in the tub or pump. For a loud squeal or high-pitched tone, inspect the pump and belt routing. This flow keeps you moving from quick, low-effort fixes to more involved repairs, and it helps you decide when a pro is needed.
Most common fixed approach: quick-win overview
The fastest path to a quieter machine is a systematic, low-friction approach: level the unit, redistribute the load, and verify the drum spins freely without a heavy wobble. Tighten any loose feet or cabinet panels that may be amplifying vibration. Clean or replace worn door gaskets if they’re rubbing during cycles. If the noise persists, inspect the belt and bearings, then consult a professional for bearing replacement or motor service. This overview sets you up for the more detailed steps that follow.
Safety, warnings, and when to seek professional help
Working on a washer carries electric and mechanical hazards. Always unplug before inspecting components. Do not attempt to disassemble the motor, bearings, or sealed drive components without proper training. If you smell burning, hear grinding that precedes heat, or notice water leaks from seals, stop use immediately and call a licensed technician. Regular safety practices—like using anti-vibration pads, securing hoses, and keeping the area dry—minimize risk. If you’re unsure about any step, it’s safer to contact a pro than to risk injury or further damage.
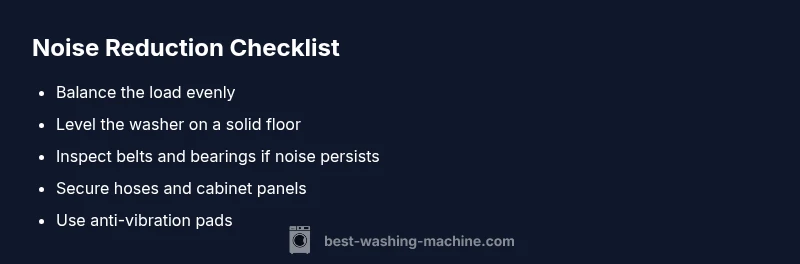
Maintenance strategies to keep noise low
Preventive maintenance is the best defense against loud washers. Regularly check and tighten feet, level the unit on a solid surface, and ensure the floor beneath is firm. Use appropriate load sizes and distribute items evenly to avoid spin-induced wobble. Periodically inspect drive belts for wear and replace them per the manufacturer’s recommendations. Clean the drum and pump filters to prevent buildup that can worsen noise. By making these practices routine, you’ll reduce noise and extend the life of your machine.
Steps
Estimated time: 45-60 minutes
- 1
Power off and unplug
Disconnect the washer from the power source to prevent shock while inspecting moving parts. Remove any coins or debris nearby that could fall into the gap. Wait a moment to ensure capacitors discharge before touching components.
Tip: A quick safety check reduces the risk of electrical injury. - 2
Level the washer and secure feet
Place a carpenter’s level on the top surface and adjust each foot until fully level. If the floor is uneven, use anti-vibration pads or shims under the feet. Recheck level after placing a full load in the tub.
Tip: Even small tilt differences amplify vibration at high spin speeds. - 3
Redistribute and reduce load
Open the door and rearrange items for even distribution. Avoid overloading the drum and balance heavy items across opposite sides. Run a test cycle with a small, balanced load to gauge noise.
Tip: Overloading can drastically increase noise and wear. - 4
Inspect hoses and drum access
Check for kinks in inlet hoses and ensure they’re fully seated. Remove the drum’s inspection cap if accessible and listen for any rattling caused by loose objects. Reinstall any covers securely.
Tip: Hose movement can amplify vibration and create new noise patterns. - 5
Check for bearing and belt issues
If you hear grinding or rumbling that changes with load or speed, there may be worn bearings or a loose belt. Carefully observe the belt path for cracks or glazing. Do not force parts or remove seals if you’re unsure.
Tip: Bearings usually require professional replacement. - 6
Test run and confirm
Run an empty or small load cycle to verify the noise level. If the machine runs quietly, gradually reintroduce a normal load and listen for changes. Document any persistent noises to share with a technician.
Tip: A controlled test helps isolate the source cleanly.
Diagnosis: Machine is unusually loud during operation
Possible Causes
- highUnbalanced load or unstable floor
- highWorn drum bearings or tub supports
- mediumWorn drive belt or pulley
- lowForeign object in drum or pump
- lowLoose parts (feet, panels, hoses)
Fixes
- easyPause, redistribute laundry, and level the machine
- hardInspect drum bearing/tixer for wobble and replace if needed
- easyTighten feet, secure cabinet and hoses
- easyRemove any foreign objects from drum/pump
FAQ
Why is my washing machine making banging noises during spin?
Banging often points to an imbalanced load or a worn drum bearing. Start by redistributing the laundry and leveling the unit. If the sound persists, inspect the drum and bearings for wear or damage.
Banging during spin usually means an imbalance or worn bearings. Redistribute the load and level the machine, then check for worn parts if it continues.
Can a noisy washing machine be fixed without a professional?
Yes for simple issues like balancing, leveling, and checking hoses. However, bearing or belt problems are risky to fix yourself and typically require a licensed technician.
Yes for simple checks, but for bearings or belts you should call a professional.
What are the signs of worn drum bearings?
A low growling or grinding sound that changes with drum speed often indicates worn bearings. Excessive wobble or visible looseness is another red flag. These usually require professional replacement.
A low grinding noise with wobble usually means bearings are worn and need a pro.
How can I reduce washing machine noise after installation?
Ensure the unit is level, loads are balanced, and hoses aren’t rubbing. Use anti-vibration pads and avoid overloading. Regular maintenance reduces noise over time.
Make sure it’s level, balance loads, and use anti-vibration pads.
When should I replace the washer instead of repairing it?
If noise persists after fixes and key components are failing, replacement may be more cost-effective than ongoing repairs. Consider the age and overall condition of the unit.
If fixes don’t help and key parts fail, replacement is often wiser.
Is loud noise a safety issue I should stop using the machine for?
Loud noises can indicate moving parts in distress. If you notice burning smells, smoke, or leaks, stop using the machine and disconnect power until inspected by a professional.
If you smell burning or see smoke, stop and call a pro.
Watch Video
The Essentials
- Identify root causes with simple checks first
- Level and balance the washer to curb spin noise
- Imbalanced loads are the top cause of loud spins
- Call a pro for bearings or belt replacement