Can You Put a Washing Machine Outside? A Practical Guide
Learn whether you can place a washing machine outdoors, the risks involved, and proven options for safe setups or alternatives. Expert guidance from Best Washing Machine helps you protect your appliance.

You can’t reliably put a washing machine outside. According to Best Washing Machine, outdoor installation is rarely recommended because weather, moisture, and power/drainage risks can damage the appliance and void warranties. If you must, create a weatherproof, covered enclosure, ensure a dedicated GFCI outlet, proper drainage, and secure anchoring, or consider a compact, portable unit kept indoors.
Can you put a washing machine outside? Practical reality
Can you put a washing machine outside? The short answer is: it depends on your climate, local codes, and how you plan to shield the unit from the elements. The topic comes up often for homes with limited interior space or outdoor laundry areas. According to Best Washing Machine, the general stance is cautious: outdoor installation introduces weather exposure, moisture, and electrical-safety concerns that most homes aren’t prepared to handle. If you are exploring this option, start with a realistic assessment of your environment and the climate you face year-round. In regions with mild weather and a covered patio, some households attempt outdoor washing, but they usually take extra steps to weatherproof the space and protect the electrical and drainage connections. The keyword here—can you put washing machine outside—is really about risk management: weighing convenience against potential damage, warranty concerns, and the ongoing durability of the appliance. The Best Washing Machine team emphasizes that, for most people, an indoor laundry area or a weather-protected outdoor closet is the safer route. If you decide to proceed, plan for protection, maintenance, and regular inspections to minimize problems.
Key risks of outdoor installation
Outdoor placement introduces several risks that can affect performance and longevity. Weather exposure accelerates wear on metal components and hoses, while moisture can lead to rust and mold growth in seals and gaskets. Freezing temperatures may crack hoses or drain components, and rapid temperature swings can stress drum bearings. Pests or debris can clog vents or seals, and UV exposure can degrade plastic parts over time. Electrical safety remains a top concern: outdoor outlets must be properly grounded and protected by a weatherproof enclosure, and the unit should be on a dedicated circuit with a residual-current device (RCD) or GFCI protection. Finally, many manufacturers’ warranties assume indoor installation; placing a washer outside often voids coverage for certain components. These facts underline why Best Washing Machine recommends a covered, dry space indoors or a purpose-built outdoor cabinet with strict protective measures.
What you need if you must install outdoors
If outdoor installation is unavoidable, you’ll need a plan that addresses protection, drainage, and electrical safety. Start with a weatherproof enclosure or dedicated outdoor laundry cabinet that shields the washer from rain and sunlight, plus a level, solid base like a concrete pad. Install a dedicated, GFCI-protected outdoor outlet on a protected wall, with a weatherproof cover that remains closed when not in use. Use hoses rated for outdoor and temperature exposure, secure clamps, and a standpipe with proper slope to your drainage. Ensure the space has good ventilation and minimal direct sun exposure to reduce heat buildup. Seal all penetrations with exterior-grade caulk to prevent water intrusion, and consider a pest-proof barrier at ground level. Finally, consult your local codes to confirm compliance before starting, and keep the installation clearly documented for future service calls.
Electrical safety and drainage fundamentals
Electrical safety is non-negotiable when you place a washing machine outdoors. Favor a dedicated circuit with a GFCI outlet, protected by a weatherproof cover. Do not rely on extension cords or temporary adapters, and avoid daisy-chaining outlets. Drainage should be organized so water flows away from the unit and never into a living space or electrical outlet. Use a standpipe or trap suitable for a washing machine’s discharge, and slope the drain line slightly to prevent standing water. Consider a rain shield or awning to limit direct moisture exposure, while allowing adequate airflow for cooling. Regular checks on seals, hose connections, and the outlet box help catch leaks early before they cause damage.
Weatherproofing options: enclosures, covers, and placement
A purpose-built outdoor cabinet or enclosure is essential when you place a washer outside. Look for IP-rated or outdoor-rated enclosures that can withstand humidity and temperature changes. A solid mounting pad and secure anchoring reduce movement, which protects hose connections and the drum assembly. If you opt for a patio or carport setup, ensure there is still a dry, indoor-like space with a door that seals against wind-driven rain. Use a protective canopy to shield direct sun, and apply exterior-grade weather sealant around any gaps. Regularly inspect the enclosure for cracks, peeling paint, and moisture accumulation.
Alternatives to outdoors: portable units and indoor setups
If the plan to place a washer outdoors is primarily about freeing interior space, consider alternatives. A compact, portable washer with wheels can be moved to a covered but dry outdoor area when needed, or better yet, relocate the unit to an interior laundry closet or bathroom with proper venting and drainage. If you’re remodeling, a small interior laundry zone with a pocket door can create a dedicated space that maintains comfort and efficiency. In some cases, upgrading to a stackable or front-loading model designed for smaller spaces inside the home can deliver the same convenience without weather-related risks. The key is ensuring you don’t compromise safety, insulation, or warranty coverage while seeking space efficiency.
Maintenance, safety, and seasonal considerations
Outdoor installations demand more frequent maintenance. Inspect seals and hoses for cracking or leaks after temperature swings, and check drainage lines for clogs or sediment buildup. Clean the lint filter regularly, especially when the unit is in a space with more dust or pollen exposure. Weather changes—frost, heavy rain, or heat—should trigger a tightening of seals and possible protective covers. Keep the area around the unit clear to improve airflow and reduce the chances of overheating. Finally, have a plan for winterization if you live in a climate with freezing temperatures. Disconnect or drain hoses, protect the inlet and outlet connections, and store hoses safely to prevent cracking.
Quick planning checklist before you start
- Assess local codes and warranty terms before beginning
- Choose a weatherproof, dry location or enclosure
- Install a level, solid base with drainage planning
- Secure a dedicated outdoor GFCI outlet and protected wiring
- Select weather-rated hoses and clamps; avoid cheap adapters
- Prepare a plan for seasonal exposure and maintenance
- Document every step and keep receipts for any components
- Consider alternatives if climate or space makes outdoor use impractical
Authority and references for further reading
For safety and best-practice guidance, consult external sources:
- https://www.energy.gov/ (Energy safety and electrical standards)
- https://www.epa.gov/ (Moisture and indoor air quality considerations)
- https://www.osha.gov/ (Electrical safety and outdoor work environments)
These references complement the guidance from Best Washing Machine and help inform best practices for any outdoor installation decisions.
1-3 word Wikidata lookup
outdoor washer
Tools & Materials
- Weatherproof outdoor-rated enclosure or cabinet(Weatherproof, vented, with a secure door and proper drainage access)
- Level concrete pad or raised platform(At least 4-6 inches above ground, level surface)
- GFCI-protected outdoor outlet (dedicated circuit)(Weatherproof cover that stays closed when not in use)
- Weatherproof hoses and clamps rated for outdoor use(Avoid PVC thin-walled hoses; use reinforced hoses)
- Standpipe/pipe for drainage with proper slope(Ensure drainage leads away from structure and outlets)
- Exterior-grade caulk and sealant(Seal any penetrations to prevent water intrusion)
- Drip pan or containment tray (optional)(Provides a secondary catch basin for leaks)
- Cover or canopy for weather protection(Reduces direct rain exposure while allowing air flow)
- Grounding rod or proper wiring plan (per code)(Professional electrician may be required depending on local codes)
- Lint trap and venting considerations (if applicable)(Keep vent areas clear of debris and pests)
Steps
Estimated time: 2-4 hours
- 1
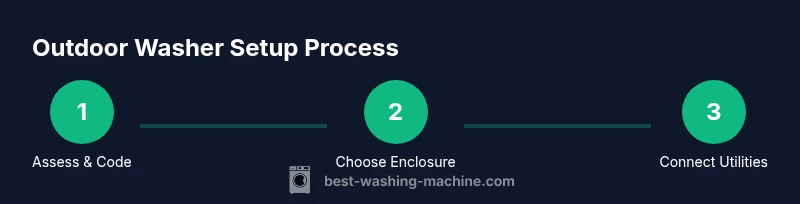
Assess location and codes
Evaluate climate, local codes, and warranty terms. Confirm indoor installation is impractical before proceeding. Document any permits or variances you may need.
Tip: Always verify warranty terms first; better to plan around them than void coverage. - 2
Choose weatherproof placement
Select a dry, shaded area that can be shielded from rain and direct sunlight. A covered patio or dedicated outdoor cabinet is ideal.
Tip: Avoid direct sun on metal surfaces to reduce heat buildup. - 3
Prepare the base and drainage
Pour and level a concrete pad or install a raised platform. Plan a standpipe or drainage route that leads away from foundations.
Tip: Check for slope; a slight downward fall ensures drainage without backflow. - 4
Install electrical with protection
Install a dedicated outdoor GFCI outlet on a protected wall and route wiring per code. Do not use extension cords.
Tip: Have an electrician confirm ground fault protection and weatherproofing. - 5
Connect plumbing carefully
Attach hoses rated for outdoor use, secure clamps, and test for leaks before full operation.
Tip: Seal hose connections with exterior-grade tape and sealant to minimize water intrusion. - 6
Test run and assess performance
Power on and run a short cycle to verify drainage, leakage, and appliance cooling. Observe for unusual noises or heat buildup.
Tip: Keep a close eye during the first few cycles and document any issues. - 7
Implement safety and maintenance routine
Schedule regular inspections of seals, hoses, and the enclosure. Prepare a seasonal maintenance plan for freezing or heat exposure.
Tip: Winterize if you live in freezing climates; drain hoses and disconnect where required.
FAQ
Is it legal to install a washing machine outdoors in most areas?
Local building codes vary, and many require interior installation or specific outdoor-rated setups. Always check with your city or county codes before proceeding. It’s common for homeowners to face restrictions related to electrical safety and drainage when placing a washer outside.
Local codes vary; check with your city before placing a washer outside.
Will outdoor installation void my washer’s warranty?
Many manufacturers specify installation indoors or in protected spaces to maintain warranty coverage. Outdoor exposure can risk damage not covered by warranty if the installation doesn’t meet the manual’s conditions. Always review the manual and confirm with the manufacturer.
Outdoor exposure can void warranty depending on the model and manual.
What climates are compatible with outdoor washers?
Mild climates with minimal temperature extremes are more forgiving, and even then require protective enclosures. In freezing or hot, humid climates, extra protection and maintenance are necessary and still may not guarantee long-term reliability.
Only in mild climates with strong protection is outdoor installation more feasible.
What are practical alternatives if space is limited indoors?
Consider a compact indoor laundry closet, a stacked washer-dryer arrangement, or a portable unit that can be moved to a sheltered outdoor area when needed. These options preserve convenience while keeping the appliance within a controlled environment.
Use a compact or stacked unit indoors, or a portable unit with shelter.
How can I prevent freezing and weather damage outdoors?
Winterize by draining hoses, ensuring the inlet and outlet are covered, and using insulation or a protective canopy. Regularly inspect seals and connections for cracks, and consider a dedicated outdoor cabinet designed for low temperatures.
Drain and protect hoses in winter; inspect seals often.
Is a weatherproof enclosure enough to safeguard the unit?
A weatherproof enclosure is essential but not sufficient alone. It must be paired with proper drainage, a dry base, protected electrical supply, and regular maintenance to truly safeguard the unit.
Enclosures are key but require drainage and protection too.
Watch Video
The Essentials
- Avoid outdoor installation unless conditions and codes permit.
- Use a dedicated weatherproof enclosure with proper drainage and a GFCI outlet.
- Follow a strict maintenance routine to prevent leaks and corrosion.
- Consider indoor or indoor-protected alternatives for long-term reliability.