Where to Install a Washing Machine in Your Home: Placement Guide
Learn expert-tested strategies for choosing the best spot to install a washing machine at home, covering water, drainage, power, space, and safety considerations for quiet, reliable operation.

If you’re unsure where to install the washing machine in your home, start with proximity to cold water and a dedicated drainage path, then ensure a grounded outlet and level floor. Prioritize a dry, accessible space like a utility room or laundry closet, away from heat, direct sunlight, and heavy foot traffic. This planned setup supports longevity, safety, and quiet operation.
Choosing the Right Location: where to install washing machine in house
Selecting the optimal spot for a washing machine is more than aesthetics; it directly impacts performance, safety, and daily convenience. The question where to install washing machine in house depends on access to plumbing, drainage, a reliable power source, and a stable, level floor. In many homes, the best locations are utility rooms, basements, or dedicated laundry closets that offer proximity to a cold-water line and a standpipe. The Best Washing Machine analysis shows that consistent placement reduces vibration, prevents leaks, and extends the appliance’s life. Start by surveying potential spaces and noting available outlets, water shutoffs, and drainage options. Consider future needs too—will you need to stack a dryer, add shelving, or place baskets and hampers nearby? Environment matters: avoid direct sunlight, high humidity, or heat sources like radiators; keep the area dry and well-ventilated. Finally, confirm that the chosen spot allows you to load and unload comfortably, with doors that can swing open without obstruction. By planning first, you’ll minimize costly relocations later and set up for a quieter, more efficient laundry routine. In this article, we’ll walk you through practical considerations, layout ideas, and safety steps to help homeowners, renters, and laundromat operators make the best choice. According to Best Washing Machine, a well-chosen location is the cornerstone of a trouble-free laundry day.
Essential considerations: water supply, drainage, electricity, and venting
A safe and reliable washing machine setup hinges on clean, accessible services. Start with water supply: locate a cold-water line with a shut-off valve you can reach without moving the machine. Attach hoses with proper fittings and sealant where required, and avoid bending hoses sharply to prevent leaks. Drainage is equally important: identify a standpipe or laundry tub that can receive the discharge from the washer, and ensure the hose is secured so it won’t slip out during a load. Electricity should come from a grounded outlet that matches the machine’s amperage; in damp areas, a GFCI outlet is strongly recommended. Venting is not required for most standard washers, but if you plan to combine the space with a vented dryer, ensure there is adequate clearance and vent routing. Always keep the connections dry and perform a leak test with a small amount of water before loading a full cycle. These fundamentals reduce the risk of leaks and electrical hazards over time. Best practices from the field emphasize verifying codes and secure fittings before first use. Based on Best Washing Machine research, gradual, careful setup minimizes post-install issues.
Floor and space requirements: size, clearance, and leveling
Your washer needs a flat, solid surface and enough space to tolerate operation. Start by measuring the appliance width, depth, and height, and compare with the available floor area; leave space for hoses, venting (where applicable), and serviceability. A level floor matters; even a slight tilt can cause vibrating, shifting, and accelerated wear. If the floor isn’t perfectly flat, use leveling shims or a vibration-absorbing pad. Keep a clearance buffer around the machine so doors can swing open and hoses aren’t pinched. Consider accessibility: is there room to move the unit through a doorway or hallway if you need to relocate it? If you plan to place a stacking unit, check whether your model supports stacking and whether a dedicated stand is required. By ensuring proper footprint and leveled support, you’ll prevent uneven wear, leaks, and noise. A well-measured installation prevents doorstep trips and reduces accidental damage during daily loads.
Noise and vibration management: minimizing disruption
Noise and vibration are common concerns for laundry setups, especially in small apartments or homes near bedrooms. A stable, level base is your first defense. Use anti-vibration pads or thick rubber mats under the feet to dampen movement on hard floors, and ensure the machine is not contacting walls or cabinetry on any side. Place the washer away from fragile surfaces or nearby appliances that could resonate. If you notice excess movement during cycles, re-level the machine and verify that the load is balanced. Front-loading machines tend to run more quietly, but proper installation and loading technique matter for any type. Consider sound-dampening accessories, such as door seals or enclosure panels, if your space is shared or open-plan. Regular maintenance, including cleaning lint traps and checking hoses, also reduces operational noise over time. A quieter laundry room improves day-to-day living in rental units and busy family homes alike.
Plumbing and drainage setup: hoses, valves, and traps
Plumbing is the backbone of your washer’s reliability. Start by connecting the cold-water supply hose to the appropriate valve using plumber’s tape as needed to secure a water-tight seal. Do not reuse old hoses; replace them if there are signs of wear or bulging. The drain hose should be positioned securely into a standpipe or drain port; avoid kinks that could block water flow. Fasten the hose to the machine or dedicated standpipe to prevent dislodgement during cycles. If you’re in a multi-story home, consider a secondary drain to handle overflow risk. Inspect fittings after the first few test cycles and tighten as necessary. Keep a bucket handy during initial connection in case of small drips. This plumbing setup helps prevent leaks and water damage in the long run. For renters, confirm permission for alterations to plumbing before making changes.
Electrical safety and outlet placement: GFCI and circuits
Electrical safety is essential when installing any household appliance. Verify there is a dedicated, properly grounded outlet nearby the location you choose, with a circuit capacity appropriate for the washer’s power draw. In damp spaces, a GFCI outlet adds protection against shock. Do not run the washer on extension cords or through shared circuits that may trip during operation. If you must relocate a receptacle, hire a licensed electrician to ensure compliance with local codes. Before plugging in, inspect the cord for cracks or damaged insulation, and never operate the washer if the outlet or plug appears compromised. Finally, keep water away from the electrical panel and avoid using extension cords to minimize fire risk. Following electrical safety guidelines protects families and property, reducing insurance risks and unplanned downtime.
Ventilation and space planning: laundry room or utility closet
Ventilation improves air quality and reduces humidity that can affect flooring and cabinetry. If your laundry area is a closet or closet-style room, ensure there is enough air exchange and that the space does not feel suffocating when the doors are closed. Use louvered doors or vent openings if possible, and consider a small exhaust fan for damp climates. Avoid stacking installations in spaces that feel cramped or have limited airflow, which can worsen condensation. In homes with basements or attached garages, ensure the room is insulated and dry to prevent moisture buildup around the machine. Proper ventilation also helps prevent mold and maintains equipment longevity. Good airflow and moisture control make maintenance easier and extend the life of your washer.
Layout options by home type: small apartments, houses with basements, laundry closets
Different housing configurations call for different installation strategies. In compact apartments, a compact or stackable unit inside a dedicated laundry closet may be ideal, with careful planning for plumbing lines and access. In houses with basements, you can often locate the washer near existing laundry plumbing or utilities, reducing long hose runs and potential heat exposure. For laundry nooks adjacent to kitchens or bathrooms, ensure there is a moisture barrier behind cabinetry and that drainage is accessible without compromising other fixtures. Each layout has advantages and trade-offs, so map your priorities—noise, accessibility, and space efficiency—against your house’s plumbing routes and electrical outlets. The Best Washing Machine team emphasizes planning and safety checks over ad hoc placement to minimize surprises during operation.
Maintenance and post-install checks: test run and routine checks
After installation, run a test cycle with a small load to verify that water flows correctly and no leaks occur. Check all connections while the machine is running and examine the floor for any drips. Listen for unusual noises that could indicate an out-of-balance load or loose fittings. Confirm door clearance and ensure the drum spins freely without rubbing. Create a simple maintenance schedule: inspect hoses every six months, clean the filter if your model has one, and reseal any connections if you notice moisture. If you encounter persistent issues, consult the user manual or contact a professional. Routine checks can catch problems early, saving time and preventing damage to floors and cabinetry. This approach keeps your laundry area safe and efficient for years ahead.
Quick recap: why placement matters for water, safety, and energy use
A deliberate placement strategy minimizes leaks, reduces noise, preserves floor integrity, and improves energy efficiency. By coordinating plumbing routes, electrical outlets, and ventilation, you lay a foundation for reliable operation and easier maintenance. The placement decisions you make today influence future renovations or upgrades, including dryer stacking or relocation for renovations. With a thoughtful approach to where to install washing machine in house, homeowners, renters, and operators can enjoy a more streamlined, safer laundry routine.
Tools & Materials
- Adjustable wrench(Used to loosen/tighten fittings on water supply lines)
- Screwdriver set (Phillips and flathead)(For mounting brackets and fixtures)
- Level(To ensure the machine sits evenly)
- Measuring tape(To verify space clearances and accessibility)
- Teflon plumber’s tape(Seal threaded connections against leaks)
- Shut-off valve (1/2 inch)(Connects to cold water supply)
- Drill and bits (optional)(If you need to secure the unit or mount brackets)
- Bucket or shallow tray(Catch drips during hose connections)
- Hose clips or ties(Secure hoses and prevent movement)
- Sealant or gasket silicone(Seal small gaps around fixtures)
Steps
Estimated time: 2-3 hours
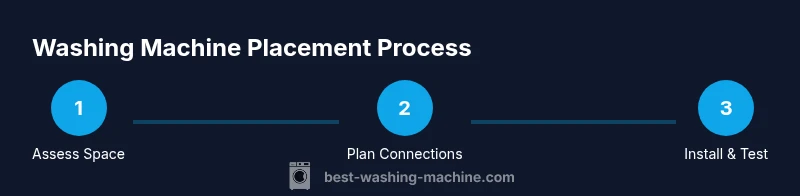
- 1
Assess space and feasibility
Survey potential locations, measure available space, and check for obstructions like cabinetry or doors. Confirm proximity to cold water, drain access, and an electrical outlet. Log any constraints so you can compare options before moving the appliance.
Tip: Take photos from multiple angles to compare layouts later. - 2
Locate water supply and drainage routes
Identify the closest cold-water valve and the best drain path. Ensure hoses can reach without sharp bends and that the drain will not back up into sinks or tubs. If routing through walls or cabinets, plan for sleeves or grommets to protect hoses.
Tip: Turn off the water supply before disconnecting any fittings. - 3
Prepare electrical outlet and circuit readiness
Verify a grounded outlet is nearby and rated for the washer’s load. In damp spaces, use a GFCI-protected outlet. Clear a path for cords away from water and heat sources, and avoid extension cords.
Tip: Inspect the cord and plug for damage before first use. - 4
Choose final location and align connections
Move the washer into position and align it with the water valve and drain. Ensure the rear clearance allows hoses to lay naturally without kinking. Plan for any required mounting brackets if stacking is intended.
Tip: Leave a small buffer behind the machine to accommodate hose movement. - 5
Install hoses and connect water lines
Attach the cold-water hose with plumber’s tape and tighten securely. Connect the drain hose to the standpipe or drain, securing it so it cannot slip out during cycles. Check for any leaks after a brief test flow.
Tip: Do not reuse old hoses; replace if bulging or cracked. - 6
Level and secure the machine
Use the level to adjust the feet until the unit sits evenly. If needed, place vibration-absorbing pads under the feet. Ensure the machine is stable and does not rock during manual or spin cycles.
Tip: Once leveled, avoid moving the machine frequently to prevent wear on connections. - 7
Run a test cycle and check for leaks
Run a small test load with water flowing and observe all connections. Look for drips around hoses, valves, and the drain. If leaks are detected, tighten fittings and reseal where necessary before loading a full cycle.
Tip: Be present during the test to catch leaks early and prevent floor damage.
FAQ
Do I need a professional to install a washing machine?
In many cases you can install basic hookup yourself if you are comfortable with plumbing and electrical connections. However, if you're unsure or local codes require a licensed professional, it's wise to hire one. A professional can ensure compliance and reduce the risk of leaks or electrical hazards.
You can often do it yourself, but if you're unsure or codes require it, hire a professional to ensure safety and compliance.
Can a washing machine be installed in a closet?
Yes, washing machines can be installed in a closet or utility nook, provided there is enough space for hoses, doors to swing, and access to water and outlets. Ensure proper ventilation if the area is enclosed and that service access remains feasible.
Yes, in a closet with space, ventilation, and access to water and outlets.
What is the minimum space required around a washing machine?
Maintain clearance on all sides for hose connections and service access, and allow room for doors to open fully. Avoid tight corners that restrict maintenance or venting. If you plan to stack a dryer, confirm compatibility and required spacing.
Keep clear space on all sides for hoses and door access.
Is it safe to install a washing machine on a second floor?
Yes, with a level, solid floor and proper hoses and outlets. Use anti-vibration measures to minimize movement and protect floors and ceilings. If the structure creaks or shows signs of stress, pause and reassess the setup.
Yes, as long as the floor is level and connections are secure.
What safety codes apply to washing machine installations?
Follow local building and electrical codes, including proper grounding and GFCI protection in damp areas. If you’re unsure, consult a licensed electrician or plumber and obtain any necessary permits before modifying plumbing or wiring.
Adhere to local codes and consider professional guidance for permits and safety.
What maintenance is needed after installation?
Regularly inspect hoses and connections for wear and leaks, clean lint traps, and run periodic test cycles to verify proper operation. Keep the area dry and free of debris that could affect the machine’s performance or the floor.
Check hoses and connections periodically and keep the space clean.
Watch Video
The Essentials
- Plan location before buying a washer.
- Ensure water, drainage, and power are accessible and safe.
- Level and secure the machine to reduce noise and wear.
- Test connections carefully to prevent water damage.
- Follow local codes and safety guidelines for a compliant setup.