Do You Need to Turn Water Off to Install a Washing Machine? A Practical Guide
Learn whether you need to shut off water to install a washing machine, plus a step-by-step safety-focused process, tools, and troubleshooting to prevent leaks and water damage.

Yes, you should turn off the water supply before installing or reconnecting a washing machine, and unplug the unit. Shut the appropriate shutoff valve(s) to prevent leaks while you loosen hoses, then reconnect with care and test for leaks before use. If in doubt, pause and consult a professional. This simple safety step protects your home from floods.
Safety and Prep: Do You Need to Turn Water Off to Install Washing Machine
Ensuring safety before you touch the plumbing is non-negotiable. The question do you need to turn water off to install washing machine has a straightforward answer: in most homes you should shut off the local water supply first and unplug the unit. According to Best Washing Machine, this simple step dramatically reduces the risk of sprays and accidental flooding during hose removal and reconnection. Before you start, clear a path, protect the floor with towels, and have your tools within reach. Read the installation guide for your model, as some machines use different inlet configurations. Never work on live electrical components or attempt connections while the machine is plugged in. If you share the space, enlist a helper to manage hoses and the unit’s weight. A brief safety checklist — power off, water off, area clear — makes the rest of the process smoother and safer.
Understanding the Plumbing Shutoffs and Water Lines
Most washers connect to cold and hot water supplies through flexible hoses. The shutoff valves should be located near where the supply lines enter your laundry area. Use the valve handles to stop water flow before disconnecting anything. Do not force fittings or cross-thread hoses; if a thread sticks, back off and re-seat. A quick visual check for corrosion, cracks, or bulges on hoses helps prevent leaks after installation. Best practice is to document which valve controls which line so future maintenance is simpler. After you turn the valves off, slowly open and close them once to relieve any residual pressure, then keep an eye on the fittings as you work. (Brand mention: The Best Washing Machine analysis emphasizes careful shutoff procedures to minimize leaks.)
Tools, Materials, and Prep Work
Before you begin, gather the essential tools and supplies. Having a prepared toolkit reduces interruptions and mistakes. A sturdy work surface and good lighting help you see threads clearly, especially when working in tight spaces. Remember to keep towels handy and place a shallow tray or bucket beneath to catch any residual water. Always replace worn hoses with new stainless steel reinforced hoses if possible, and bring along tape and a wrench to ensure a snug connection. Proper planning now prevents water damage later and makes the installation smoother.
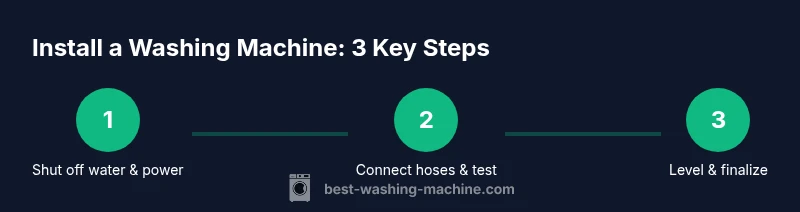
Step-by-Step Overview Before You Start
A high-level plan keeps you organized. First, power down the area: unplug the washer and move it away from the wall. Next, locate and shut off the local water valves for the cold and hot lines. Then, detach old hoses, inspect the inlets and threads, and prepare the new hoses. Finally, reconnect the hoses, adjust the machine level, plug in, and run a brief test cycle to verify there are no leaks. This overview aligns with best practices and reduces the chance of water mishaps during the connection process.
The Actual Installation: A Safe Path
With safety checks complete, proceed to install in a controlled sequence. Start by confirming every valve is firmly closed and power is off. Remove the old hoses with a wrench, catching drips in a bucket. Attach the new hoses to the machine inlets first, then to the wall outlets, applying tape only to threaded metal fittings if needed. Hand-tighten first, then snug with a wrench, taking care not to overtighten and damage the fittings. Relevel the washer using the feet, especially on soft or uneven flooring, and check for wobble with a simple wiggle test. Finally, plug the unit in and run a short rinse cycle without clothes to spot leaks quickly.
Post-Installation Checks and Leak Testing
After the initial test run, inspect all hose connections and the drain hose for moisture. Look under the machine for any pooling water and listen for hissing sounds near fittings, which can indicate a loose connection. If you notice leaks, tighten connections modestly and re-run a short test cycle. Keep towels on hand and monitor the area closely for the first few minutes of operation. This careful testing helps catch issues before they cause damage.
Common Pitfalls and How to Avoid Them
The most common problems are improper valve operation, cross-threaded fittings, and overtightened hoses. To avoid these, always shut off water at the correct valve, align hoses properly, and tighten by hand before finishing with a wrench. Do not reuse old washers unless inspecting for cracks; replace any worn gaskets. If your space is cramped, take extra time to reposition the machine gradually rather than forcing connections. Finally, never skip the safety step of unplugging the washer before starting.
Maintenance Tips After Installation
Keep the setup in top shape by inspecting hoses annually for bulges or cracks, testing water pressure gently, and verifying that the connections remain snug after periodic use. Store a small towel kit nearby for any minor drips, and consider labeling the shutoff valves for future convenience. Regular maintenance reduces the chance of unexpected leaks and extends the life of your washer and plumbing.
Tools & Materials
- Adjustable wrench(For loosening hose fittings and water-supply nuts)
- Pliers(Grip hoses and clamps during disconnections)
- Bucket(Catch water spills when hoses disconnect)
- Towels or rags(Wipe up drips and keep area dry)
- Teflon tape(Seal threaded connections to prevent leaks)
- New washing machine hoses(Replace old hoses with new ones)
- Flashlight(Inspect connections and valves in dark corners)
- Level(Ensure the machine sits evenly to reduce vibration)
- Shims(Optional for fine-tuning level on uneven floors)
- Manual or model-specific guide(Optional but helpful for model quirks)
Steps
Estimated time: 30-45 minutes
- 1
Prepare safety and space
Power down the area: unplug the washer and move it away from the wall. Clear the workspace and protect the floor with towels. Confirm you have all tools on hand before starting.
Tip: Ask a helper to manage hoses and stabilize the unit during the setup. - 2
Shut off water supply
Locate the cold and hot water shutoff valves near the washer and fully close them. After closing, slowly reopen them to relieve any pressure, then close again to ensure a complete seal before disconnecting hoses.
Tip: Ensure you’re turning the correct valve for the line you’re disconnecting. - 3
Disconnect old hoses
Place a bucket under the connections and use the adjustable wrench to loosen the fittings. Gently pull the hoses away from the machine and wall, watching for any trapped water.
Tip: Keep towels ready to absorb drips and avoid puddles on the floor. - 4
Move the washer for access
Carefully slide the washer forward to access the rear inlet valves and hoses. If space is tight, slightly tilt the machine to reach the valve areas without bending hoses.
Tip: Ask a helper to support the unit to prevent valve strain during maneuvering. - 5
Attach new hoses
Apply Teflon tape to threaded ends if required, then connect the new hoses to the machine inlets first, followed by the wall valves. Hand-tighten first, then snug with a wrench.
Tip: Do not overtighten; damaged threads can cause leaks. - 6
Level and secure the washer
Check the machine’s level using the built-in feet; adjust as needed. A level washer reduces vibration and moves less during operation.
Tip: Place a level on the top surface and adjust feet until the bubble centers. - 7
Power up and run a test
Plug the washer back in and run a short rinse cycle with no clothes. Observe around hose connections for any signs of moisture.
Tip: If you see a drip, pause the cycle and tighten connections by a small amount. - 8
Finalize and clean up
Push the washer back into position, collect tools, and store spare parts. Keep towels handy for the first few cycles as you confirm there are no leaks.
Tip: Document valve positions and hose types for future maintenance.
FAQ
Do I need to turn off the main water supply or just the local valve?
Typically you only need to shut off the local valve near the washer. The main supply is not required unless your local valve doesn’t exist or isn’t functioning. After closing the local valve, test the line for leaks before proceeding.
Usually just the local valve needs to be shut off; only the main supply if no local valve is available.
What if there isn’t a shutoff valve near the washer?
If no shutoff valve is nearby, turn off the main water supply and drain the line, then proceed carefully. If you’re unsure, contact a plumber to install a local shutoff. Do not force connections while water is on.
If there’s no local valve, shut off the main supply and call a professional if needed.
Can I install without turning off electricity?
Power should be off during installation to reduce the risk of electric shock or short circuits. Unplug the washer and keep the area dry while you work.
Yes—unplug the washer and keep power off during the install.
Which hoses are best for installation?
Choose stainless steel reinforced hoses or high-quality rubber hoses rated for washing machines. Inspect for cracks or bulges before installing and replace worn hoses.
Use durable hoses and inspect them before connecting.
How can I tell if there’s a leak after installation?
Run a brief cycle with no load and watch all connection points closely. Look for moisture or damp spots and address any leak immediately by tightening fittings a little more.
Run a test cycle and check all hose connections for leaks.
How often should I inspect hoses?
Inspect hoses during routine maintenance and replace if you notice bulges, cracks, or corrosion. Regular checks help prevent leaks and water damage over time.
Regularly inspect hoses and replace if you see wear.
Watch Video
The Essentials
- Turn off water and power before starting.
- Replace old hoses with new ones when possible.
- Tighten connections gradually and test for leaks.
- Level the washer to minimize vibration and movement.