How to Troubleshoot a Washing Machine Leaking Water
Urgent, step-by-step troubleshooting for a washing machine leaking water. Identify common leak sources, perform safe checks, follow a diagnostic flow, and know when to call a pro.

If your washing machine is leaking water, start with simple checks: turn off the machine, unplug it, and shut off the water valves. Inspect hoses and clamps for looseness or damage, examine the door seal (or lid seal), and clear any visible blockages. If the leak persists after these basics, proceed with the diagnostic flow and safe step-by-step fixes. This approach often prevents bigger damage.
Why a washing machine is leaking water
If your washing machine is leaking water, it can be alarming and disruptive. Leaks arise from several common sources that are usually fixable with basic tools and safe practices. According to Best Washing Machine, most leaks come from hoses, door seals, or drainage components, rather than mysterious internal failures. Start with a calm, methodical check: unplug the unit, power down the circuit if possible, and ensure you have towels ready for any spill. A leaking washer near the hose connections or the back of the drum is often a sign of a loose clamp, a cracked hose, or worn gaskets. Document where you observe moisture so you can communicate clearly with a technician if needed. By addressing the simplest issues first, you reduce the risk of water damage and save on repair costs while keeping yourself and loved ones safe. Best Washing Machine analysis emphasizes starting with the least invasive fixes before moving to parts replacement.
Quick checks before you call for help
Before summoning professional service, perform these safe checks to rule out obvious causes. Always unplug the machine and turn off the water valves first.
- Inspect inlet hoses at the back for kinks, cracks, or loose clamps. Tighten clamps and replace damaged hoses as needed.
- Check the drain hose for secure connections and correct height positioning. A hose that’s pushed too far into the drain can cause backflow and leaks.
- Examine the door boot seal (front-loading) or lid seal (top-loading) for tears or gaps. If you see cracks, replace the seal following the manufacturer’s instructions.
- Look around the base for pooled water that indicates a connection issue or a crack in the tub or pump housing. Clean up any spill and run a short test with no laundry after resealing.
- If suds accumulate excessively or you notice leaks only with certain detergents, switch to a milder detergent and run a rinse cycle to observe changes.
These checks address the most common and least invasive leak causes. If you still see water after these steps, continue with the diagnostic flow and recommended fixes. The Best Washing Machine team suggests documenting findings and photos to guide a pro if needed.
Common leak sources explained: hoses, pump, door seal
Leaks are rarely a mystery if you understand the likely culprits. Here’s how each source typically behaves and what to inspect:
- Hoses and connections: Inlet and drain hoses are the most frequent places leaks originate. Look for cracks, bulges, or oil staining along hose lengths; inspect clamps and fittings for looseness. Sometimes a simple hose replacement is all that’s needed.
- Door or lid seals: Front-load washers rely on a flexible boot seal around the door. Tears or pinch points let water escape during fills or spins. Replacing the seal can restore a watertight connection and prevent future leaks.
- Pump and seals: The pump impeller seals or tub seals can wear over time, especially in older models. A leaking pump may drip behind the washer or spray water during cycles. If you notice water near the bottom of the machine during a wash, inspect the pump housing and seals for signs of wear.
- Detergent drawer and fittings: Over-sudsing or residue buildup in the detergent drawer can redirect water to the outside, simulating leaks. Clean the drawer and incoming fittings to ensure proper drainage.
- Inlet valve and water supply: A faulty inlet valve can drip during the fill stage. If water drips from the valve itself, replace the valve assembly.
By understanding these sources, you can target your repairs without unnecessary disassembly. Always prioritize safety: unplug the machine and avoid touching electrical components when there is standing water nearby.
Safety considerations and when to stop
Dealing with a washing machine leak can involve both electricity and water, so safety is critical. Never work on a live electrical circuit or with the machine plugged in if water is present on the floor. Use a bucket or towels to manage spills and dry surfaces to reduce slip hazards. If you discover a damaged power cord, a cracked tub, or a flooded outlet, stop and call a licensed technician immediately. Handling gas or electrical components without proper training is dangerous. When in doubt, seek professional help rather than risking injury or fire. Best Washing Machine emphasizes that safe remedies and timely professional assessment help minimize further damage and safety risks.
For homeowners and renters who want to minimize risk, consider placing a shallow tray under the washer and using a floor drain if available. This can help contain leaks while you diagnose the problem. Regular inspection of hoses and seals can also prevent many leaks before they start.
Prevention and safety to avoid future leaks
Prevention is more affordable than repeat repairs. Implement these practices to keep leaks at bay:
- Schedule annual hose and seal inspections and replace aging hoses proactively.
- Use manufacturer-recommended detergents and avoid overloading the drum, which can stress seals and hoses.
- Keep the area around the washer accessible for quick checks and maintenance.
- Maintain proper drainage height for the drain hose to prevent backflow.
- Install a simple water alarm or moisture sensor near the washer to catch leaks early.
By staying proactive, you reduce the risk of leaks and extend the life of your machine. The Best Washing Machine team recommends a quick monthly quick-check routine to catch issues before they become costly repairs.
Diagnostic flow overview
The diagnostic approach follows a simple, logical path: observe the symptom, list possible causes, and test fixes in order of likelihood and ease. Start with hoses and seals, then pump and valve components, and finally internal tub or transmission-related issues if leaks persist. If at any point you observe a strong odor of burning plastic, unusual noises, or evidence of electrical issues, discontinue use and contact a professional immediately. The key is to control safety first, then address the most probable causes with low-effort fixes before escalating to component replacement.
Steps
Estimated time: 45-60 minutes
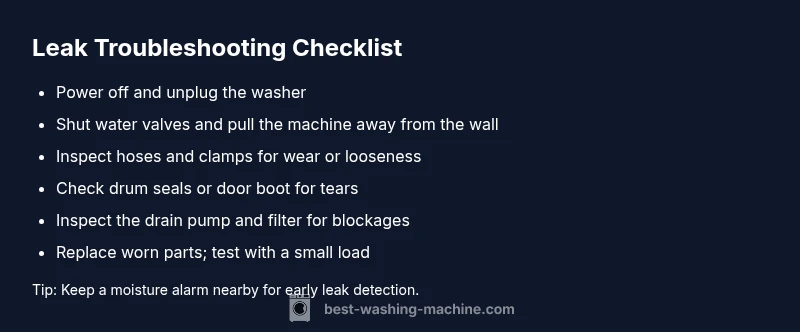
- 1
Power off and unplug; shut water supply
Unplug the washer from the outlet and turn off both hot and cold water supply valves. Move furniture or items away from the machine to access hoses. This ensures you won’t have electric shock risk or spills while inspecting.
Tip: Have towels ready and place a bucket under the hoses to catch any residual water. - 2
Inspect inlet and drain hoses
Carefully pull the washer away from the wall to access back panels. Check inlet and drain hoses for bulges, cracks, or leaks. Tighten clamps and replace any damaged hoses with ones of the correct size and rating.
Tip: Take a quick photo of each hose configuration before removing anything to aid reassembly. - 3
Check door boot or lid seal
For front-load machines, inspect the door boot for tears or gaps. For top-load, inspect the lid seal. If you find cracks, replace the seal and re-seal the mating surfaces.
Tip: Only use manufacturer-approved seals to avoid compatibility issues. - 4
Inspect the pump and filter area
Locate the pump housing and check for cracks, loose fittings, or a seeping gasket. If the filter is clogged, remove debris and clean it thoroughly before reassembly.
Tip: Wear gloves and keep a shallow tray under the pump area to catch drips. - 5
Run a test with a small load
Reconnect power and water, run a short wash cycle with a minimal load. Observe all connections for dripping or spraying. Stop the cycle if any new leaks appear.
Tip: Avoid full loads during testing to limit potential mess. - 6
Decide on next steps
If leaks persist after all checks and part replacements, schedule a professional service. Document the observed symptoms and all changes you made for the tech.
Tip: Keep a maintenance log to track recurring issues and the fixes you’ve attempted.
Diagnosis: washing machine is leaking water
Possible Causes
- highLoose, cracked, or pinched inlet or drain hoses and/or clamps
- highWorn or damaged door boot seal (front-load) or lid seal (top-load)
- mediumFaulty pump gasket or tub seal
- lowIncorrect drain hose installation or height
Fixes
- easyTighten clamps, replace damaged hoses, and reseal any loose connections
- mediumReplace worn door/lid seals following the manufacturer’s guide
- mediumInspect and replace pump gaskets or tub seals if signs of wear are present
- easyCorrect drain hose height and secure connections; ensure proper routing
FAQ
What are the most common causes of a washing machine leak?
Most leaks come from hoses, door seals, or the drain pump. Inspect these first, as fixes are often simple and cost-effective. If leaks persist, a professional check is advised.
Most leaks usually come from hoses, door seals, or the drain pump. Start with those areas, and call a pro if it keeps leaking.
How do I fix a leaking hose on a washer?
Turn off power and water, disconnect the hose, check for cracks or bulges, and replace with a matching hose. Re-tighten clamps firmly and test for leaks.
Turn off power and water, inspect the hose for damage, replace if needed, and re-tighten clamps. Test again.
Is it safe to run the washer if it’s leaking water?
No. Do not run the washer while it’s leaking. Unplug the machine, unplug power, and identify the leak source before attempting any repair.
No, don’t run it. Unplug it and find the leak source before trying any fix.
When should I replace the door seal or tub seal?
If you see tears, gaps, or persistent leaks after hose checks, replace the door boot seal or tub seal. Follow manufacturer instructions for best results.
Replace the seal if it’s torn or leaking after checking hoses.
When is professional help necessary?
If leaks persist after basic checks and seal/hose replacements, or you notice electrical signs, noise, or unusual smells, contact a licensed technician.
Call a professional if leaks don’t stop after the checks, or if you notice electrical signs.
Can overloading cause leaks?
Overloading can stress seals and hoses, causing drips. Follow load size guidelines and balance loads to reduce strain on fittings.
Yes, overloading can contribute to leaks by stressing seals and hoses.
Watch Video
The Essentials
- Start with the simplest hose checks.
- Prioritize safety: unplug and shut water off first.
- Replace worn seals to stop most leaks.
- Call a pro if leaks persist after fixes.