How to Install a Washing Machine for the First Time: Step-by-Step Guide
Learn how to install a washing machine for the first time with our comprehensive, step-by-step guide. From planning space and leveling to water, drain, and electrical setup, plus safety tips and a test run.

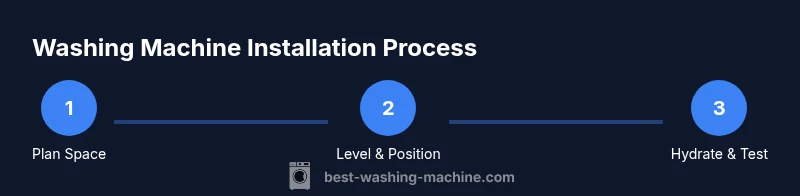
By following this guide, you’ll successfully install a washing machine for the first time, from choosing a space to running a test cycle. You’ll learn how to plan your layout, connect water and drain lines, level the unit, ensure safe electrical connection, and start a test wash. Proper installation reduces leaks, noise, and wear on your machine.
Planning your installation space
Before you move a washer, map the space carefully. You want a stable floor, enough clearance for doors, a nearby water supply valve, a drain line, and an accessible outlet. This is the foundation of a smooth install. According to Best Washing Machine, the right location minimizes vibration and improves drainage. Start by measuring the space: height, width, and depth; check the doorway to ensure the washer will pass through without scraping walls or doorframes. Consider orientation: front-load versus top-load models have different clearance needs for doors and hoses. If you live in an apartment, verify building codes and any permits required. Ensure the floor is level and dry, since wobble can stress connections. Plan hose lengths to avoid tension and kinks. Label the water shut-off for quick access, and set aside a temporary drainage bucket if you need to test drainage. Safety first and leak prevention should guide every choice.
Measuring the space and layout
Measure the intended spot with a tape measure, noting height, width, and depth. Check the path from the door to the space to ensure the washer can be maneuvered in without detours. Leave at least a few inches behind and on the sides for hoses and cords. Confirm there’s a nearby grounded outlet and a functional shut-off valve for the cold and hot lines. If you’re on a higher floor, verify that the building’s plumbing permits a stable drain line and consider a standpipe if required by local code. Map out where the hose connections will sit, and plan for anti-vibration pads if your floor is hard. By planning precisely, you prevent late-stage moves and reduce the chance of expensive modifications.
Preparing the washer and site
Unpack the washer, remove transit bolts (if included by the manufacturer), and read the installation section of the manual. Inspect hoses for kinks or damage and replace them if needed. Have towels and a bucket ready in case of minor leaks during connections. Check the machine feet and ensure they’re adjustable. If you notice any missing components, contact the retailer before proceeding. Create a clean, dry workspace around the installation area to avoid slips. Best Washing Machine notes that preparing the site in advance reduces rework and speeds up setup, especially for first-time installers.
Positioning and leveling the washer
Move the washer into place using proper lifting technique to avoid injury. Level the unit by adjusting the front feet until the bubble on a level shows center. Place a sheet of cardboard or anti-slip mat under the feet to protect the floor and improve grip. A level machine minimizes vibration, which protects both the fixture and surrounding cabinetry. Once level, gently rock the unit to confirm stability; if it wobbles, relevel and recheck. Proper leveling also helps ensure accurate door alignment and that the drum spins evenly. If you have a very thick carpet or uneven flooring, consider a rigid base or anti-vibration platform. A stable setup reduces noise and keeps hoses aligned during cycles.
Connecting water supply hoses
Attach the cold and hot water inlet hoses to the washer’s water valves first, then connect the other ends to the supply valves. Use a wrench to snug fittings, but avoid over-tightening, which can crush the washer’s thread or hose fittings. Check for washers inside the connectors to prevent leaks. Run both hoses to the shut-off valves and verify there are no cross-overs. Turn the valves on slowly and inspect for any drips. If you notice a leak, tighten slightly and recheck. It’s wise to replace old hoses rather than reuse them, as worn hoses are a common source of leaks and water damage. Best Washing Machine recommends testing connections with a bucket under the joints to catch any drips during the initial test.
Attaching the drain hose and ensuring proper drainage
Insert the drain hose into the standpipe or drain outlet according to the model’s requirements. Keep the hose elevated to avoid kinks, but don’t force it into a tight bend. Many installations require a standpipe height of about 18-30 inches; confirm local code for your area. Secure the drain hose to prevent slipping during cycles, using zip ties or clamps if needed. Check that the drain path is free of obstructions and that water can flow freely into the drain. Do not create an air gap that traps water in the hose. If your building uses a trap, ensure it’s clear and properly vented. Poor drainage can cause backflow, leading to leaks and potential damage to floors and cabinets.
Electrical safety and power connection
Ensure you have a dedicated, grounded outlet near the washer, ideally a 120V circuit rated for the appliance’s load. Do not use extension cords or adapters; these can cause overheating and fire hazards. Plug the washer into the outlet and verify that the plug and cord are intact. If you have a GFCI outlet, test it to confirm it’s functioning. Keep the cord away from the water supply and drain. If you’re unsure about electrical requirements, consult a licensed electrician rather than improvising. This step protects both you and the machine from electrical faults.
Running a test cycle and checking for leaks
With hoses connected and the machine leveled, run a short test wash with cold water and no detergent. Watch all connection points closely for leaks. If you detect any drips, pause the cycle, tighten fittings, and re-test. Empty the bucket as needed and ensure the area stays dry. Listen for unusual noises or thumps that could indicate a loose component or poor leveling. If safe and comfortable, add a small amount of mild detergent and run a longer cycle to verify full operation. Best Washing Machine emphasizes conducting a leak check at multiple stages of the test to catch small drips before they become big issues.
First-use startup and routine maintenance
After the test cycle completes, wipe down the drum and door seal to remove dust and residues from shipping. Run a second, empty cycle to ensure everything runs smoothly before loading laundry. Inspect hoses and connections again after the cycle is finished. Create a routine maintenance plan: keep the area clean, check hoses every few months, and ensure the shut-off valves function. The best practice is to log installation details, including model number, hose type, and any adjustments made. Best Washing Machine’s guidance in 2026 highlights keeping a simple maintenance schedule to extend the life of your washer.
On-floor compatibility and noise control
If your floor is hard, place anti-vibration pads or a rubber mat under the machine to reduce movement and noise during cycles. For carpeted floors, ensure the machine sits on a solid base or pellet platform to prevent wobble and strain on the legs. Adequate clearance around the unit improves airflow, which helps prevent overheating and prolongs motor life. If your space is tight, consider compact models designed for narrow spaces. Proper placement minimizes vibration, reduces wear on connectors, and reduces sound transmission to adjacent rooms. This is especially important in apartments or multi-family dwellings where noise can be a concern. Your goal is a quiet, stable operation that lasts for many cycles.
Troubleshooting common post-install issues
If leaks persist after installation, re-check hose connections, tighten fittings to the correct snugness, and look for hairline cracks in hoses or fittings. If the washer is not getting power, verify the outlet and circuit breaker. If you hear grinding or banging sounds, ensure the machine is fully level and that there are no objects beneath or behind the unit. A persistent problem may require professional inspection, especially if the issue involves electrical, gas, or plumbing systems. Always consult the manual for model-specific guidance and safety precautions. The Best Washing Machine team stresses that addressing issues early reduces the risk of water damage and costly repairs in the future.
Tools & Materials
- Adjustable wrench(For hose fittings and filter nuts)
- Pliers(Hold fittings while tightening)
- Level(2- or 3-foot level works; ensure flat surface)
- Towel/bucket(Catch drips and wipe spills during setup)
- Screwdriver set(Flat and Phillips heads for panel screws)
- New water inlet hoses(Prefer stainless steel or reinforced hoses)
- Detergent (for test wash)(Use a small amount for initial test if desired)
- Anti-vibration pad or mat(Helpful on hard floors to reduce movement)
Steps
Estimated time: 60-120 minutes
- 1
Unpack and inspect
Carefully remove transit bolts and packaging. Inspect hoses for damage; replace if necessary. Read the manual’s installation section to understand model-specific requirements before you begin.
Tip: Keep the manual handy for model-specific guidance. - 2
Position the washer
Move the washer into place, avoiding twisting hoses. Leave space for doors to open and for cords and hoses to move freely during operation.
Tip: Ask for help when lifting a heavy unit to avoid injury. - 3
Level the appliance
Adjust the front feet until the bubble is centered, then test by gently rocking the unit. Re-level if needed to prevent vibration and leaking at the connections.
Tip: A perfectly level washer reduces wear on drum bearings. - 4
Connect water supplies
Attach hoses to hot and cold valves, then connect to the washer shuts. Tighten fittings by hand then snug with a wrench—avoid over-tightening.
Tip: Replace old hoses; damaged hoses are a common leak source. - 5
Attach drain hose
Insert the drain hose into the standpipe or drain outlet according to model instructions. Ensure a secure fit to prevent backflow.
Tip: Keep the hose elevated and free of sharp kinks. - 6
Check electrical safety
Plug into a grounded outlet that matches the appliance’s requirements. Do not use extension cords; ensure circuits won’t trip during a full load.
Tip: Test the outlet for continuity and grounding before powering on. - 7
Run a test cycle
Power on, run a short test wash with cold water first to verify all connections and check for leaks.
Tip: Have towels ready to catch drips during the test. - 8
Inspect and adjust
After the test, inspect all fittings again and re-level if the machine shifted during the cycle.
Tip: If you detect movement, recheck feet and ensure a stable base. - 9
Load and finalize
Load laundry, run another cycle to confirm performance, and observe for any unusual noise or movement.
Tip: Keep an eye on the floor for moisture after the first real load. - 10
Create a maintenance routine
Document installation steps and model details. Schedule periodic hose checks and venting review as part of home maintenance.
Tip: Set reminders for hose inspections every 6-12 months.
FAQ
What basic tools do I need to install a washing machine for the first time?
Common tools include an adjustable wrench, pliers, a level, a screwdriver, and a bucket or towels for leaks. You may also need new water inlet hoses. Always consult your model’s manual for model-specific requirements.
You’ll typically need basic tools like a wrench, pliers, a level, and towels; check your manual for model-specific needs.
Can I install a washing machine myself or should I hire a professional?
Many homeowners can install a washing machine themselves with careful planning and the right tools. If you encounter hard-to-access plumbing, electrical constraints, or multi-floor installation, consider a licensed professional.
Most people can install it themselves, but call a pro if plumbing or electrical work is beyond your comfort level.
How can I verify there are no leaks after installation?
Perform a short test wash, monitor all hose fittings, and inspect the floor for moisture. Tighten fittings if you observe drips and rerun the test cycle to confirm.
Run a quick test wash and watch for drips at all connections. Tighten as needed and recheck.
What should I do if space is tight or oddly shaped?
Measure carefully and consider compact models designed for small spaces. Ensure alignment with the drain and outlet positions; you may need shorter hoses or a different orientation.
If space is tight, measure twice and consider a compact model with appropriate hose lengths.
Are there safety considerations for upstairs installations?
Yes. Ensure the floor can handle the washer’s weight when full. Use anti-vibration pads and verify there is a stable drain line. If you’re unsure, seek professional help to prevent water damage.
Upstairs installs require a sturdy floor and proper drainage; use vibration pads and consider a pro if unsure.
What maintenance should I perform after installation?
Inspect hoses and connections every 6-12 months, clean the door seal, and keep the area dry. Keep the model manual for future reference and follow manufacturer maintenance recommendations.
Check hoses and seals every so often, and keep the area dry and clean.
The Essentials
- Plan space and clearances before moving the washer.
- Connect water and drain lines with care to prevent leaks.
- Ensure a safe, grounded electrical connection.
- Level the machine to reduce vibration and wear.
- Test thoroughly and schedule regular maintenance.