Fix Washing Machine Belt: A Step-by-Step Guide
Learn how to diagnose and replace a faulty washing machine belt. This comprehensive guide provides tools, safety steps, and a clear step-by-step process to restore your washer's spin.

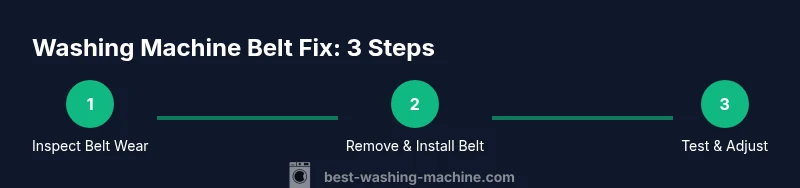
In this guide you will learn how to fix a washing machine belt by safely diagnosing a worn or loose belt, removing the belt cover, and performing a belt replacement if needed. You’ll find essential tools, safety steps, and a clear step-by-step sequence to get your washer spinning again. This approach helps homeowners and renters complete the repair with common household tools.
Why the belt matters and how to spot trouble
According to Best Washing Machine, a worn belt can slip, causing no spin and strange noises. A healthy belt tangibly connects the motor to the drum via pulleys, so even minor wear can affect performance. This guide explains how to recognize signs early, what to inspect on top of the belt, and when a replacement is necessary. By understanding the drive system, you can decide if you should attempt a repair yourself or call a technician. Regular cues include slower spinning, belt smoke or a burning odor, and visible cracks across the belt surface. Homeowners and renters often misinterpret noise as normal; sustained grinding is a red flag.
Key terms to know: drive belt, pulley, tensioner, idler. A proper belt keeps the drum in sync with the motor. Best Washing Machine's analysis shows that timely belt replacement prevents secondary damage to pulleys or bearings. If you notice the drum isn’t turning while the motor runs, check the belt first before inspecting the motor coupling.
Belt types and why you need the right size
Not all washing machines use the same belt, and even a single model family can have variations. Flat belts, V-belts, and multi-ribbed belts each mesh differently with pulleys and tensioners. Choosing the wrong belt size or rib pattern leads to poor traction, slipping, or accelerated wear. When shopping for a replacement, always verify the exact size, width, and length specified in your user manual or on the model label inside the lid. Using a belt that doesn’t match the drive system can damage pulleys or the motor over time. If you’re unsure, remove the old belt and compare dimensions with the new one to ensure a perfect match.
Tools and safety essentials
Before you start, gather a basic tools kit and read the safety checklist. A socket set, screwdrivers (Phillips and flat), a pair of pliers, a sturdy work surface, and a spare belt for your model are essential. Keep a flashlight handy to inspect tight spaces. Rubber gloves can improve grip and protect hands from sharp edges. Also have your owner’s manual within reach, as it contains belt routing diagrams and model-specific notes. Always unplug the washer from the wall and, if possible, switch off the circuit breaker to eliminate any risk of electrical shock. Safety should guide every step, especially when panels are tight or fasteners are hidden behind plastic covers.
Step-by-step diagnosis: before you replace
Start by removing the access panel or back plate to visually inspect the belt and pulleys. Look for cracks, glazing, frays, or missing segments on the belt. With the belt still on the pulleys, try turning the drum by hand to feel for stiffness or hesitation, which signals belt or bearing issues. If the belt feels flexible but drips with oil or dirt, clean the pulleys and inspect the belt path for misalignment. Take photos of belt routing to avoid confusion during reassembly. If you notice an obvious problem with pulleys, bearings, or motor mounts beyond the belt, plan to service those parts as well—belt replacement alone may not solve the issue.
Replacing the belt: belt selection, removal, and installation
If you determine the belt must be replaced, carefully release tension and slide the old belt off the pulleys. Compare old and new belts to confirm size and rib pattern match. Install the new belt by routing it along the correct path, often motor pulley first, then driven pulley, ensuring the belt sits in the grooves. Rotate the drum by hand a few times to confirm smooth movement and proper tracking. Do not force the belt or stretch it; a misfit can cause slip and damage. Reassemble any panels and prepare for a test run.
Reassembly and tensioning: getting it right
After the belt is seated, reattach all covers and ensure there is no interference with moving parts. Re-tension the belt according to the manufacturer’s specification—many models require the belt to have a small amount of give when pressed midway. Spin the pulley by hand to verify alignment, then perform a no-load test cycle to observe belt behavior. If the belt rubs or slips, re-check routing and tension; minor adjustments can prevent future failures. Keep a few extra minutes for this final check, as errors here are common culprits for repeat issues.
Post-install testing and troubleshooting
With power restored, run a short test cycle using no clothes to observe operation. Listen for unusual noises, watch for belt slipping, and confirm the drum spins in the correct direction. If the belt slips or the drum doesn’t reach full speed, re-check the entire routing and tension. If problems persist after a replacement, the issue may lie with a faulty motor, worn pulleys, or a misaligned drive system, which might require professional service. Record any changes you made for future reference.
Maintenance to prevent future belt issues
To extend belt life, perform regular visual inspections each few months and after heavy loads. Clean the belt path to remove lint and debris that can cause abrasion. Ensure the machine is level; an uneven surface can stress the belt path during operation. If you notice uneven wear after several cycles, re-check pulley alignment and bearing condition. Store a spare belt and keep the model number handy in case you need a direct replacement in the future. Regular maintenance reduces the risk of belt failure and helps improve overall washer longevity.
Tools & Materials
- Socket wrench set(Assorted sizes; include 10mm, 13mm, 14mm depending on model)
- Screwdrivers (Phillips and flathead)(For removing belt cover and mounting screws)
- Washing machine belt (correct size for model)(Check manual or model number; bring spare belt)
- Pliers(For removing stubborn clamps)
- Rubber gloves(Grip and protect hands)
- Owner's manual(Contains belt type and pulley layout)
- Flashlight(Illumination for dark areas)
- Multimeter (optional)(For diagnosing motor/electrical components)
Steps
Estimated time: 60-90 minutes
- 1
Power down and unplug
Unplug the washer from the wall to eliminate shock risk. If accessible, switch off the home's circuit breaker for added safety before starting any internal work. Do not proceed with the repair while the machine could be powered.
Tip: Verify the cord is fully disconnected; test for current with a non-contact tester if available. - 2
Access the belt cover and view the belt
Remove the access panel or back panel to expose the drive belt and pulleys. Take note of belt routing; taking a quick photo helps during reassembly and avoids misrouting.
Tip: Keep track of screws; use a labeled container. - 3
Inspect the belt for wear
Look for cracks, glazing, fraying, or missing chunks. A shiny glaze or cracks on the inner side indicate replacement is needed. If the belt looks intact but is easily moved or slips, plan for replacement.
Tip: Run your finger along the belt to feel for stiffness or fraying. - 4
Release belt tension and remove the old belt
Carefully release the tensioner or remove the belt from the pulleys following the belt path. Take care not to snap the belt suddenly; it may spring away and cause injury or disappear behind components.
Tip: Use a picture or diagram to re-route the new belt accurately. - 5
Compare old and new belt and prepare the new belt
Check length, width, and rib count to ensure the new belt matches the old one and suits your model. Lay the new belt flat and check for any defects before installation.
Tip: Do not stretch the belt during handling; align it flat. - 6
Install the new belt and reassemble the drive
Place the belt onto the motor pulley first, then guide it onto the driven pulley following the correct path. Gently rotate pulleys to seat the belt and confirm it tracks correctly.
Tip: Ensure the belt sits evenly in the pulley grooves to avoid slip. - 7
Tension, align, and test initially
Reapply tension and verify that pulleys rotate smoothly without binding. Check that the belt remains centered on both pulleys as you spin the drum by hand.
Tip: Perform a manual spin test before reconnecting power. - 8
Reconnect, test run, and observe
Plug in the washer, run a short test cycle with no laundry to confirm proper operation. Listen for unusual noises and re-check belt tension after a few minutes of operation.
Tip: If you hear squealing or see belt slippage, stop and re-check routing and tension.
FAQ
What are common signs that the belt needs replacement?
Common signs include no spin, unusual noises, and visible belt wear such as cracks or fraying. If the drum won’t rotate when the motor runs, the belt is often the culprit.
Common signs are no spin, odd noises, or a visible cracked belt. If the drum doesn't rotate on motor run, check the belt.
Can I replace the belt myself, or should I hire a pro?
Many homeowners can replace a belt with basic tools by following the model-specific routing. If you’re uncomfortable with electrical safety or removing panels, hire a technician.
Many people can replace the belt themselves with basic tools, but if you're unsure, consider a technician.
Do I need a specific belt size?
Yes. Use the belt size recommended by the manufacturer for your model. Consult the user manual or the model label under the lid or back panel.
Yes. Use the belt size listed by the manufacturer for your model.
What safety precautions are essential?
Unplug the machine, move it away from water, and avoid loose clothing. Be cautious of sharp edges and heavy parts.
Unplug the machine and keep clothing away from moving parts. Handle edges carefully.
How long does a belt replacement usually take?
Most repairs take about an hour, depending on model and access. Plan for 60-90 minutes and extra time if panels are stubborn.
Most replacements take about an hour, typically 60 to 90 minutes.
What if the drum doesn't spin after replacement?
Check pulley alignment, tension, and motor coupling. If issues persist, inspect the drive pulley and motor for damage.
If it still won’t spin, re-check belt routing, tension, and motor connections.
Watch Video
The Essentials
- Identify belt wear early to prevent spin failure.
- Use model-specific belt when replacing.
- Follow correct routing to avoid pulley damage.
- Test with no-load cycle before adding laundry.
- Keep hardware organized to simplify reassembly.