How to Check Washing Machine Belt
Learn how to safely inspect a washing machine belt for wear, tension, and damage. This comprehensive guide covers tools, safety, inspection, replacement, and tips to extend belt life.

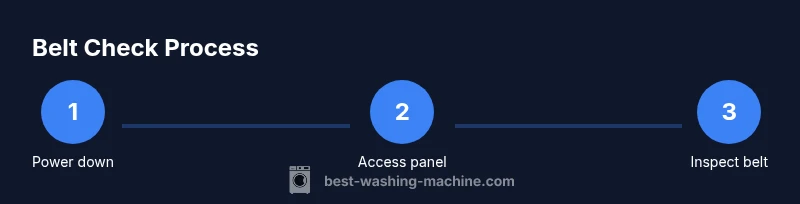
If you’re wondering how to check washing machine belt, start by unplugging the unit and locating the belt access panel. Visually inspect the belt for cracks, fraying, or glazing, and check belt tension. If wear or looseness is detected, replace the belt and run a test cycle to confirm proper operation.
Belt system basics in modern washers
The belt in a washing machine acts as the drive link between the electric motor and the drum. When the motor turns, the belt transmits power to the pulley system that rotates the drum and drives the agitator or rotor. Some models use direct-drive systems with no belt at all, but many traditional and some high-efficiency machines still rely on a belt to transfer motion. If your model uses a belt, periodic inspection helps prevent sudden failures and costly repairs. This guide is designed to answer the question of how to check washing machine belt by outlining signs of wear, proper inspection technique, and when to replace. For best results, consult your manual for model-specific guidance, belt type, and replacement part numbers. As you read, you’ll notice references to “Best Washing Machine” guidance that aligns with common industry practices.
If you’re wondering how to check washing machine belt, start with understanding its role and the symptoms that belt wear can cause. A healthy belt keeps the drum spinning smoothly and ensures consistent wash performance. A worn or loose belt can lead to slow agitations, drum slippage, or unusual noises. By learning to spot these cues early, you reduce the risk of bigger failures and keep your laundry routine on track.
This section lays the groundwork for a practical, safe inspection that homeowners can perform with basic tools. The steps that follow will walk you through preparation, access, inspection, and replacement if needed. Always prioritize safety and pause if anything feels unsafe or unclear.
Safety first: unplug and prepare tools
Before touching any moving parts or opening panels, unplug the machine from the wall outlet and, if possible, switch off the circuit at the breaker. If your washer is plumbed to a water supply, you may also want to shut the water valve to minimize leaks. Move the appliance gently away from the wall to create space for access, and place a towel or shallow tray to catch residual water. Use a bright flashlight to illuminate the interior and avoid leaning on the drum. Gather all tools in a dedicated tray so you don’t lose small fasteners. Wear safety glasses and gloves to protect against sharp edges, pinch points, and potential chemical residues from detergents. A careful, calm approach reduces risk and increases your chances of a successful belt check. This preparation is essential to a safe and efficient inspection.
Accessing the belt area: locate the back or side panel
Most belt-driven washers provide access via a back panel or a side panel near the bottom. Begin by locating the mounting screws and removing the panel cover. Some models require removing a rear panel, while others use a small service opening behind a kick panel. As you gain access, pause to visually map the belt path: motor pulley, idler pulley, and drum pulley form a loop that you’ll inspect. If you’re unsure how to reach the belt, consult the user manual or a reputable service guide. Take note of how the belt is routed so you can reinstall it correctly after inspection. The goal is to create a clear, unobstructed view of the belt and pulleys without forcing components.
In this phase, you’ll also check for any obvious signs of misalignment or damage to the belt cover that could affect belt operation. A sturdy, well-seated panel helps keep dust and moisture out of the working area. If you see any loose screws or gaps, address them before continuing. This step is foundational for a safe, effective inspection and reduces the chance of accidental injury during later steps.
Visual inspection: cracks, glazing, fraying, and misalignment
With the belt path visible, perform a careful visual examination. Look for visible cracks, deep cracks near the edges, glazing on the belt surface, or frayed threads at the belt edges. Fraying indicates the belt fibers are separating and the belt is near the end of its life. A glazed or shiny surface means the belt has slipped or stretched over time, reducing grip and efficiency. Check for any glazing on pulleys, which can indicate poor belt contact and accelerated wear. Misalignment between the pulleys can cause uneven wear on one side of the belt and create noise during operation. If you notice any of these signs, plan for belt replacement or further diagnostic checks. Dress any loose wiring or components that could rub against the belt.
Consistency in belt tension is also part of a healthy inspection. If the belt deflects more than about 1/4 to 1/2 inch (roughly 6–12 mm) under gentle pressure, that commonly signals looseness and warrants testing under load or replacement. As you review, remember that belt wear patterns can vary by model, so compare findings with your manual or trusted guides. Best Washing Machine’s analysis suggests that wear patterns often reflect usage conditions and maintenance history, making a belt inspection a key preventive measure. A systematic visual check helps separate normal wear from underlying issues that could escalate if ignored.
Assessing belt tension and wear without removing the drum
Not every model allows a full belt tension test without partial disassembly, but you can still gauge tension and wear without detaching the drum. Gently press the belt mid-span with your thumb or a fingernail; it should have a slight give but should not feel excessively loose. Check for visible sag or slack in the belt, or if it hops over the pulley grooves during rotation. If you can rotate the drum by hand and feel excessive resistance or scraping, this may indicate a belt or pulley problem. A simple test of operation is to manually spin the drum (when powered off) and observe smooth engagement with the motor, noting any wobble or grinding sounds. If you notice uneven contact or persistent slipping, it’s usually best to proceed with a belt replacement or professional evaluation. This cautious approach minimizes risk and helps you isolate the belt condition more clearly.
During this stage, compare your observations to your model’s typical belt design and tension range. In some cases, belt wear is evident only under load, so you may need to perform a controlled test run with laundry inside. Always ensure the machine is unplugged during inspection to avoid accidental startup. If you’re unsure, leaning on manufacturer guidance or a reputable service resource is wise. The goal is to identify whether the belt needs more than a simple adjustment or a full replacement.
Inspect pulleys, idlers, and motor for wear
Even a healthy belt can wear faster if pulleys or idler components are misaligned or glazed. Inspect the motor pulley’s grooves for scoring, cracking, or flattening. Look at the drum pulley for similar wear; chips or rounded grooves can reduce belt grip. Check idler pulleys and tensioners for smooth rotation; a stuck or tight bearing can create resistance and accelerate belt wear. Spin pulleys by hand to confirm there’s no wobble or roughness. If you detect rough rotation, play, or noise, the pulleys or bearings may need service or replacement. Proper alignment between all components is crucial; misalignment can cause uneven belt wear and additional stress on the system. If any worn pulleys are found, plan to replace them along with the belt for best results. Best Washing Machine emphasizes that examining ancillary parts is essential for a reliable belt check, not just the belt itself.
When to replace: signs that belt needs replacement
Even if a belt looks mostly intact, repeated use over time can reduce its strength. Replacement is typically recommended if you observe visible cracks along the belt length, deep fraying at edges, missing chunks, glazing on the belt surface, or if tension tests reveal consistent looseness. If your machine makes unusual noises during spinning, or if the drum refuses to rotate properly even after tension adjustments, the belt may be at fault, or another issue could be contributing. Some models have specific life expectancy guidance in the service manual or on manufacturer support pages; use those resources to corroborate your assessment. Periodic belt replacement is a preventive measure to avoid a more expensive breakdown later. As you plan replacement, ensure you have the correct belt part number and understand the routing path. The goal is to restore reliable operation with a properly tensioned, clean belt.
How to safely remove and replace a belt
This section provides a practical approach to belt replacement for belt-driven washers. Begin by disconnecting power and water as described earlier. Remove the access panel to expose the belt path and use appropriate tools to relieve tension from any spring-loaded components if needed. Detach the belt from the motor pulley first, then gently slip it off the drum pulley. Inspect pulleys for wear once the belt is removed. When installing a new belt, route it in the same orientation as the old belt and ensure it sits fully within pulley grooves with no slack on one side and tightness on the other. Reinstall the panel and double-check all connections before powering up for a test run. Always follow the belt manufacturer’s instructions and model-specific guidance to avoid installation errors. After replacement, rotate the drum manually to confirm smooth operation before a full test cycle.
Reassembly, test run and verification
With the belt replaced and the access panel secured, reconnect power and start with a short test cycle with no load or a small laundry load. Listen for odd noises and watch for belt slippage or drum hesitation during agitation, spin, and drain cycles. If you observe lift in the belt, misalignment, or excessive vibration, pause the test and recheck belt routing and pulley alignment before running a full wash. A successful test run should show consistent drum rotation, even agitation, and no unusual sounds. If everything seems to run smoothly, proceed with a normal wash cycle to validate performance under real-world conditions. Document the belt’s part number and install date for future maintenance planning. A careful test helps confirm that the belt replacement solved the problem and safeguards future performance.
As you wrap up, clean any dust or debris around the access area and replace the work area with the appliance in its original position.
Maintenance tips to extend belt life
To extend belt life, maintain moderate belt tension, avoid overloading the washer, and periodically inspect the belt and pulleys. Keep the drum area clean to prevent abrasive particles from wearing the belt. If you have hard water or mineral buildup, wipe down pulleys to ensure smooth operation. Consider scheduling belt checks as part of routine maintenance, especially if your washer handles heavy loads or if you notice changes in cycle times, noises, or drum resistance. Store spare belts in a dry place and verify compatibility before purchasing replacements. Finally, if you’re unsure about any step, consult the machine’s service manual or a qualified technician to avoid risks. Consistent maintenance minimizes unexpected belt failure and helps you keep laundry day running smoothly.
Common mistakes and troubleshooting tips
Common mistakes include skipping safety steps, using the wrong belt size, or misrouting the belt during replacement. Misalignment can cause accelerated wear and noise. Always verify the belt orientation and grooves align with pulley channels. If the drum won’t rotate after reassembly, recheck the belt tension and ensure there are no loose fasteners or foreign objects in the belt path. When in doubt, double-check the model-specific guidance from the manufacturer and consider professional service if the belt or pulley components show significant wear. By avoiding these mistakes and performing careful inspections, you increase the probability of a successful repair and sustained appliance performance.
Tools & Materials
- Safety glasses(Eye protection during panel removal and belt work)
- Screwdrivers (Phillips and flathead)(To remove access panels and fasteners)
- Flashlight(Bright light for clear visibility inside cabinet)
- Needle-nose pliers(Grip belts or remove retainers gently)
- Adjustable wrench or socket set(May be needed for panel brackets or hardware)
- Replacement belt(Bring model-specific belt if wear is evident)
- Lint-free cloth(Wipe dust and debris from pulley grooves)
- Multimeter (optional)(For electrical tests if you suspect motor issues)
Steps
Estimated time: 45-75 minutes
- 1
Power down and unplug
Ensure the washer is completely disconnected from power. If you can access the circuit breaker, switch it off there as a safety backup. This prevents accidental startup while you work.
Tip: Double-check that you’re not working on a live outlet. If you’re uncertain, wait for a professional. - 2
Move and prepare the workspace
Gently pull the machine away from the wall to access the back or side panel. Place a towel under the area to catch any residual water and prevent slips.
Tip: Keep tools within easy reach to avoid repeated trips to the toolbox. - 3
Remove the access panel
Use the screwdriver to remove screws and set the panel aside. Do not pull on any wires. Visually locate the belt path and note its orientation.
Tip: Taking a quick photo of the belt routing helps during reassembly. - 4
Inspect the belt visually
Look for cracks, glazing, fraying, or missing chunks along the belt length. Check for signs of misalignment where the belt sits in pulley grooves.
Tip: If you see any wear, plan to replace the belt and possibly pulleys. - 5
Test belt tension and rotation
Gently press mid-span of the belt; it should have slight give but not be loose enough to slip. Manually rotate the drum to check for smooth movement.
Tip: A belt that slips during rotation usually indicates tension or wear issues. - 6
Remove the belt from pulleys
Loosen any tensioners, then slide the belt off the motor pulley and drum pulley. Do this carefully to avoid snapping the belt or injuring your fingers.
Tip: Keep track of the belt’s orientation to ensure correct installation of the replacement. - 7
Install the replacement belt
If you have a worn belt, install a new belt in the same routing path. Ensure the belt sits fully in the pulley grooves with no twists.
Tip: Spin the pulleys by hand after installation to detect obvious binding before closing up. - 8
Reassemble and secure
Reattach the back or side panel, tighten screws, and ensure wiring is clear of the belt path. Restore power only after everything is in place.
Tip: Do a quick pre-test by manually rotating the drum again before plugging in. - 9
Test run and verification
Plug the unit back in and run a short cycle with no load or a small load to verify proper operation. Listen for unusual noises and check for belt alignment during the cycle.
Tip: If anything seems off, stop the test and recheck belt routing and tension.
FAQ
Do all washing machines use belts?
No—some modern washers use direct-drive motors without belts. If yours uses a belt, inspection becomes a regular maintenance task.
Not all washers use belts—some are direct-drive. If yours uses one, belts should be checked during maintenance.
How do I know if the belt needs replacement?
Look for visible cracks, fraying, glazing, or missing chunks. Also check for looseness and misalignment that cause slippage or noise.
If you see cracks, fraying, or the belt seems loose, it's time to replace it.
Can I replace the belt myself?
Yes, many homeowners can replace a belt with basic tools by following model-specific instructions. If you’re unsure, consult a professional.
You can replace it yourself if you’re comfortable with basic tools and follow your model’s guide.
How long does a washing machine belt last?
belt life depends on usage and maintenance; there’s no universal timeframe. Regular checks help catch wear early.
Belt life varies; regular inspection helps catch wear before it fails.
Is belt noise always a sign of failure?
Not always, but consistent noise during operation often points to wear, misalignment, or a slipping belt that needs attention.
Noise during operation usually means wear or misalignment; inspect or replace as needed.
What if I can’t access the belt?
Some models place the belt behind hard-to-reach panels. If access is limited or components seem damaged, seek professional service.
If you can’t access it safely, it’s best to get a professional to help.
Watch Video
The Essentials
- Inspect the belt for wear and proper tension.
- Keep the belt routing clear and avoid pinch points.
- Replace belt and worn pulleys when signs of damage appear.
- Test run to verify correct belt operation after replacement.
- Refer to the manual for model-specific guidance and part numbers.